
6.1 Maintenance Schedule
This maintenance schedule is for reference only. Should you use the 3D printer more frequently, adjust your schedule according to your use frequency. Before maintenance, check Snapmaker’s Limited Warranty void your warranty by self-servicing your 3D printer.
![]() Cut the power supply before maintenance.
Cut the power supply before maintenance.
Before You Print
Every Month

Every Three Months

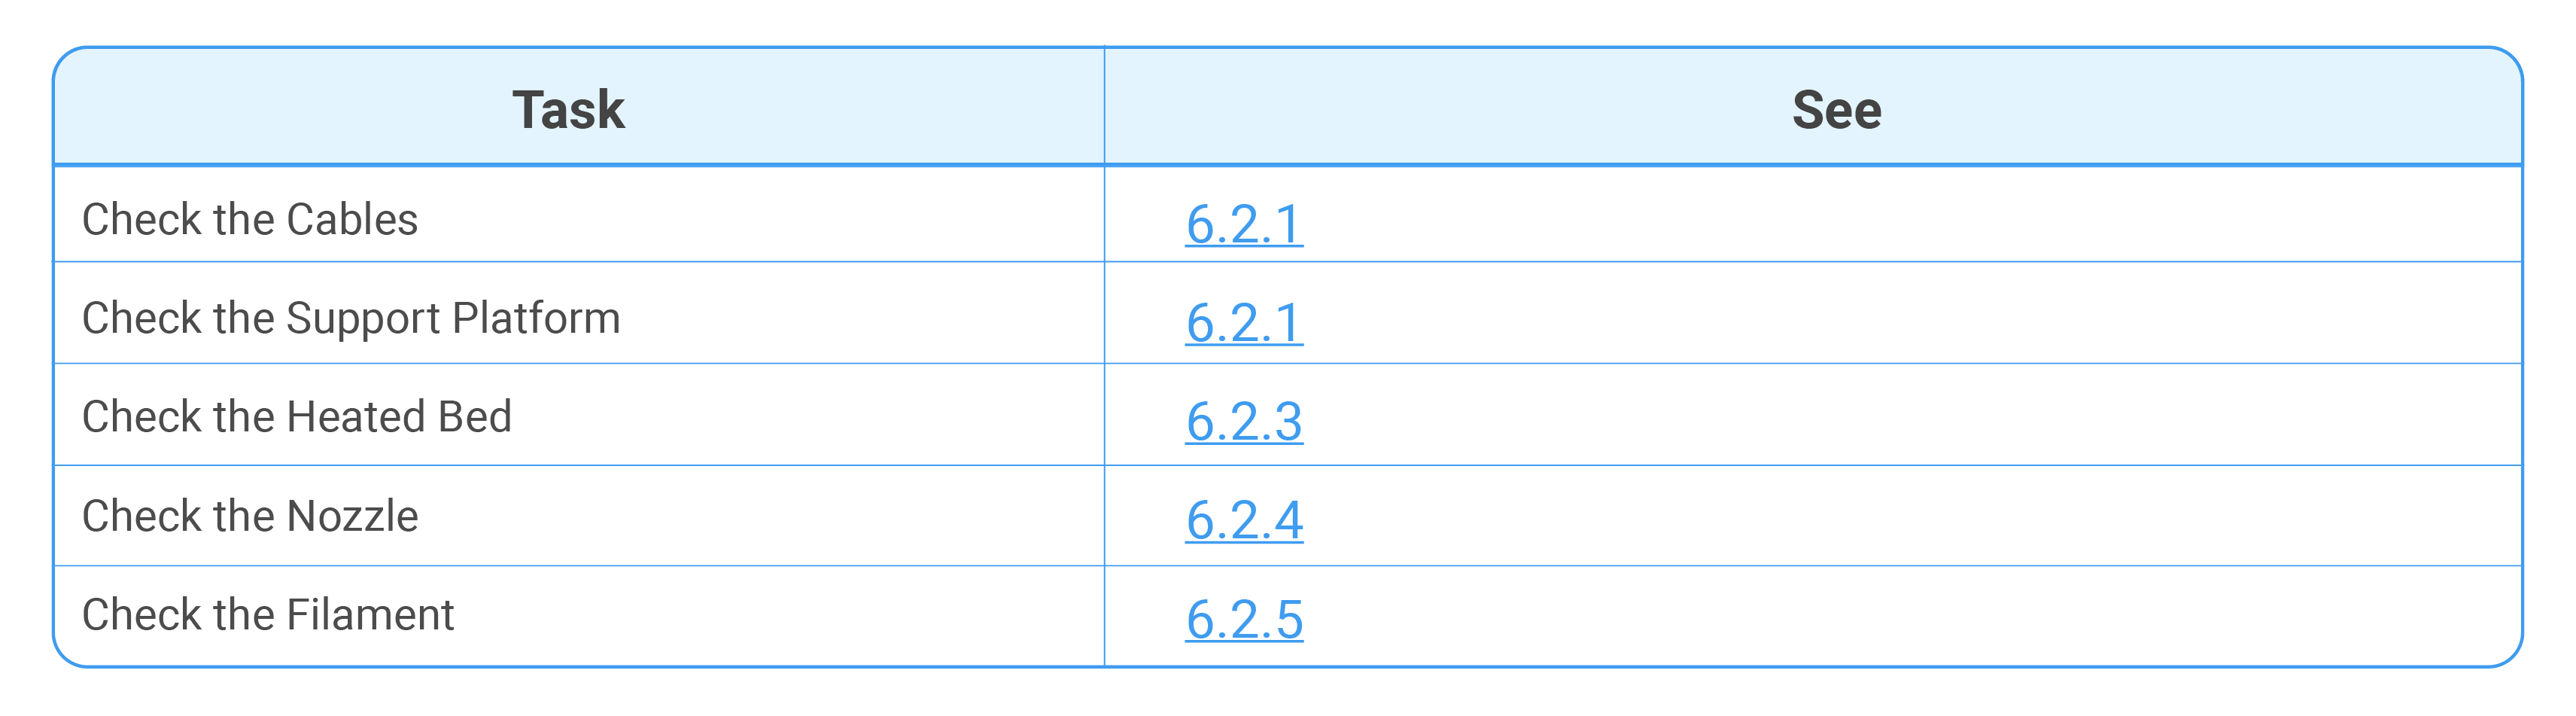
6.2 Before You Print
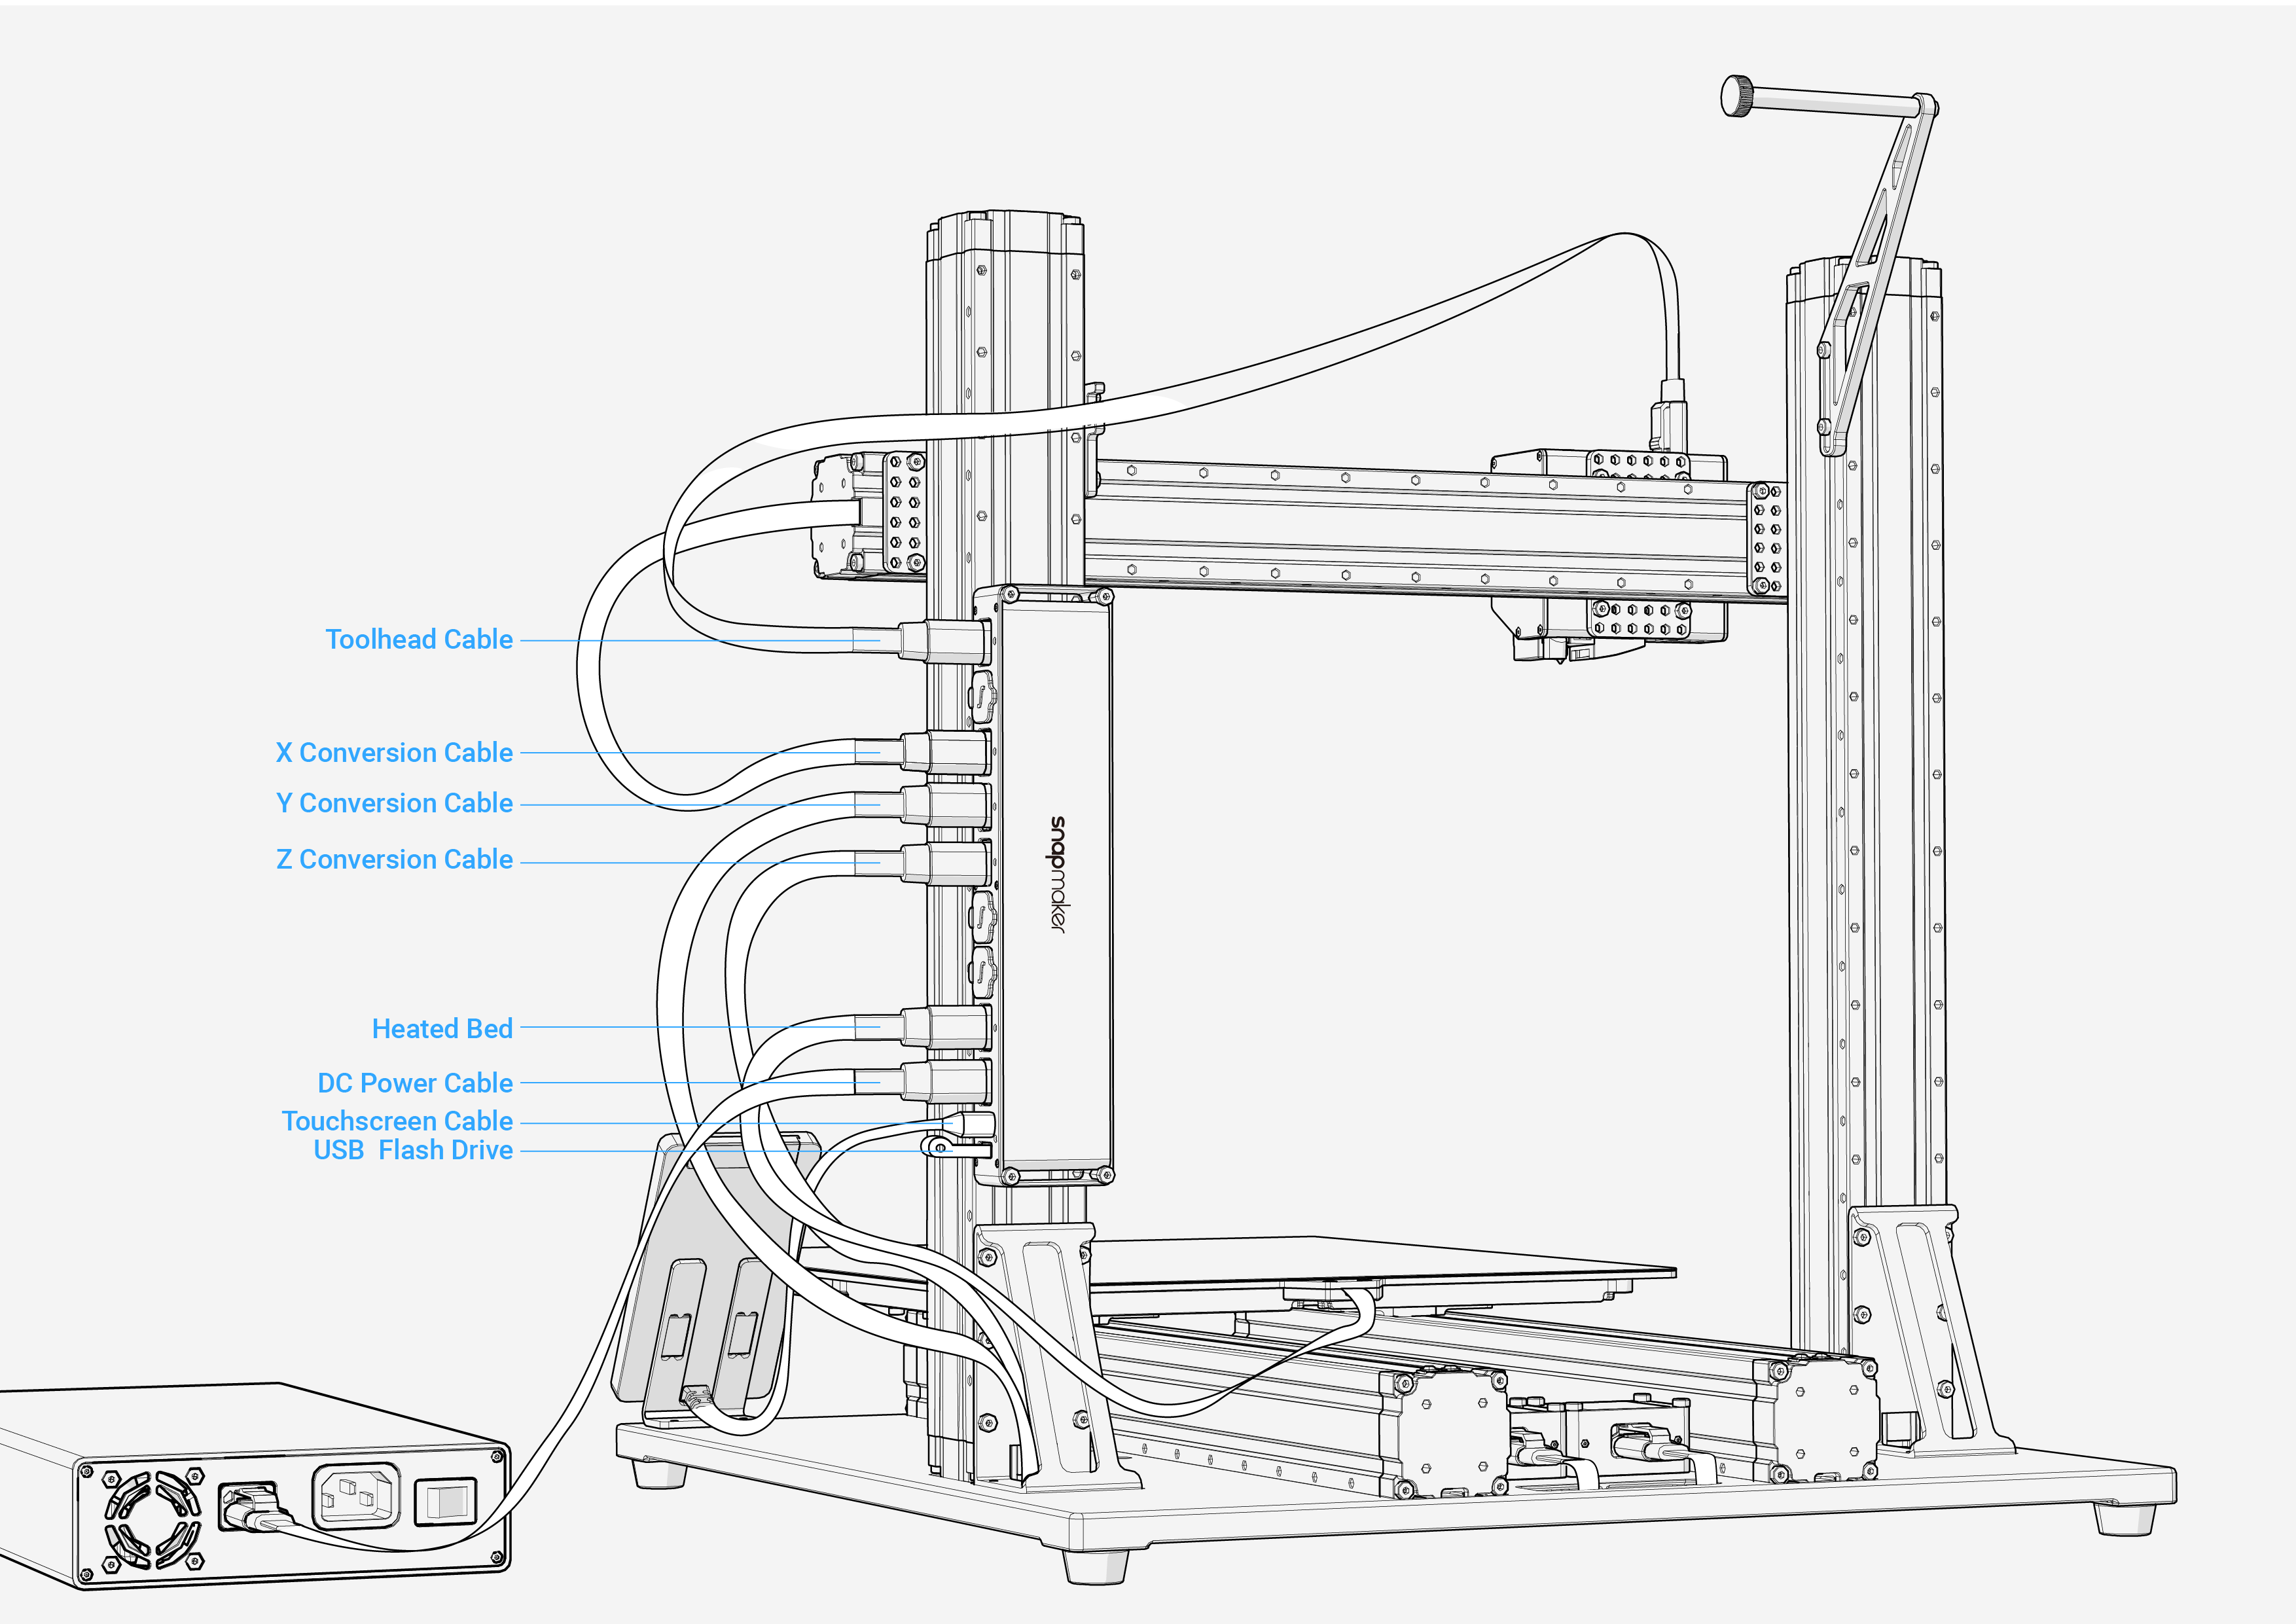
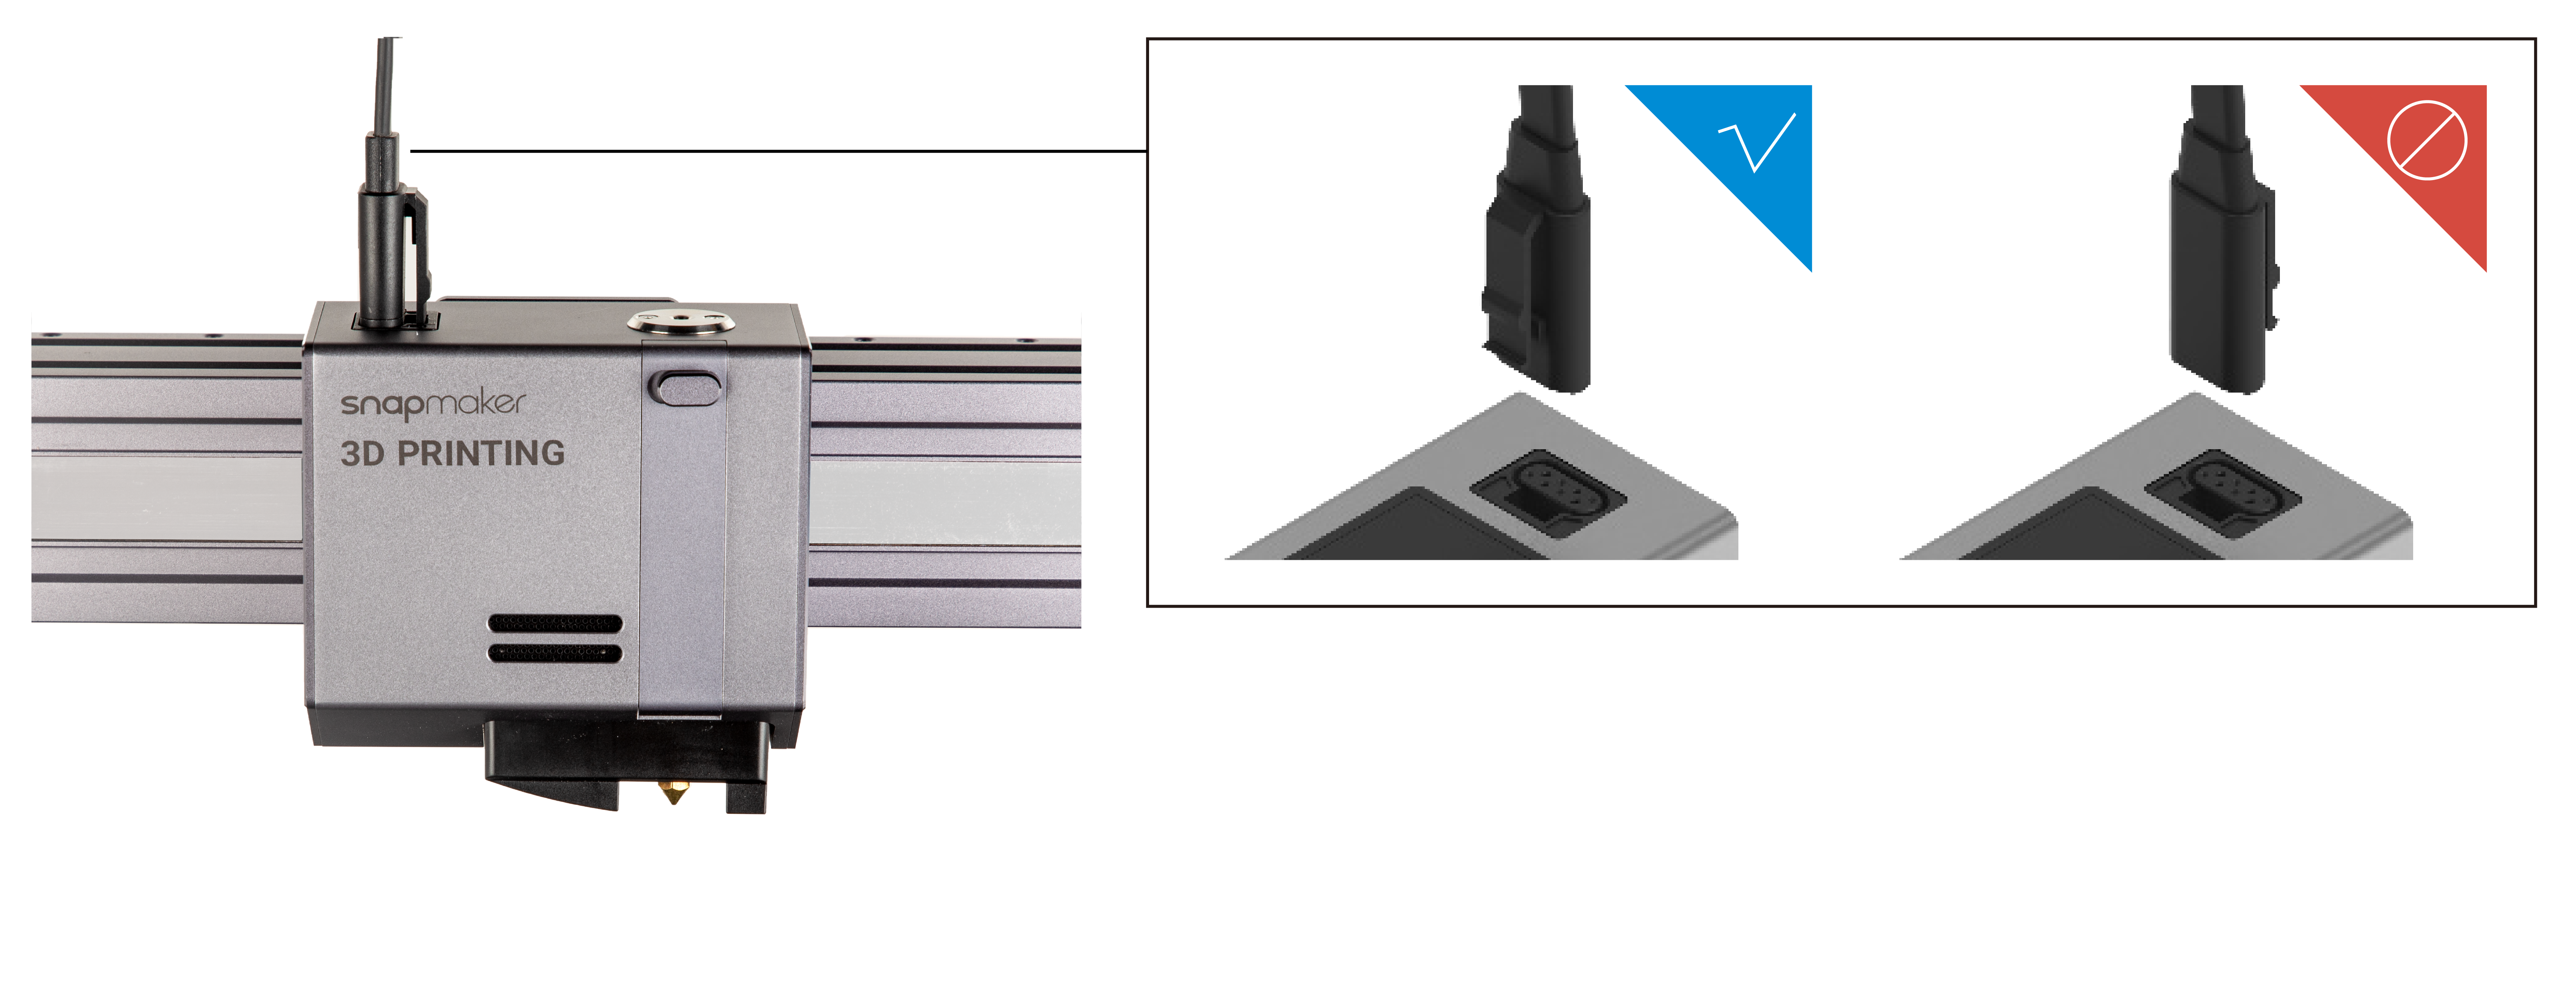
6.2.1 Check the Cables
Check if every cable is plugged into the right socket in the right direction.
- Into the Controller (A150)
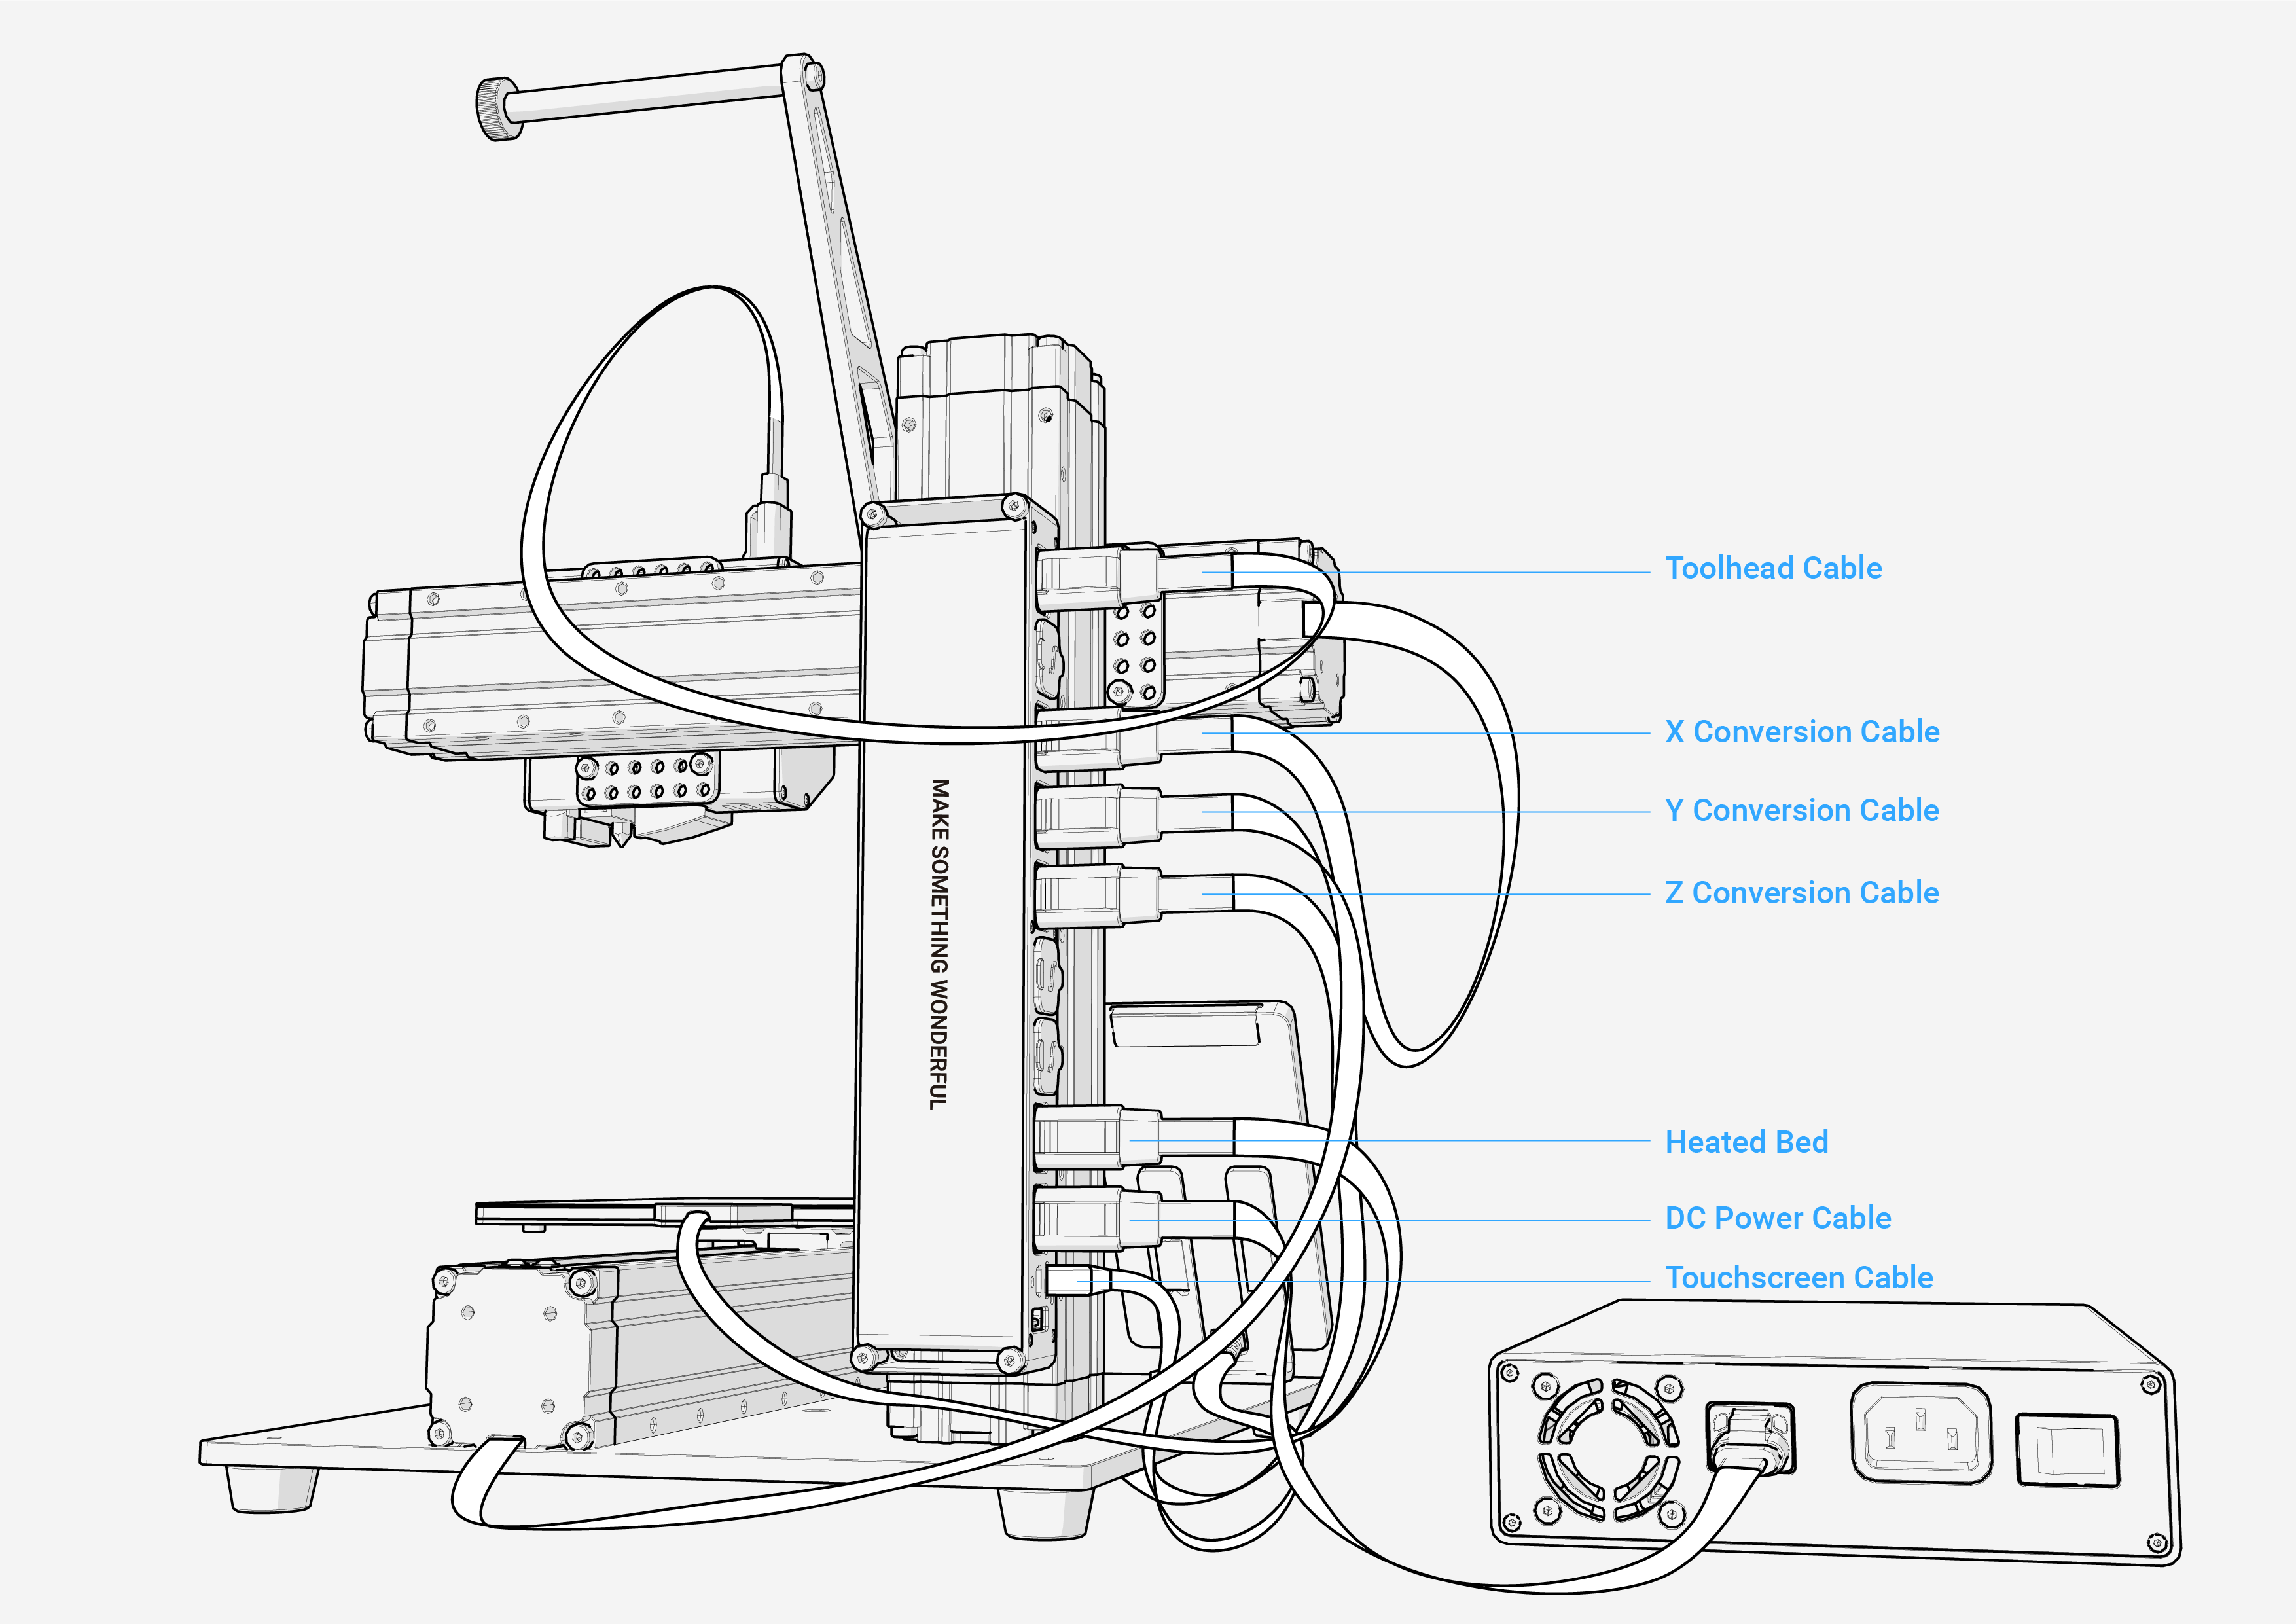
- Into the Controller (A250 & A350)
- Into the Converters
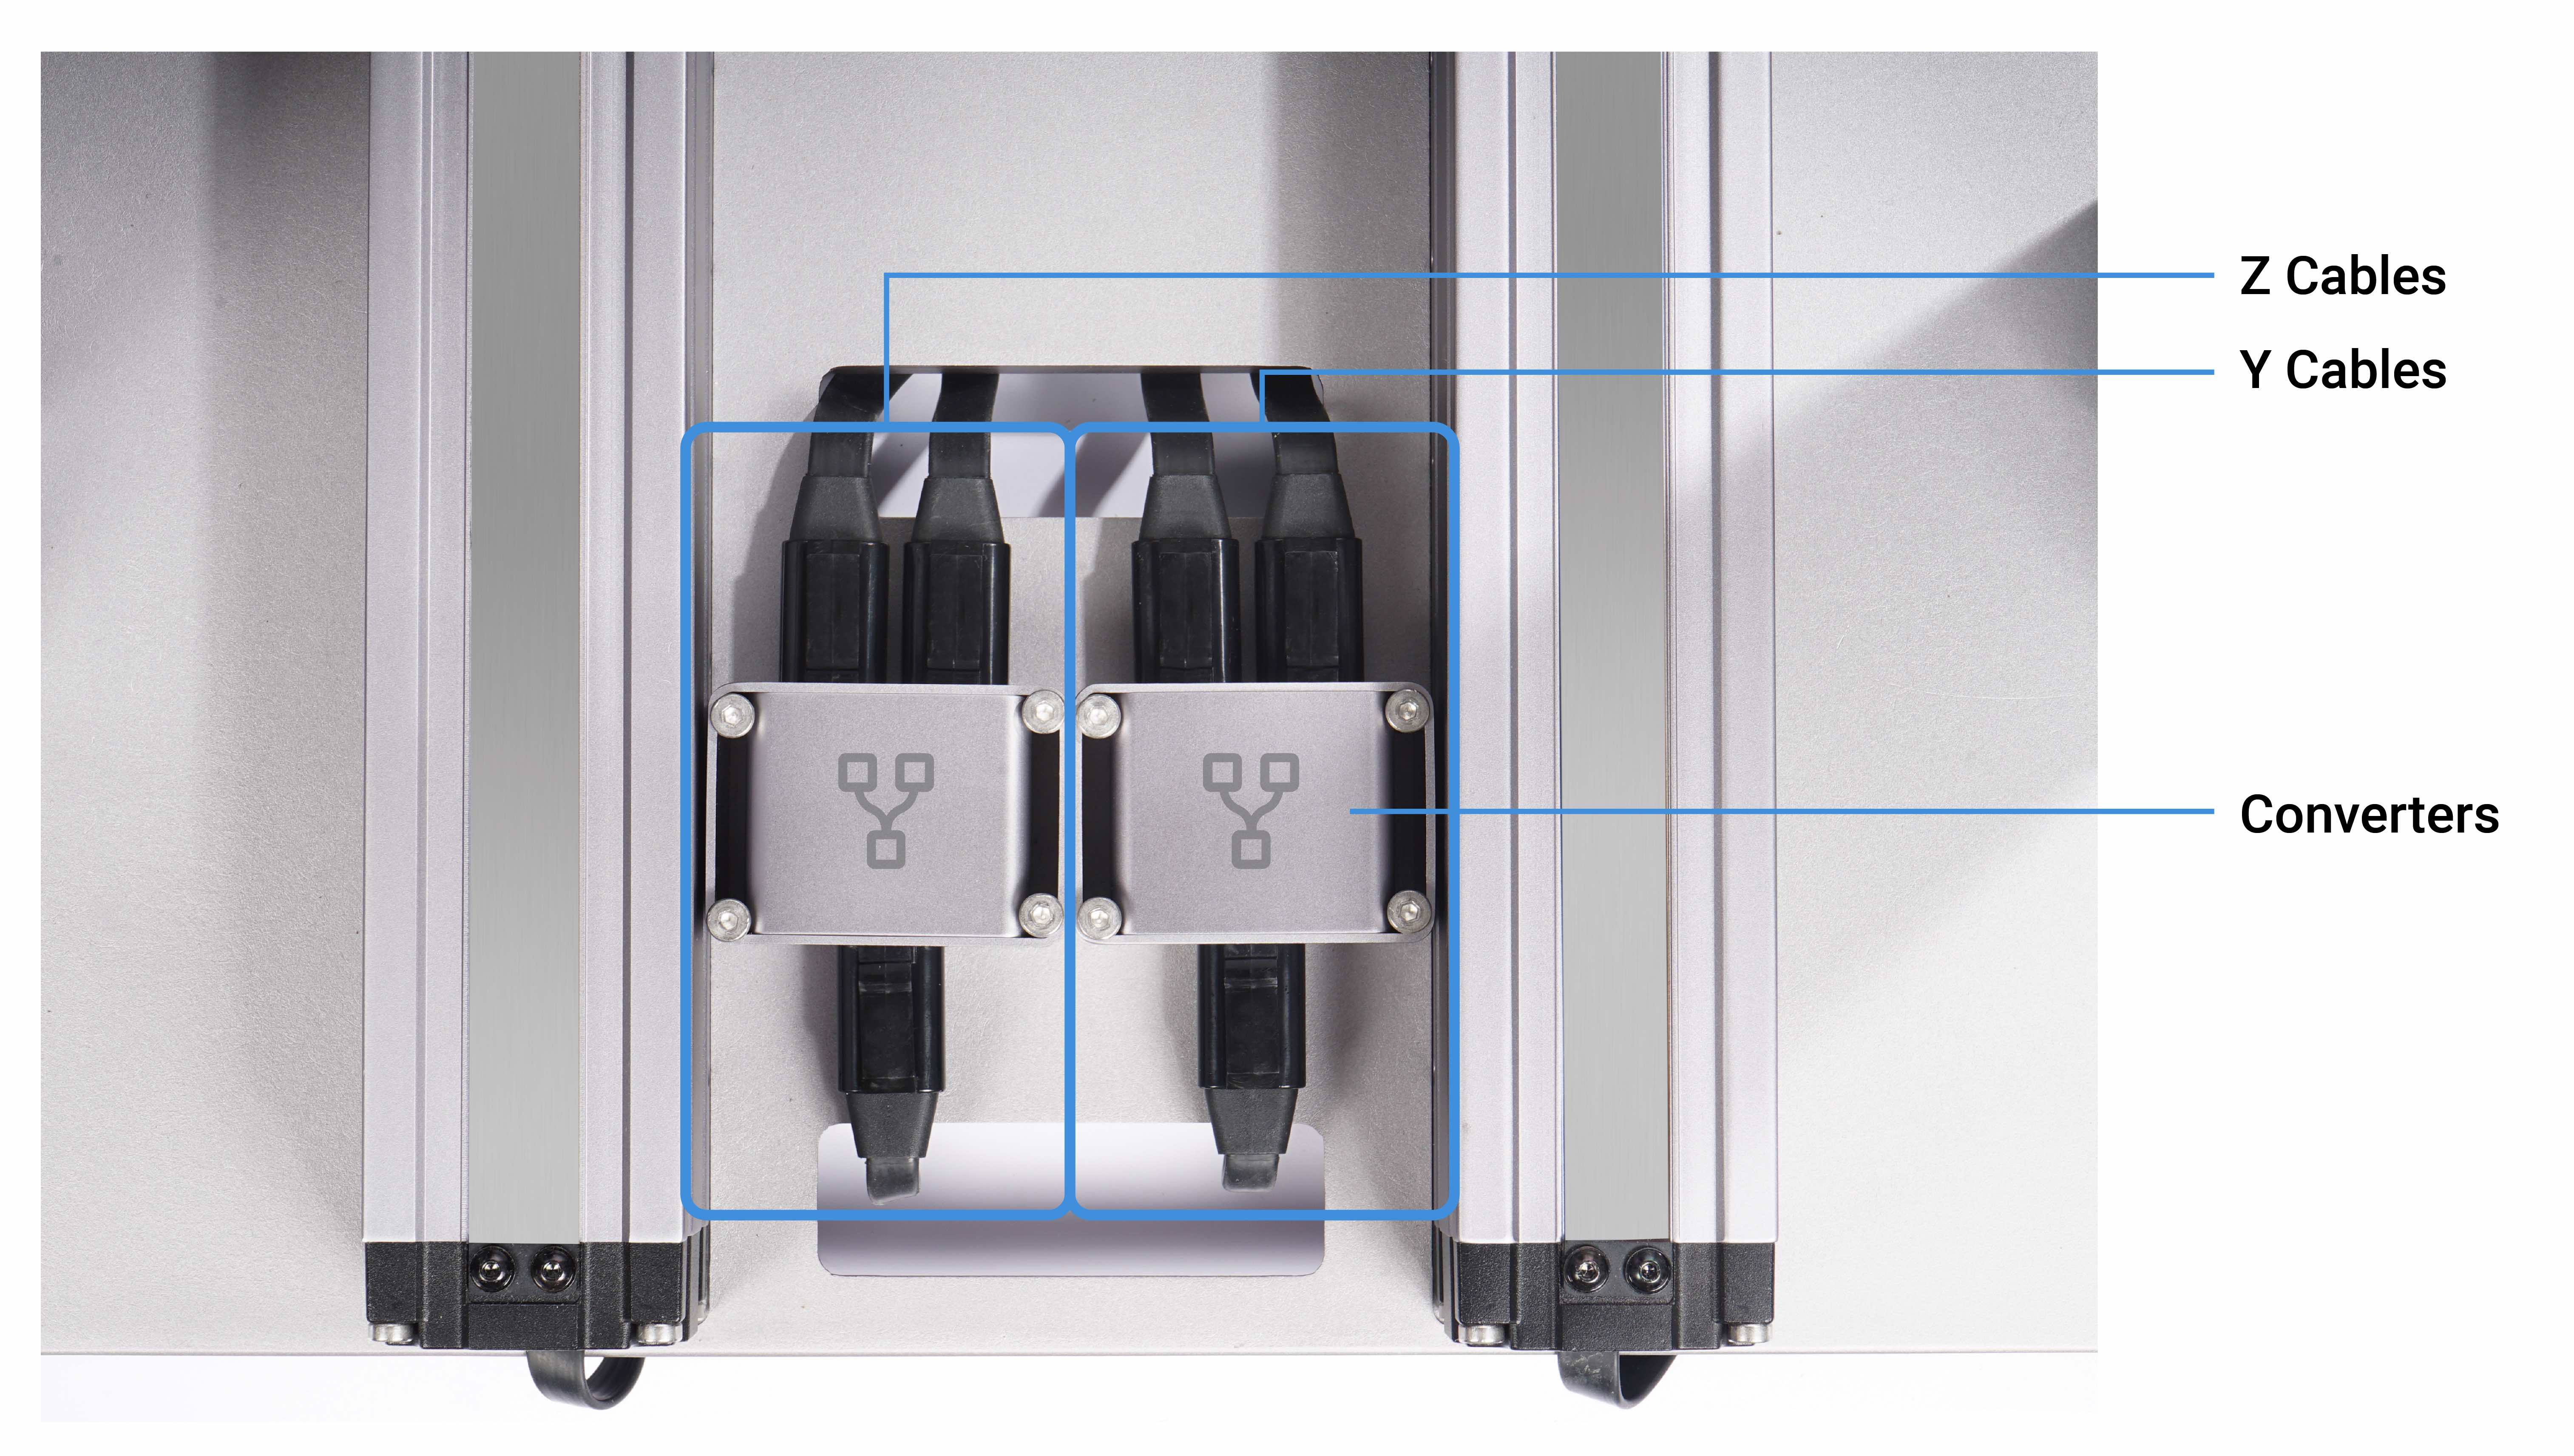
![]() Snapmaker 2.0 A150 has no Converters.
Snapmaker 2.0 A150 has no Converters.
- Into the 3D Printing Module
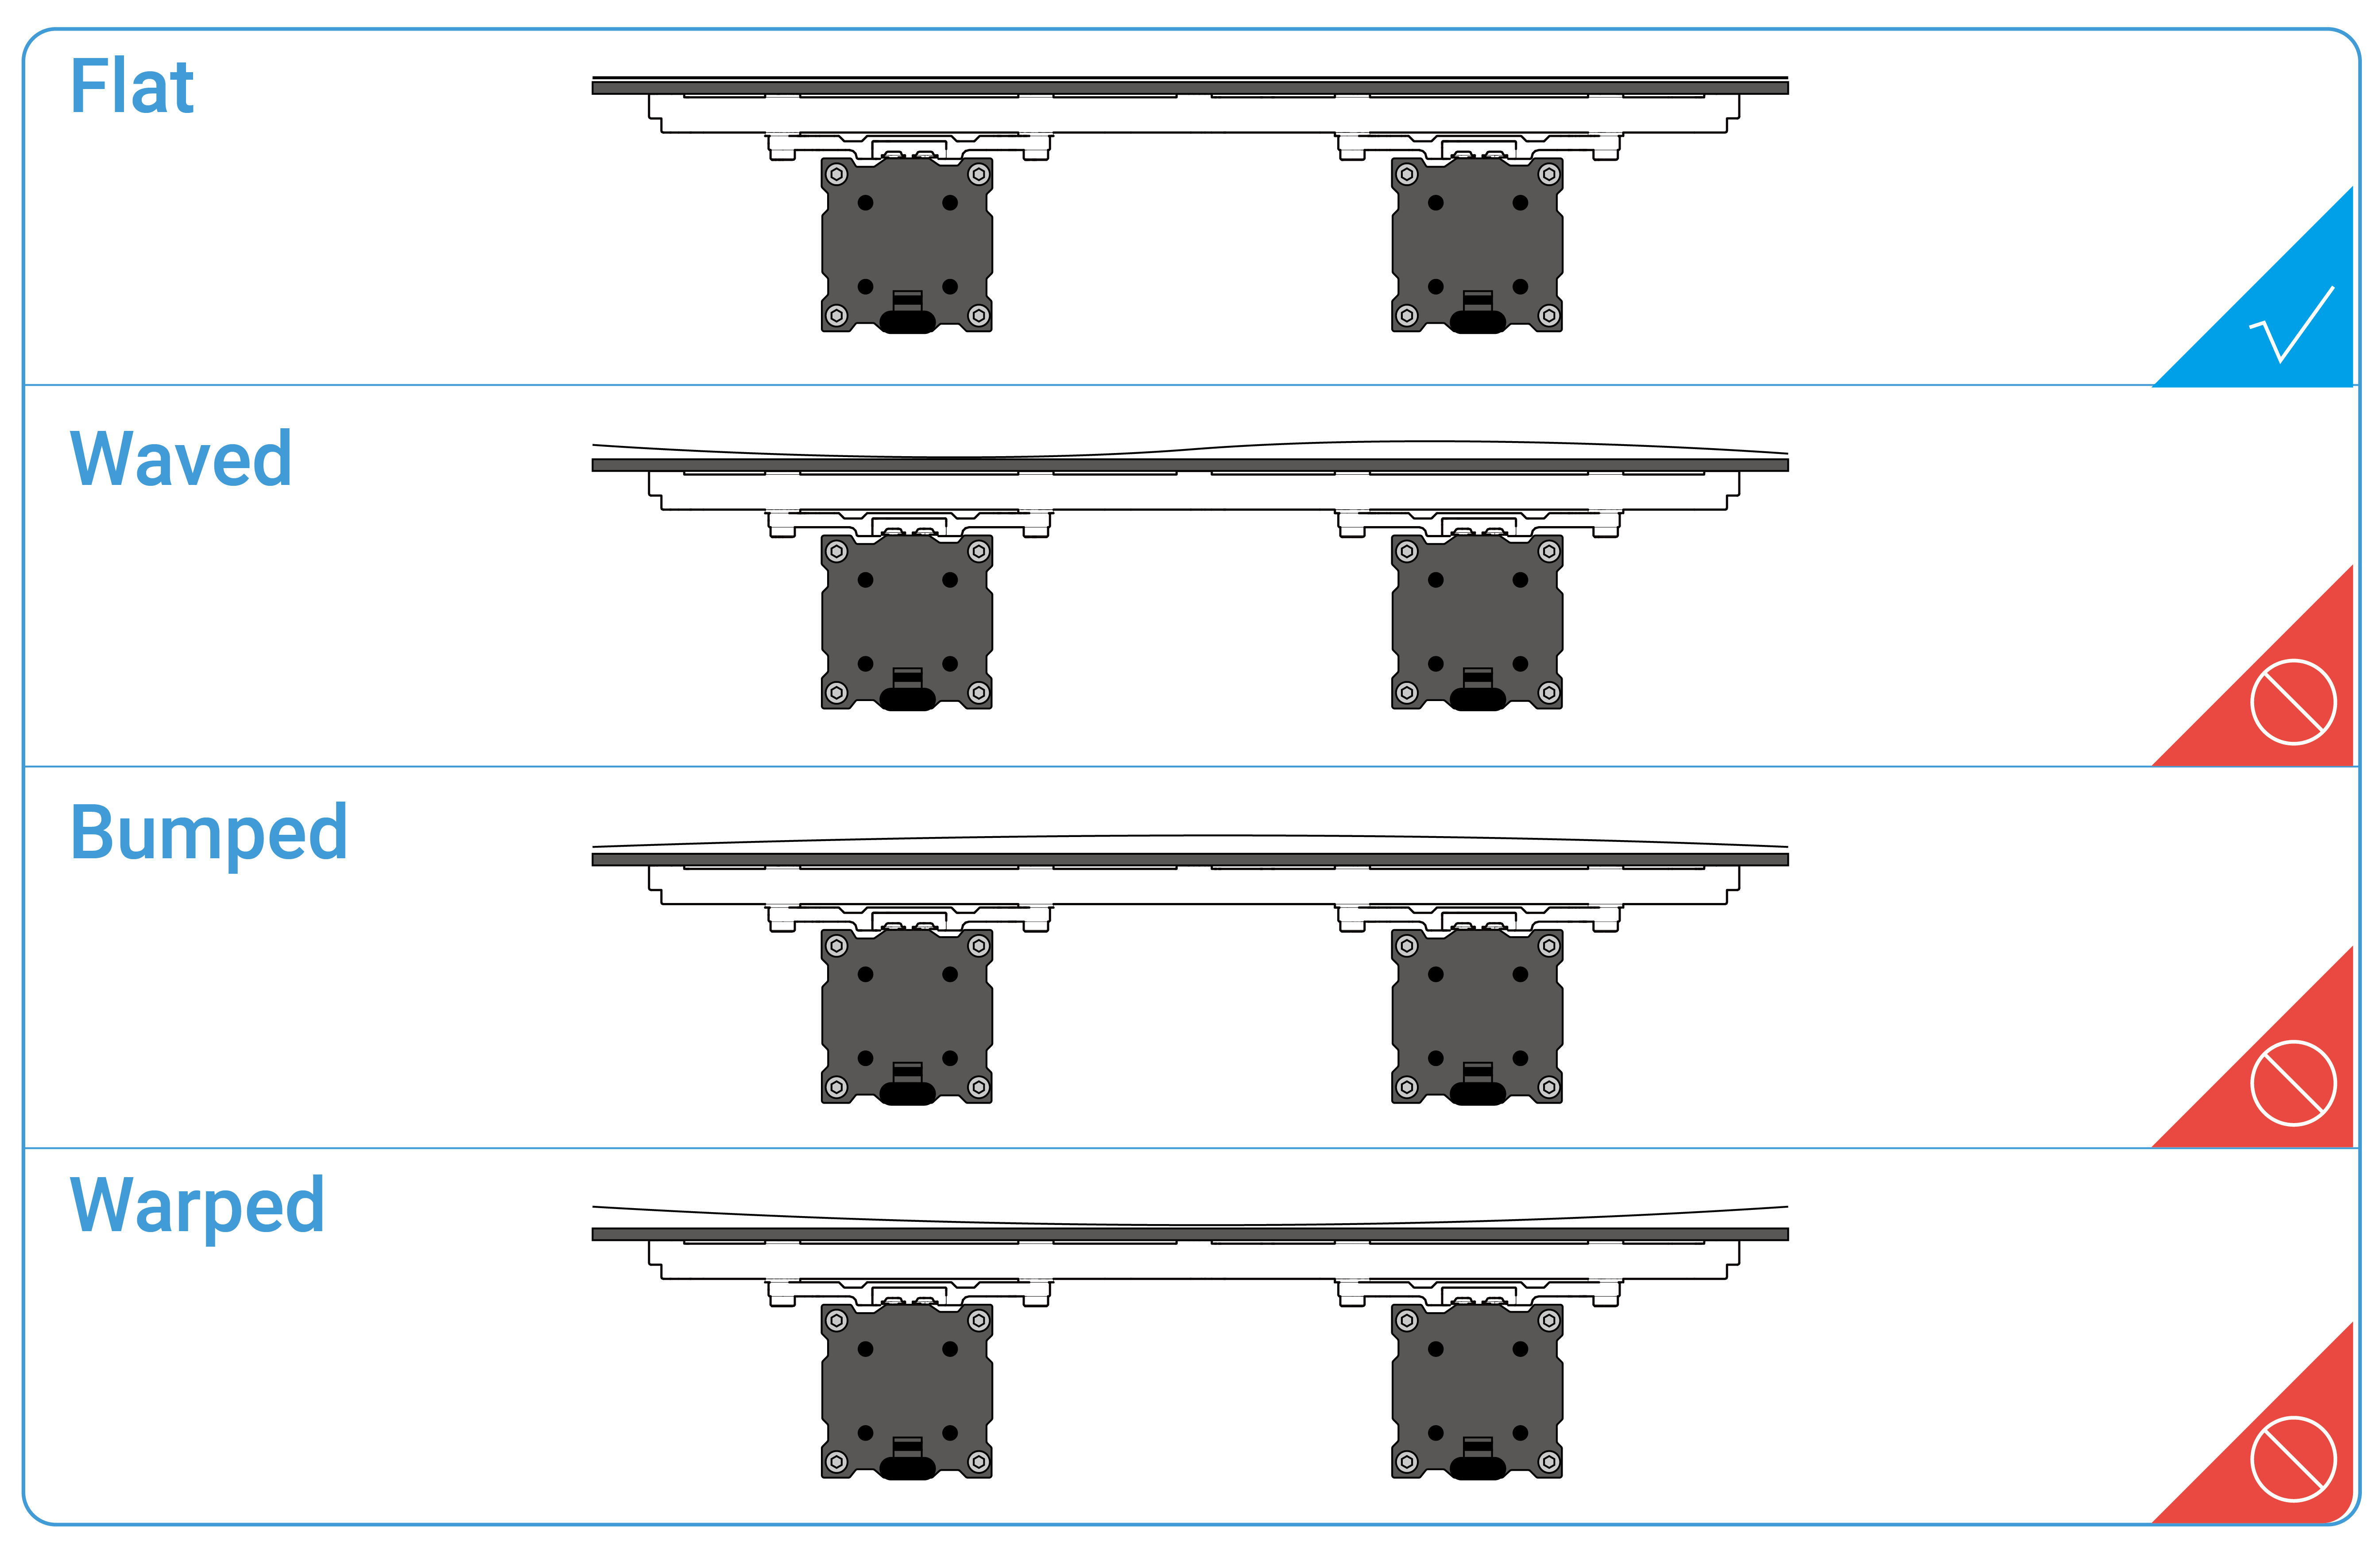
6.2.2 Check the Support Platform
Check if the Support Platform is assembled in the correct direction. The front without screws should face up, and the rear with some screws faces down. If you install the platform upside down, it will be higher than the one when it is correctly installed, and this is likely to cause the 3D Printing Module to bump into the Print Sheet.
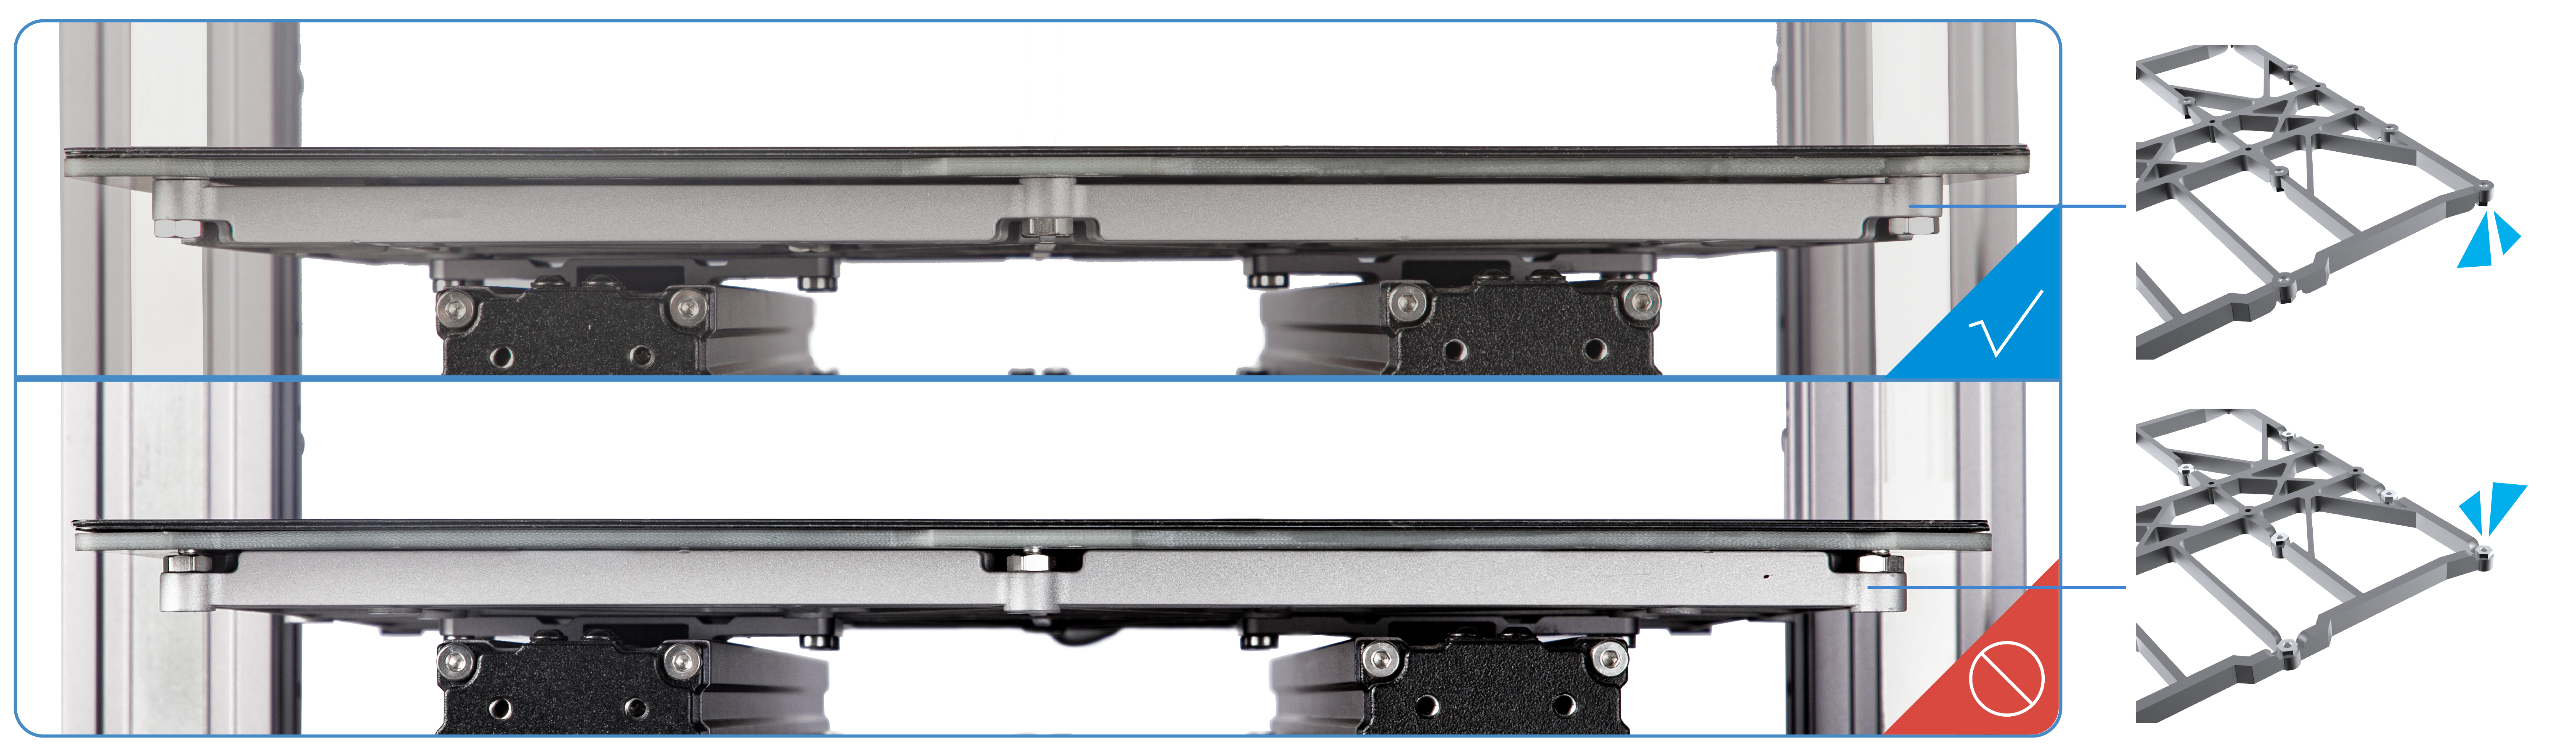
Check if the Support Platform is flat and stable, fully tightened with screws. If not, loosen all screws and reassemble the Platform.
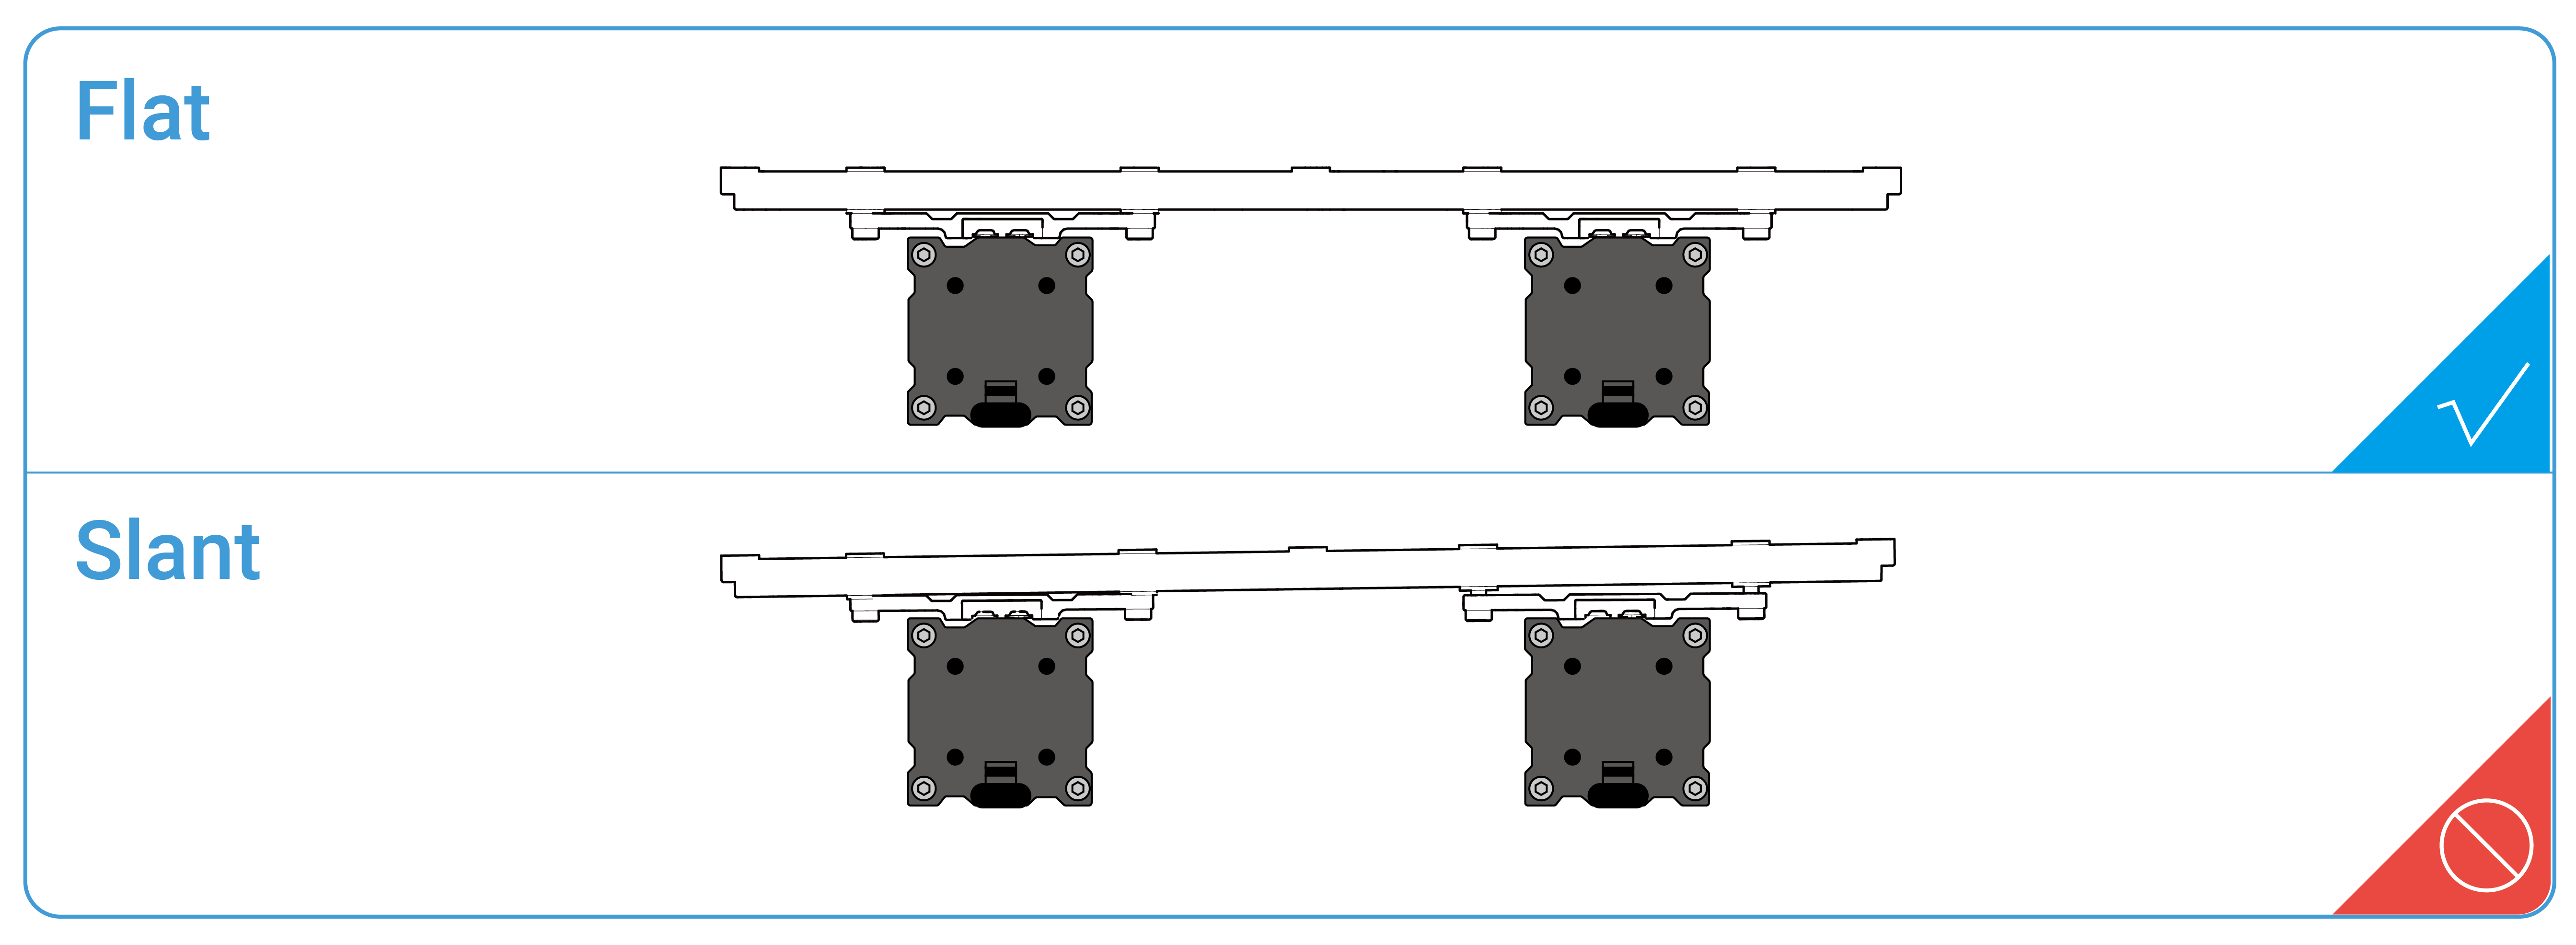
6.2.3 Check the Heated Bed
Check if the Heated Bed is flat and stable, fully tightened with screws. If not, reassemble the Heated Bed.
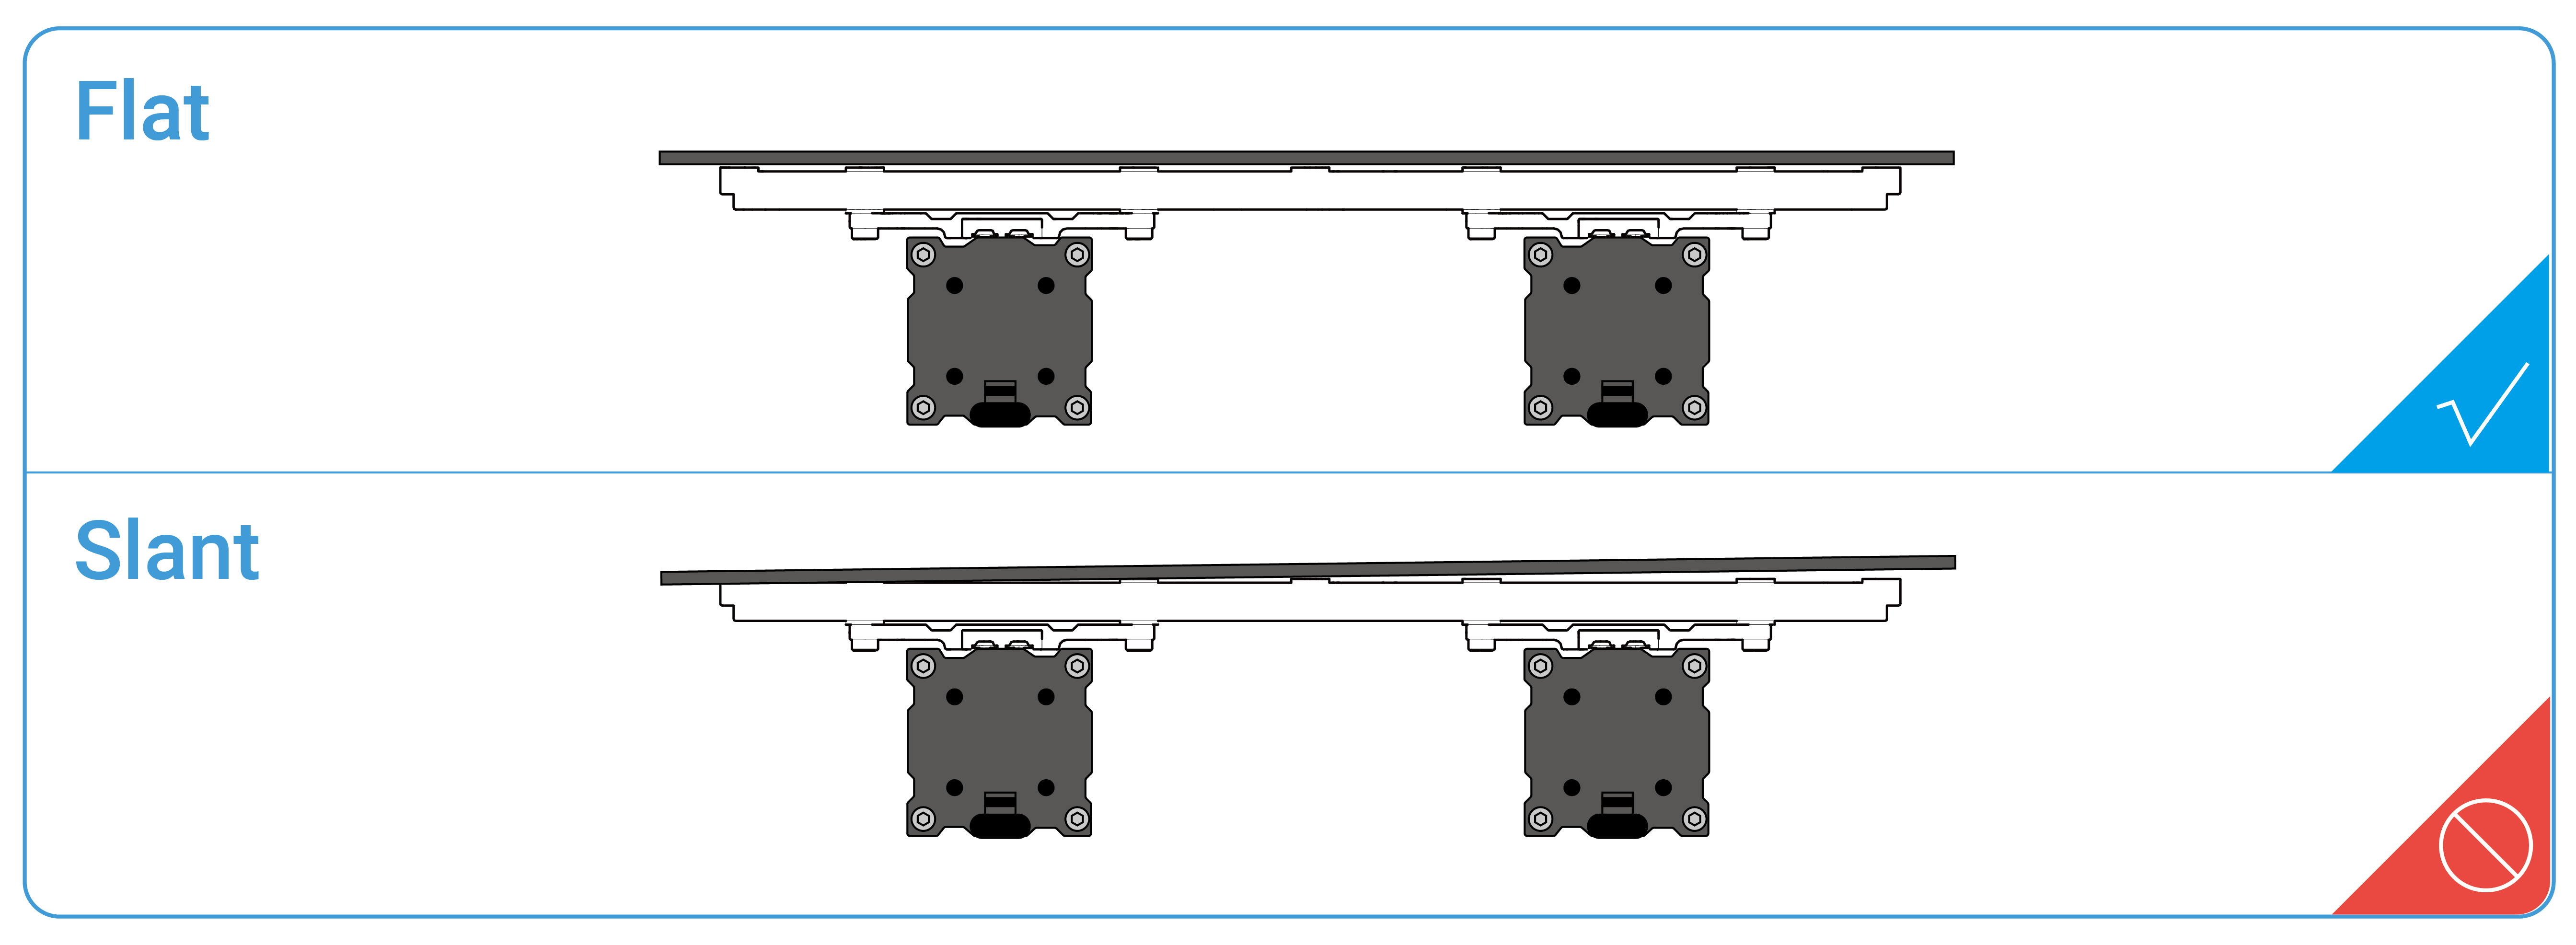
Check if the Print Sheet is correctly placed on the Heated Bed as illustrated. If not, reassemble the Print Sheet.
6.2.4 Check the Nozzle
There are many reasons why the nozzle is blocked and thus compromise the print quality. To prevent the nozzle from malfunction and blockage, check the nozzle before every printing job. If the nozzle bore or tip is blocked, follow these steps to clean the nozzle:
Clean the Nozzle Bore
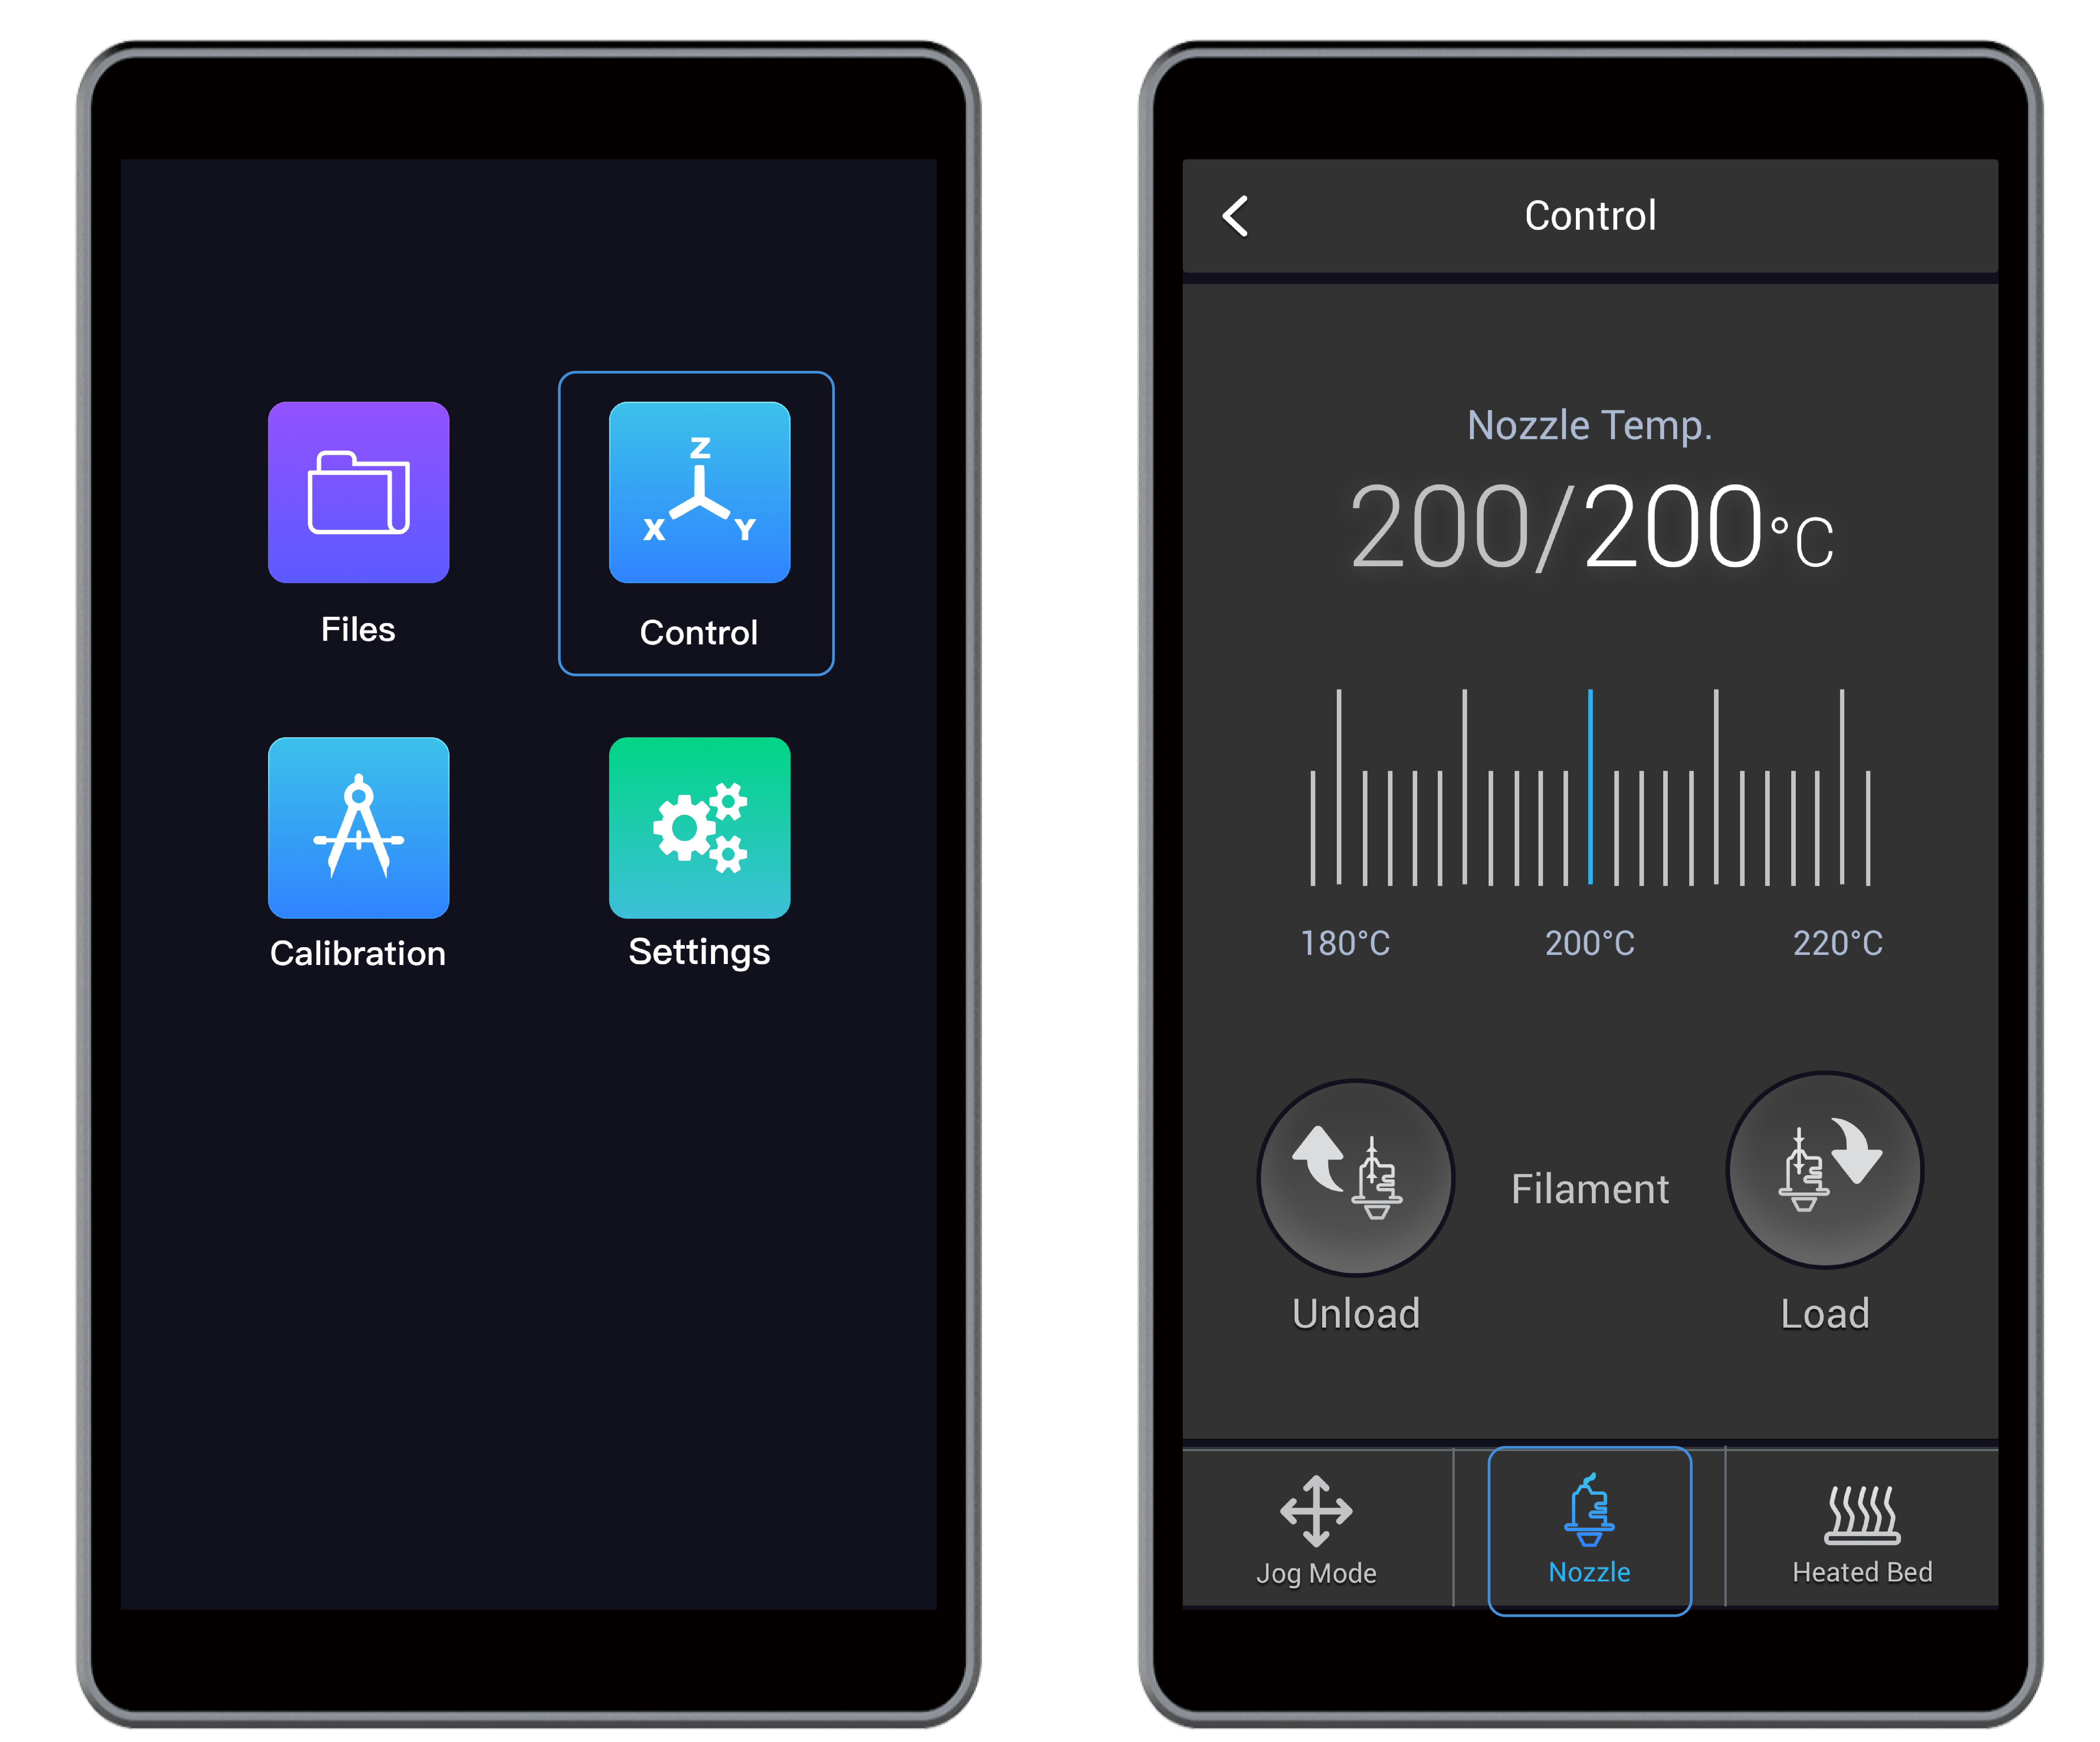
(1) Turn on the machine. Heat the nozzle up to 200°C (392°F) by tapping Control > Nozzle.
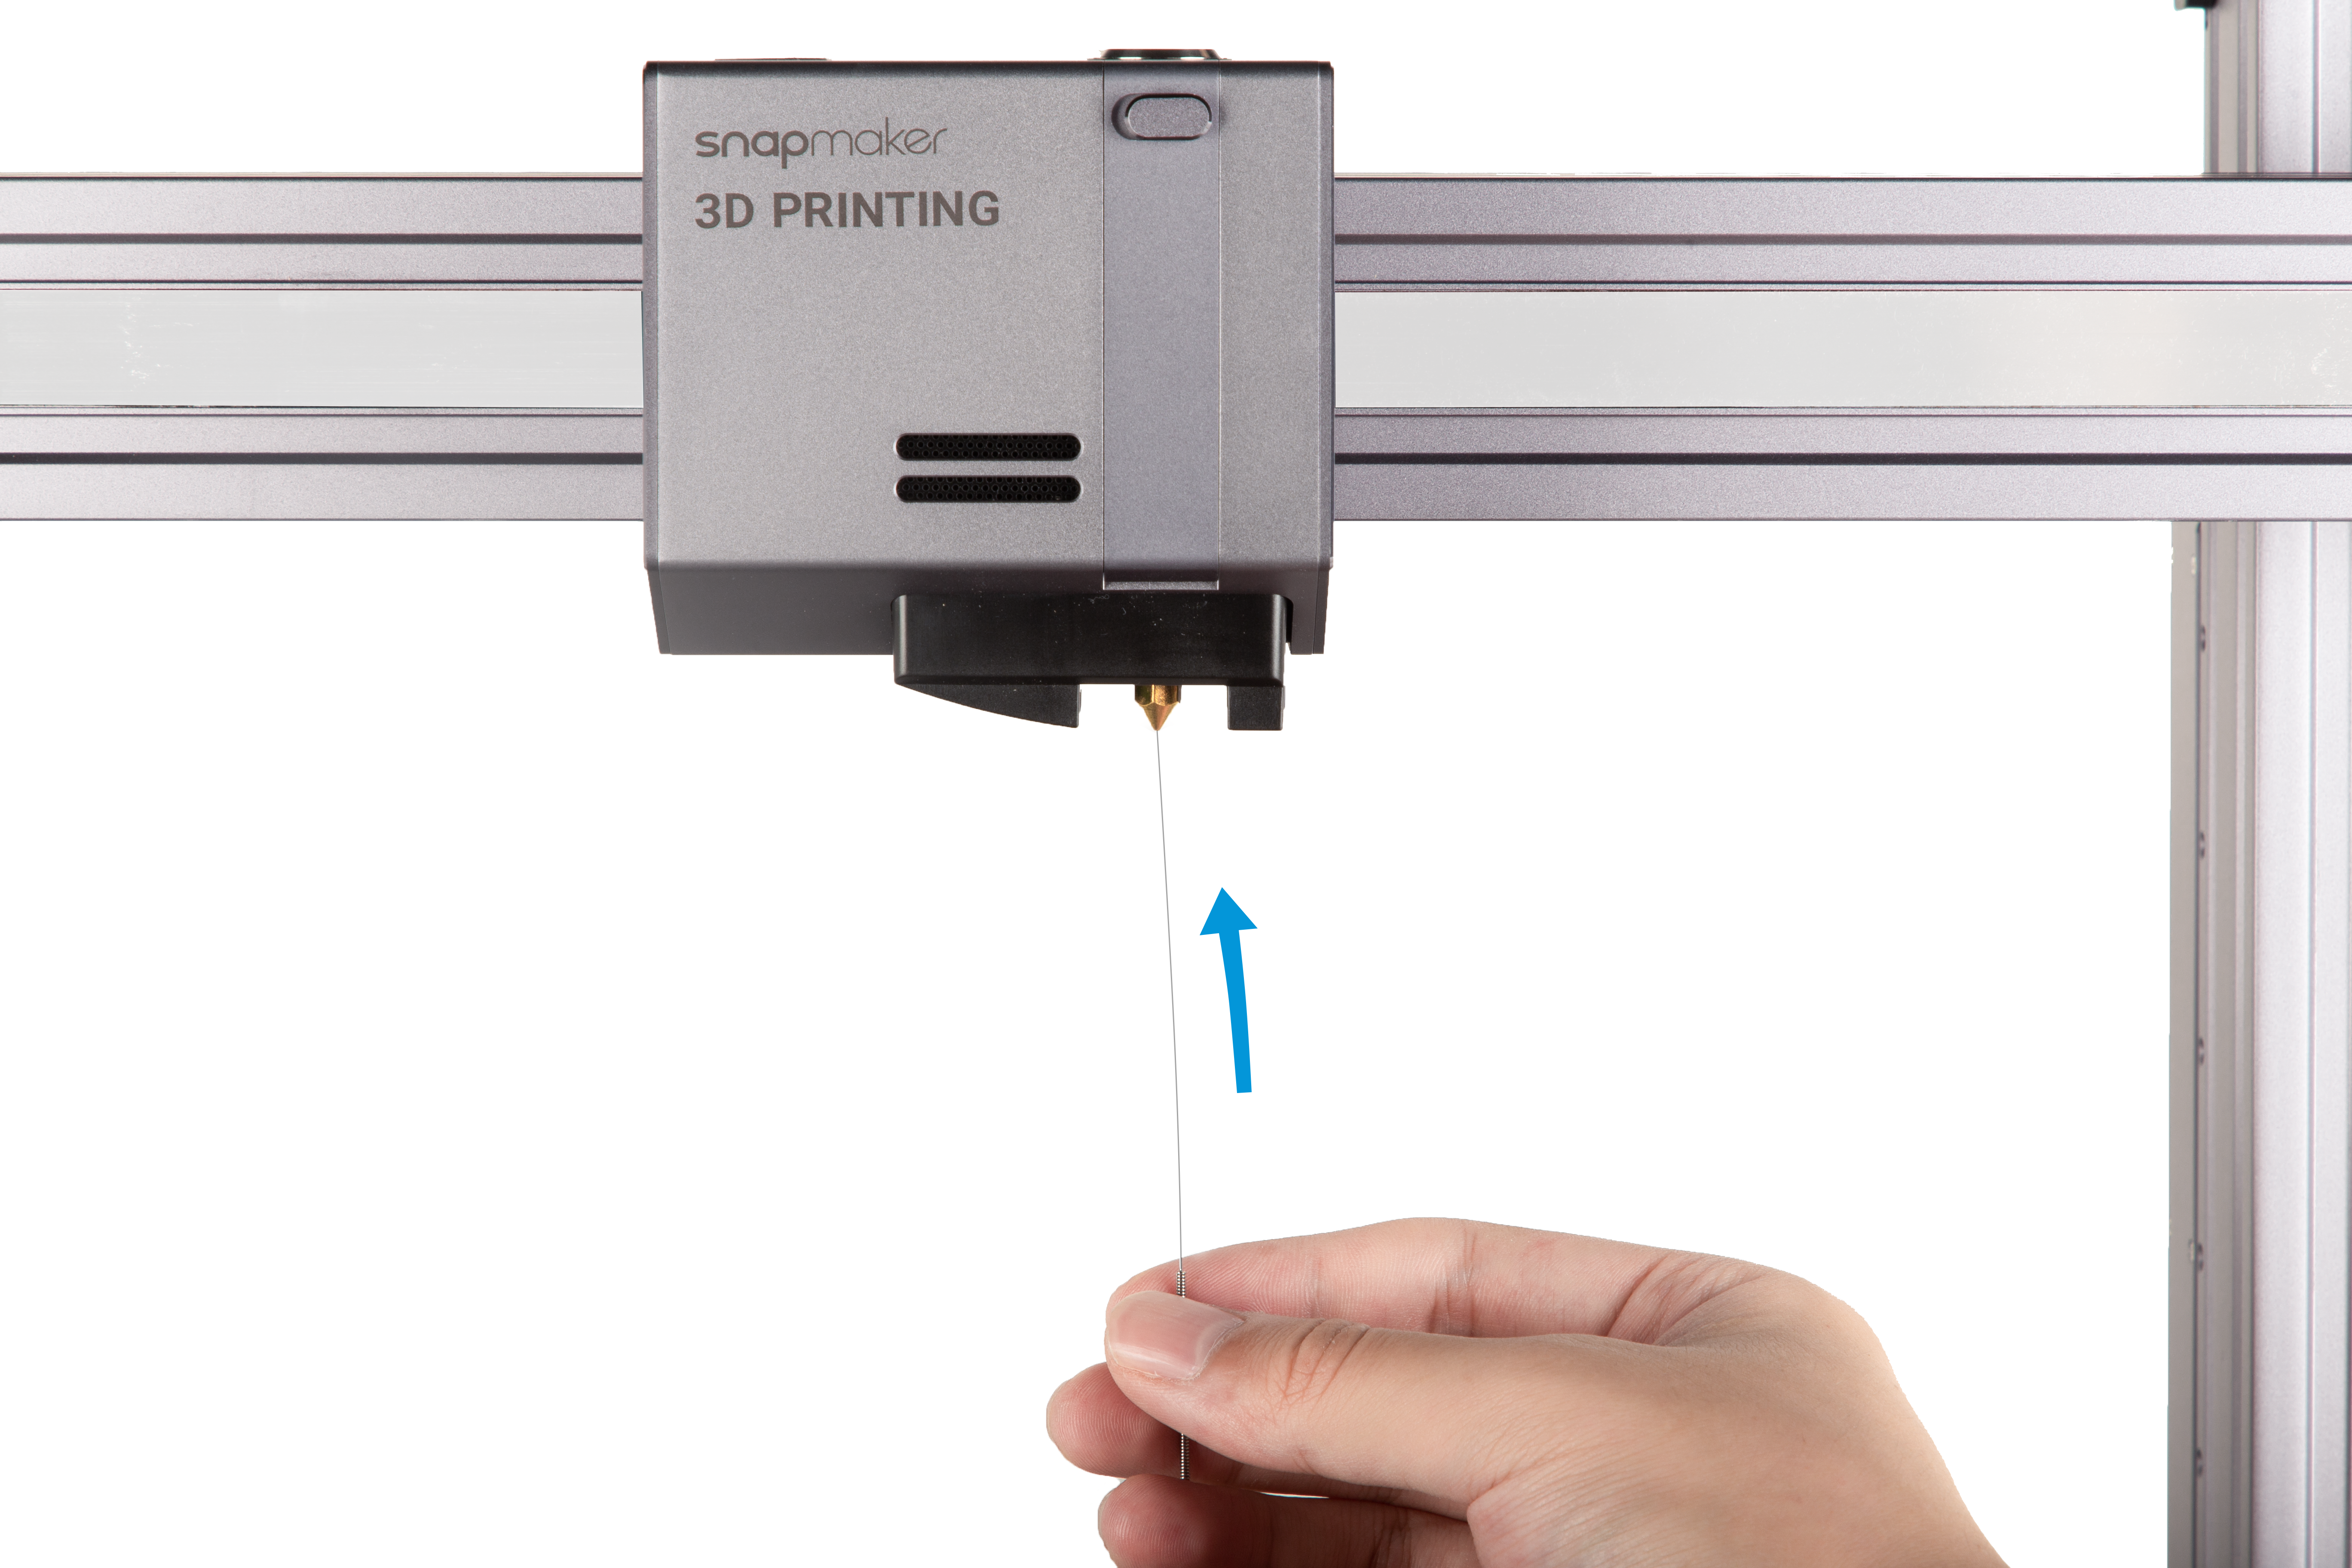
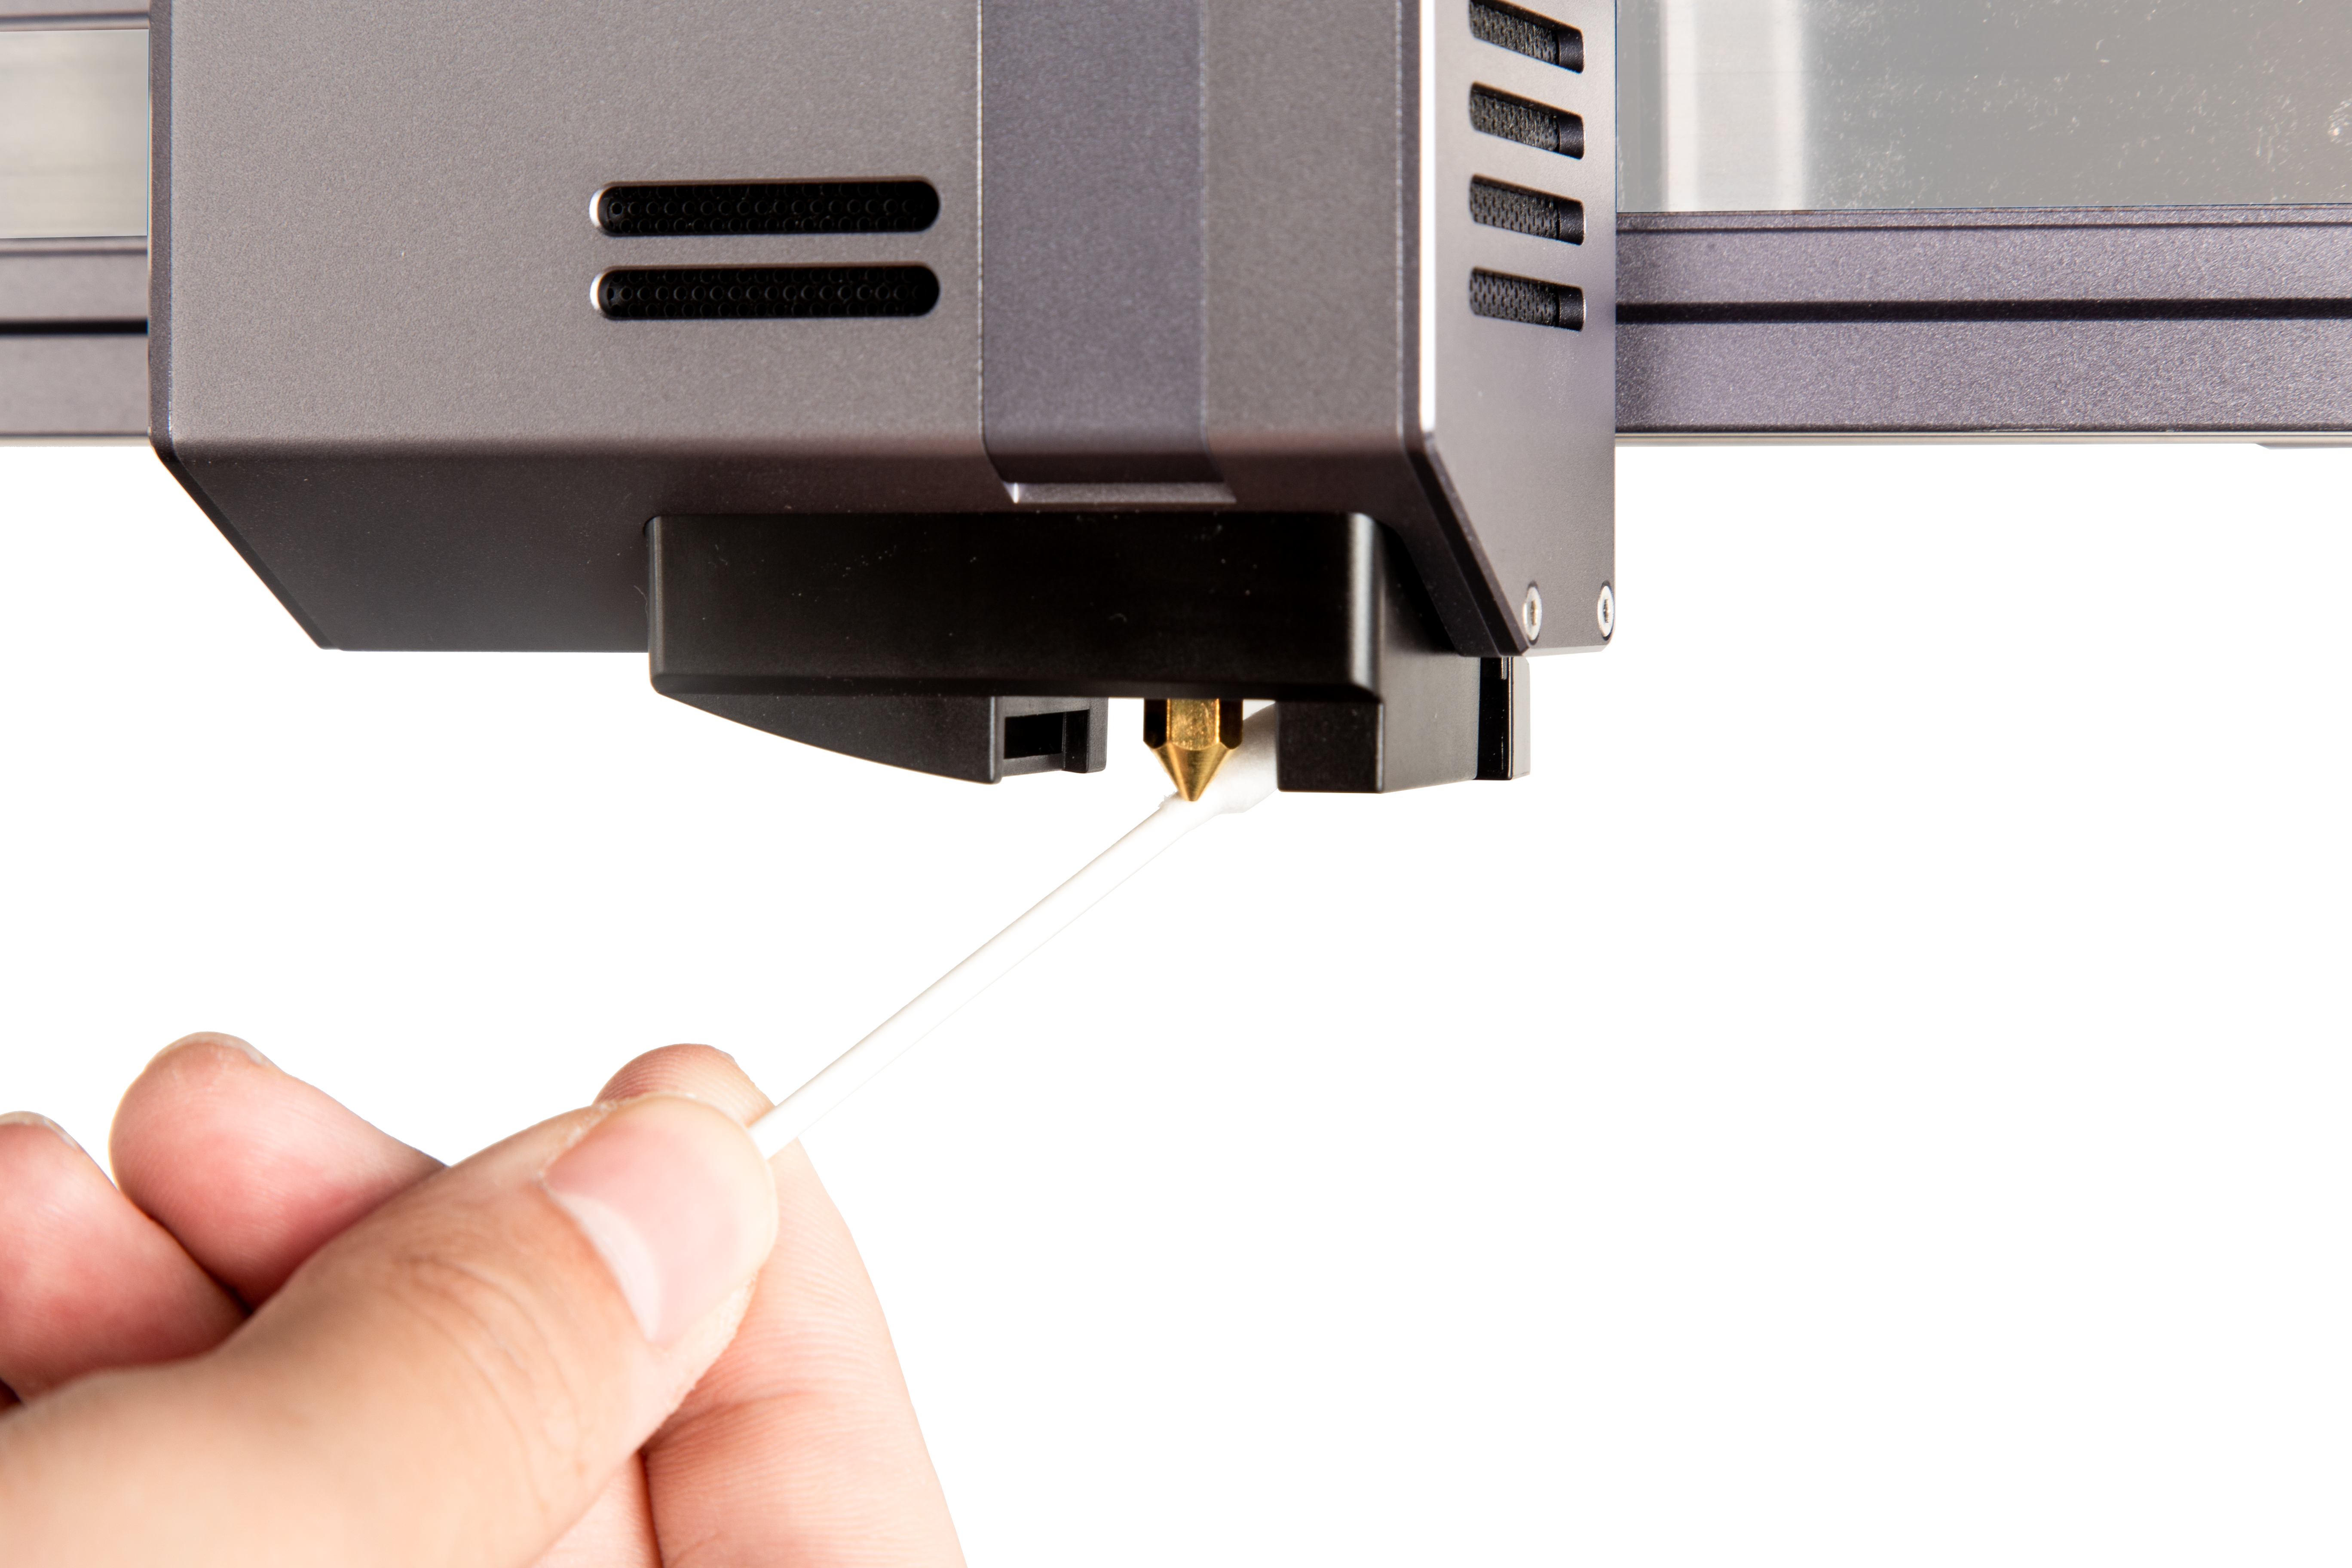
(2) Clean the bore. After the nozzle reaches the target temperature, insert a needle, with its diameter smaller than 0.4 mm, into the nozzle bore from the bottom.
![]() Do not use pliers, scissors, or drill bits to clean the nozzle as they may damage the nozzle.
Do not use pliers, scissors, or drill bits to clean the nozzle as they may damage the nozzle.
![]() Do not touch the hot nozzle with bare hands.
Do not touch the hot nozzle with bare hands.
(3) Stir the softened filament out using the needle until you have cleared the blockage.

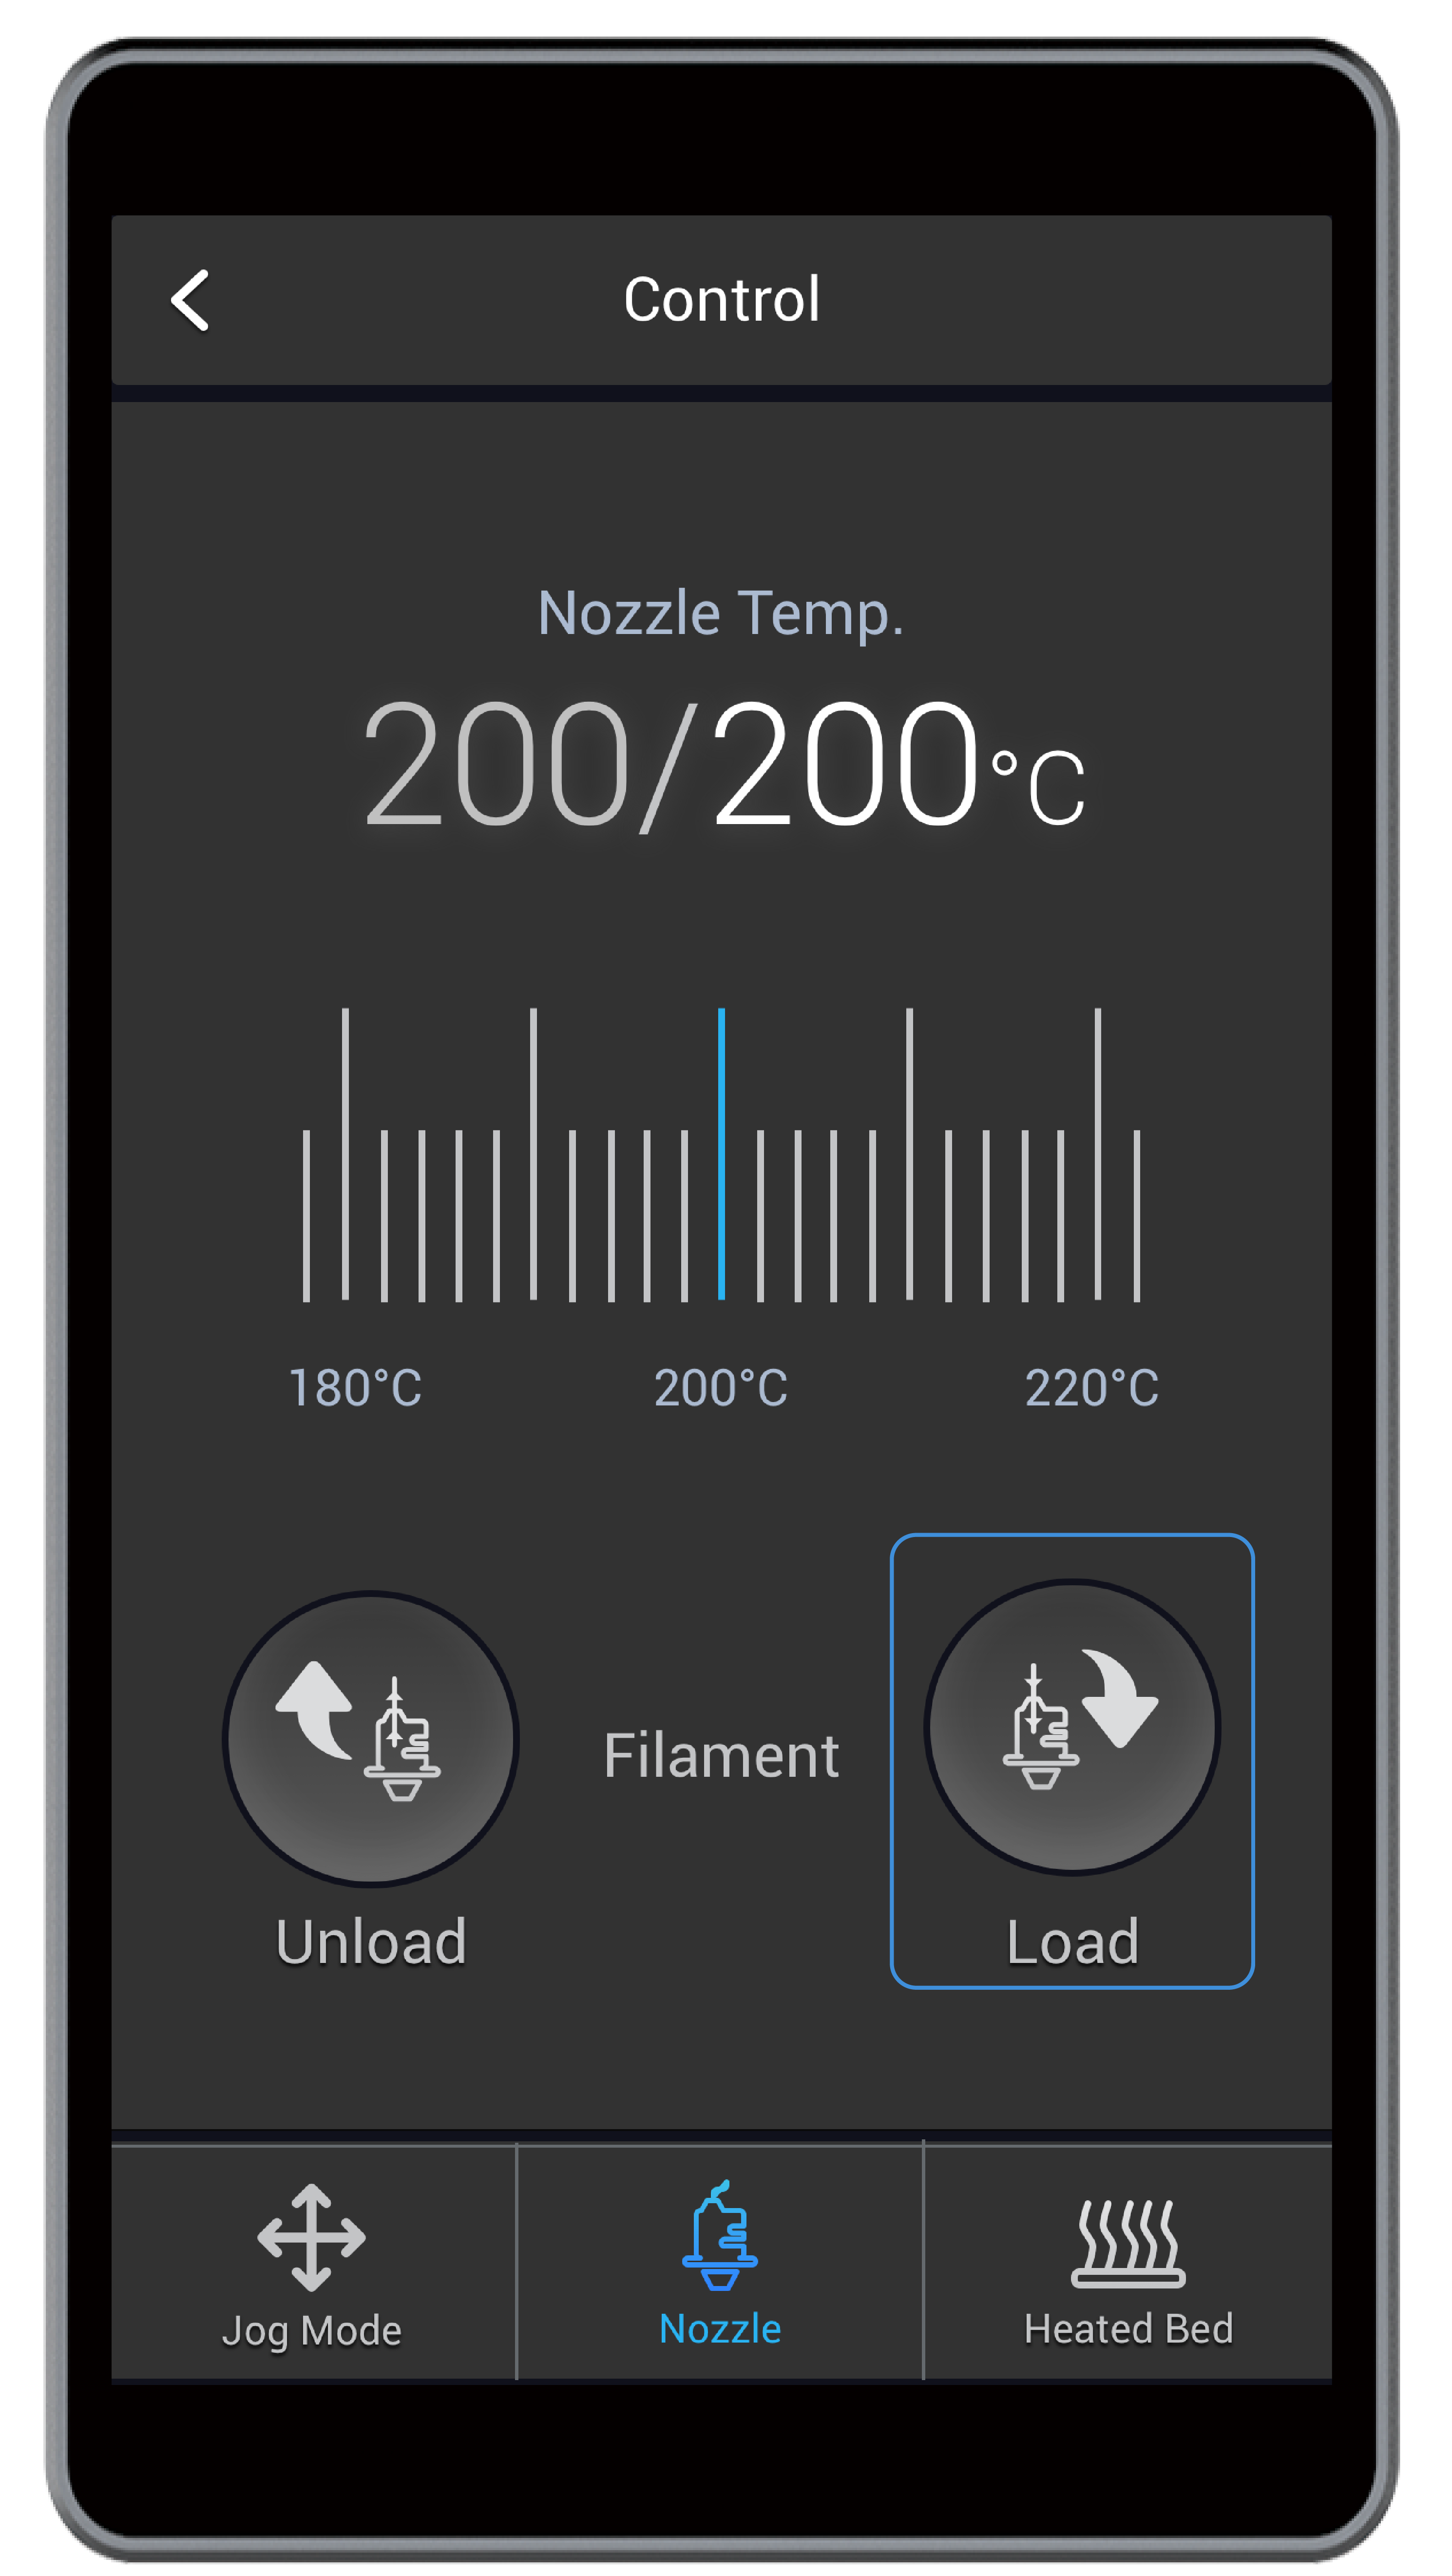
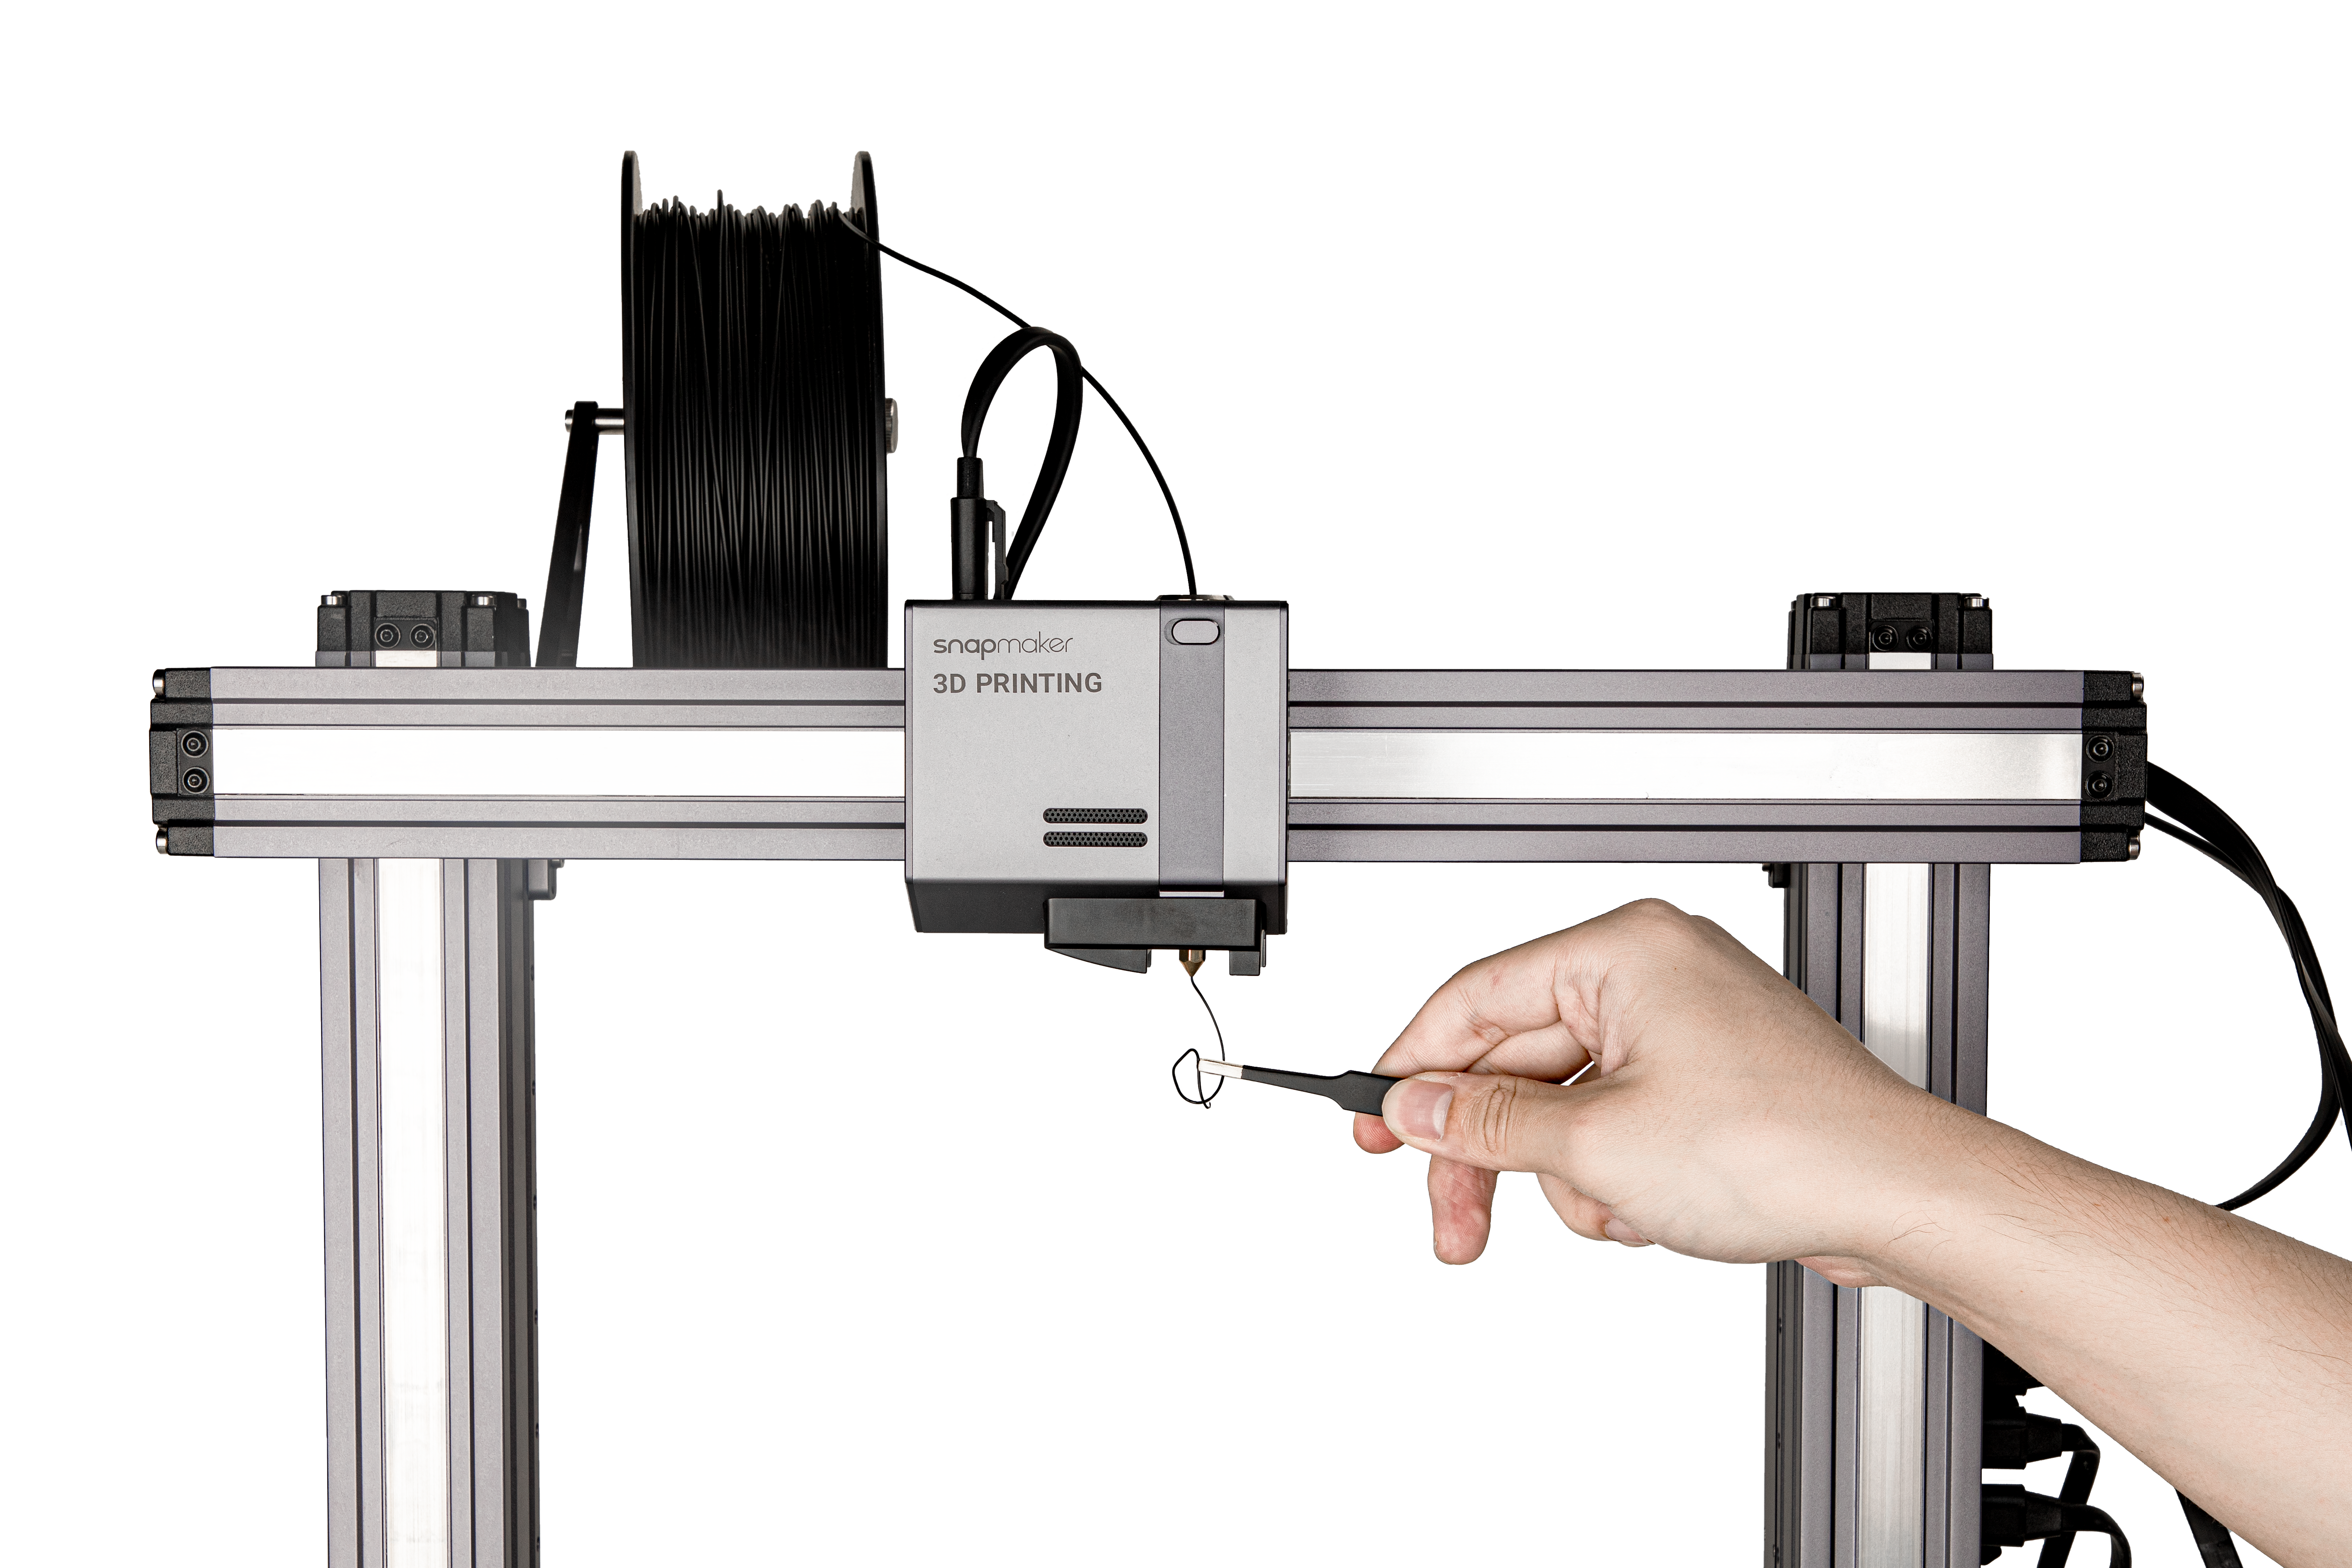
(4) Check if the nozzle is clean. Tap Load and insert the filament to see if it can get through the nozzle. If not, repeat the previous two steps to clear the blockage. If the filament comes out smoothly, you have unclogged the blocked nozzle. Remove the extruded filament using the tweezers.
![]() If the blockage remains in the nozzle, you may need to replace the hot end.
If the blockage remains in the nozzle, you may need to replace the hot end.
Clean the Nozzle Tip
Clean the nozzle tip and its surrounding area with a swab.
6.2.5 Check the Filament
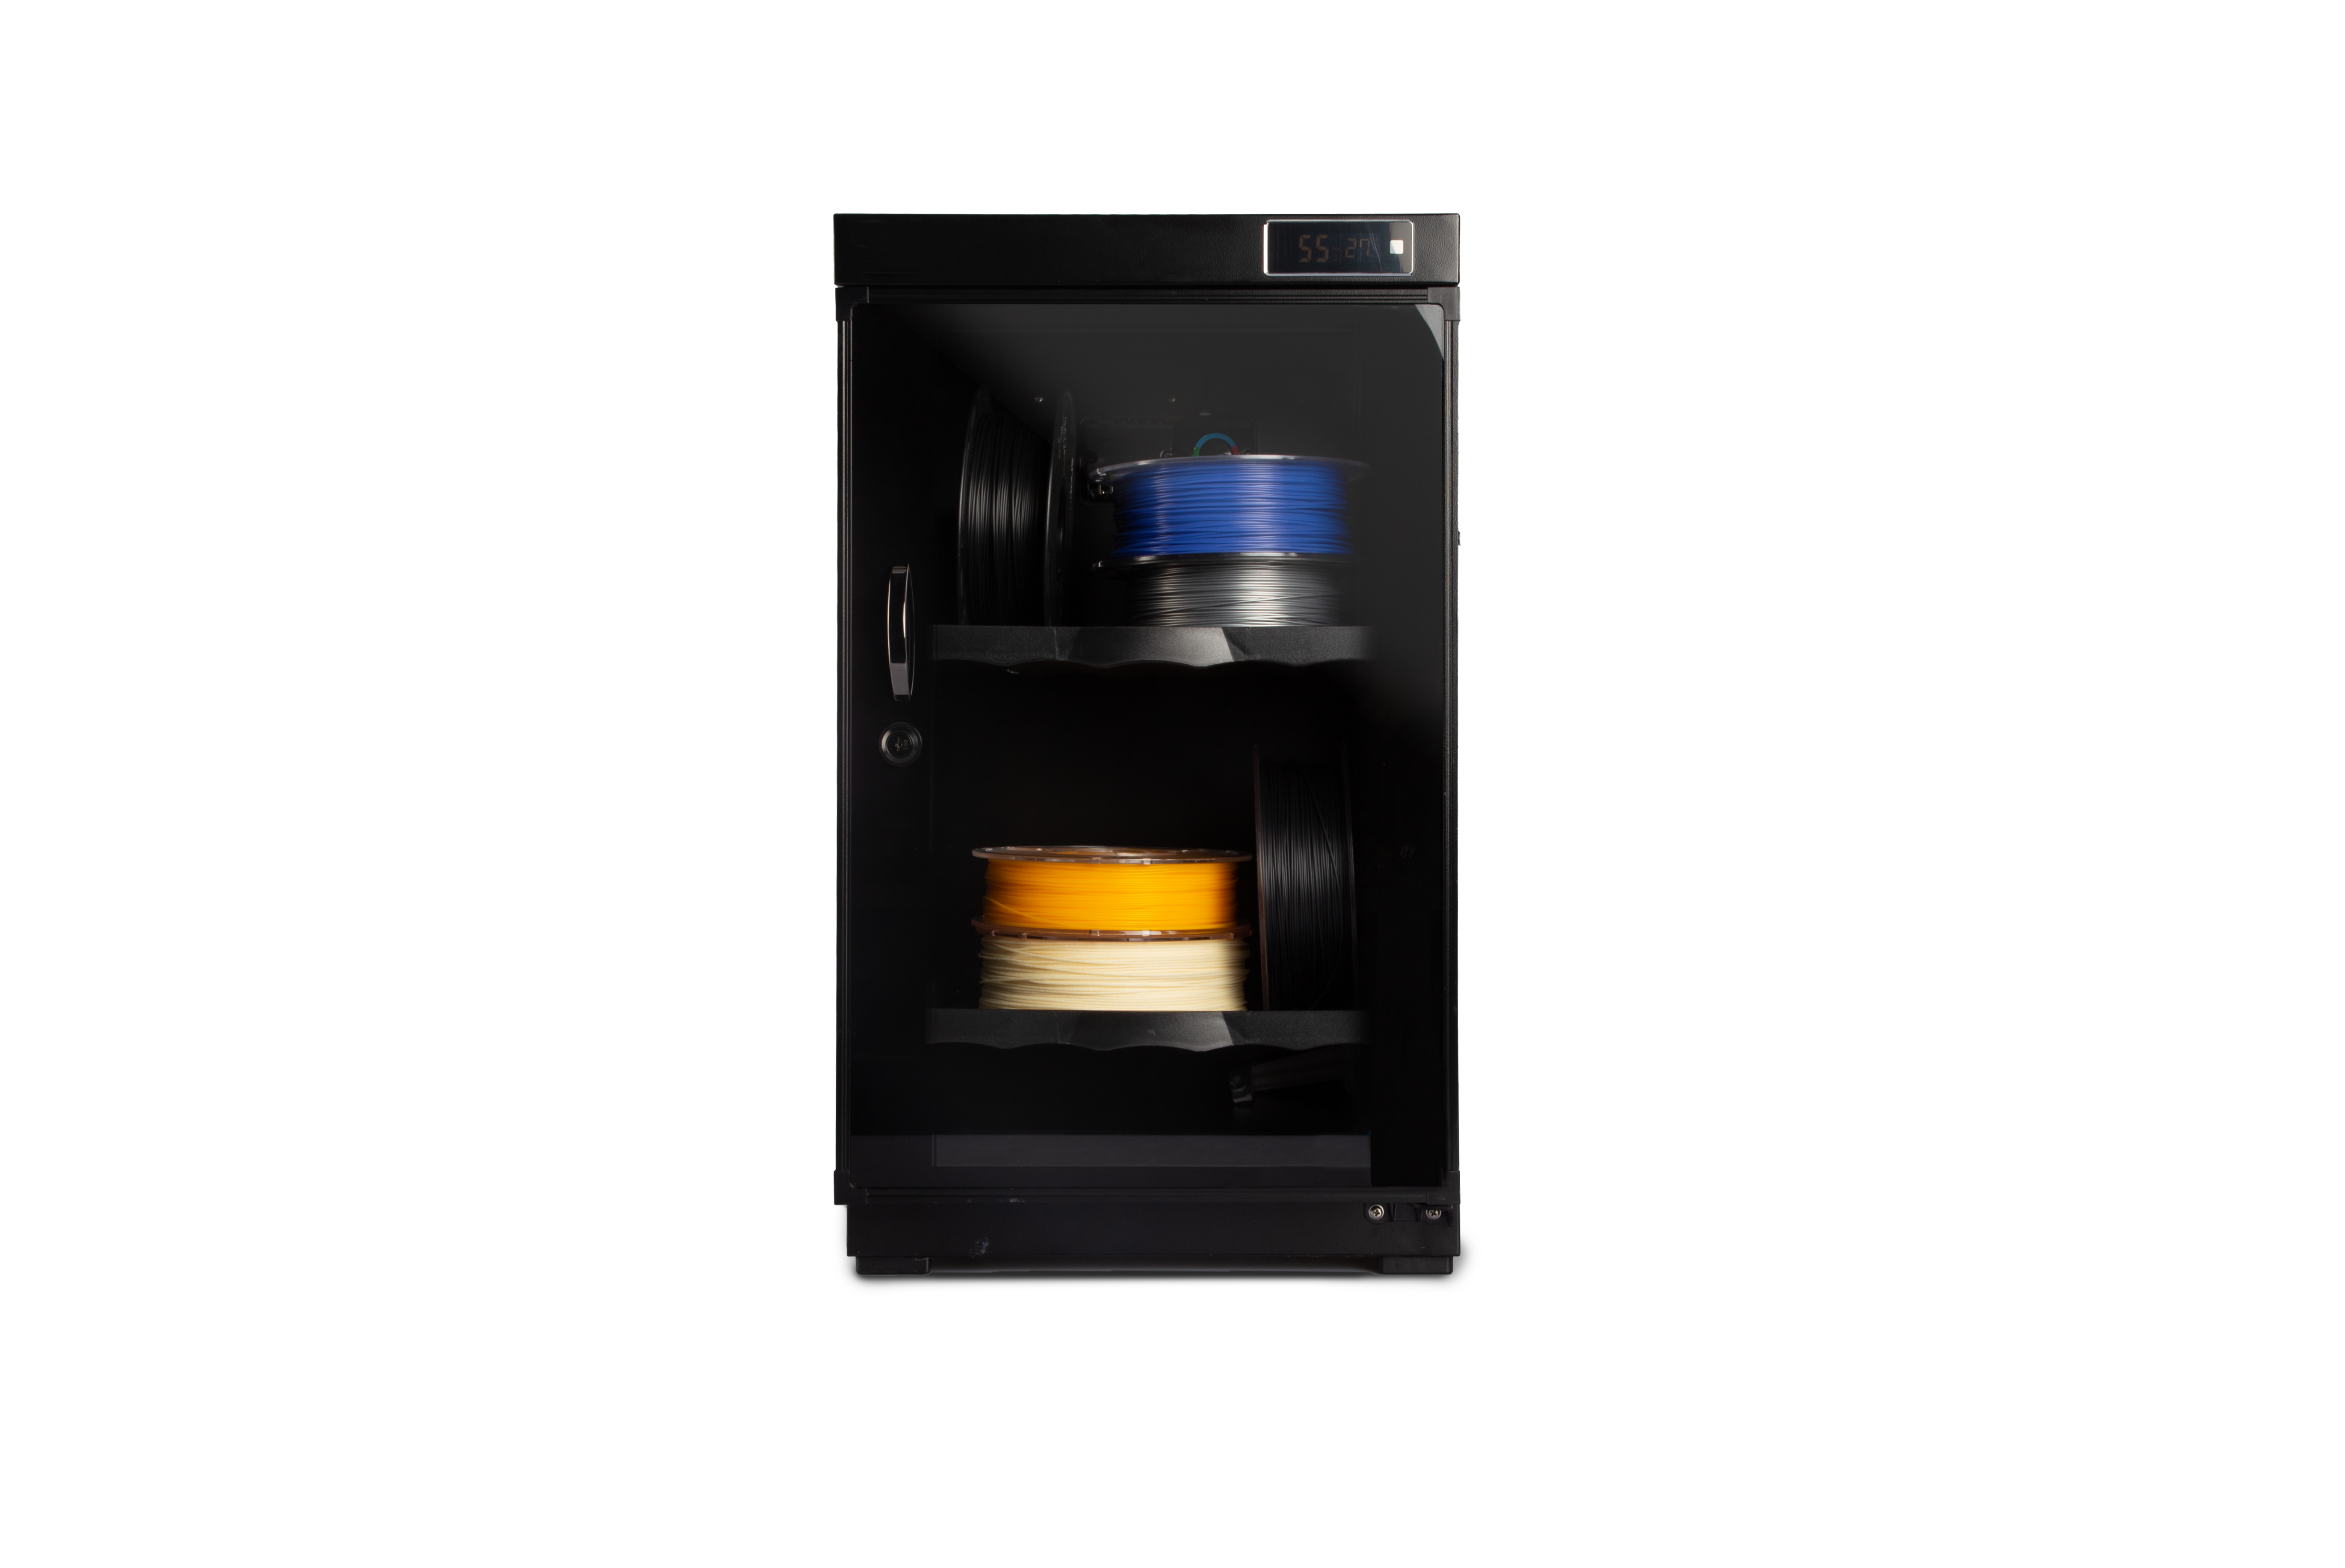
Before you print, check if the filament is damp. Here are some tips to identify, store, and dry the filament.
How to Identify Damp Filaments
These are a few common signs of damp filaments:
- Easily break if bent or pulled
- Popping sounds while being extruded
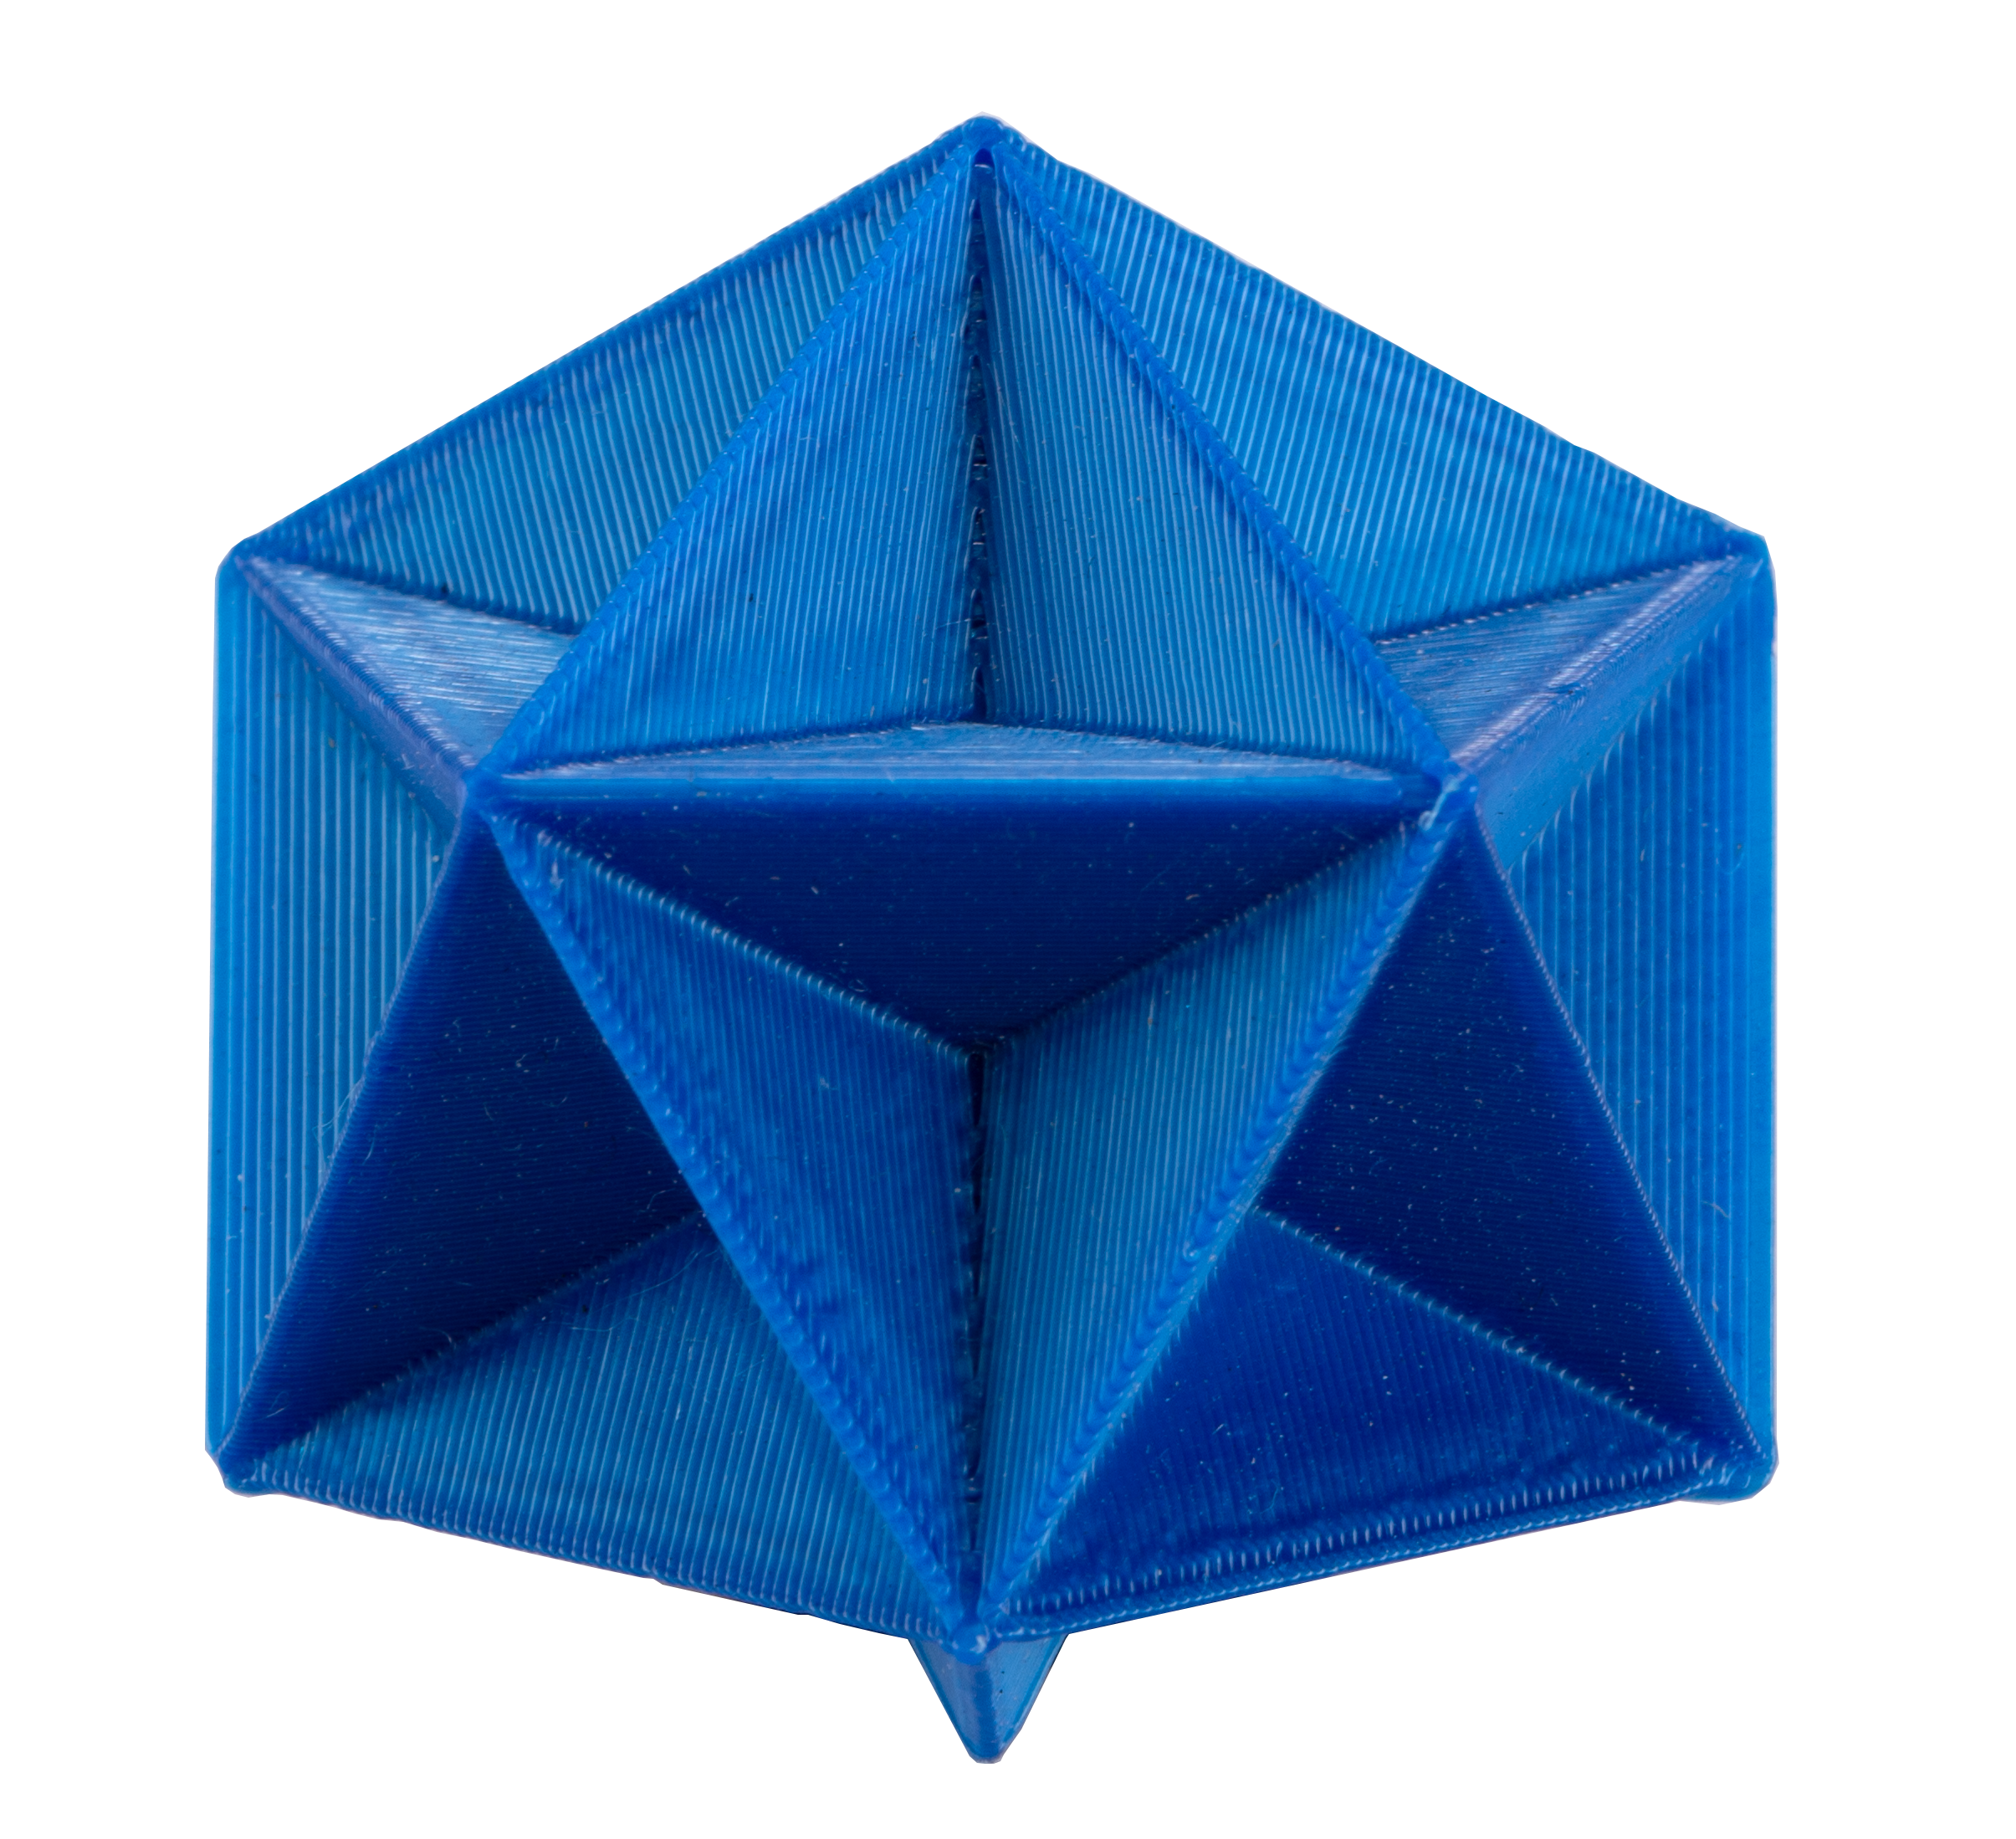
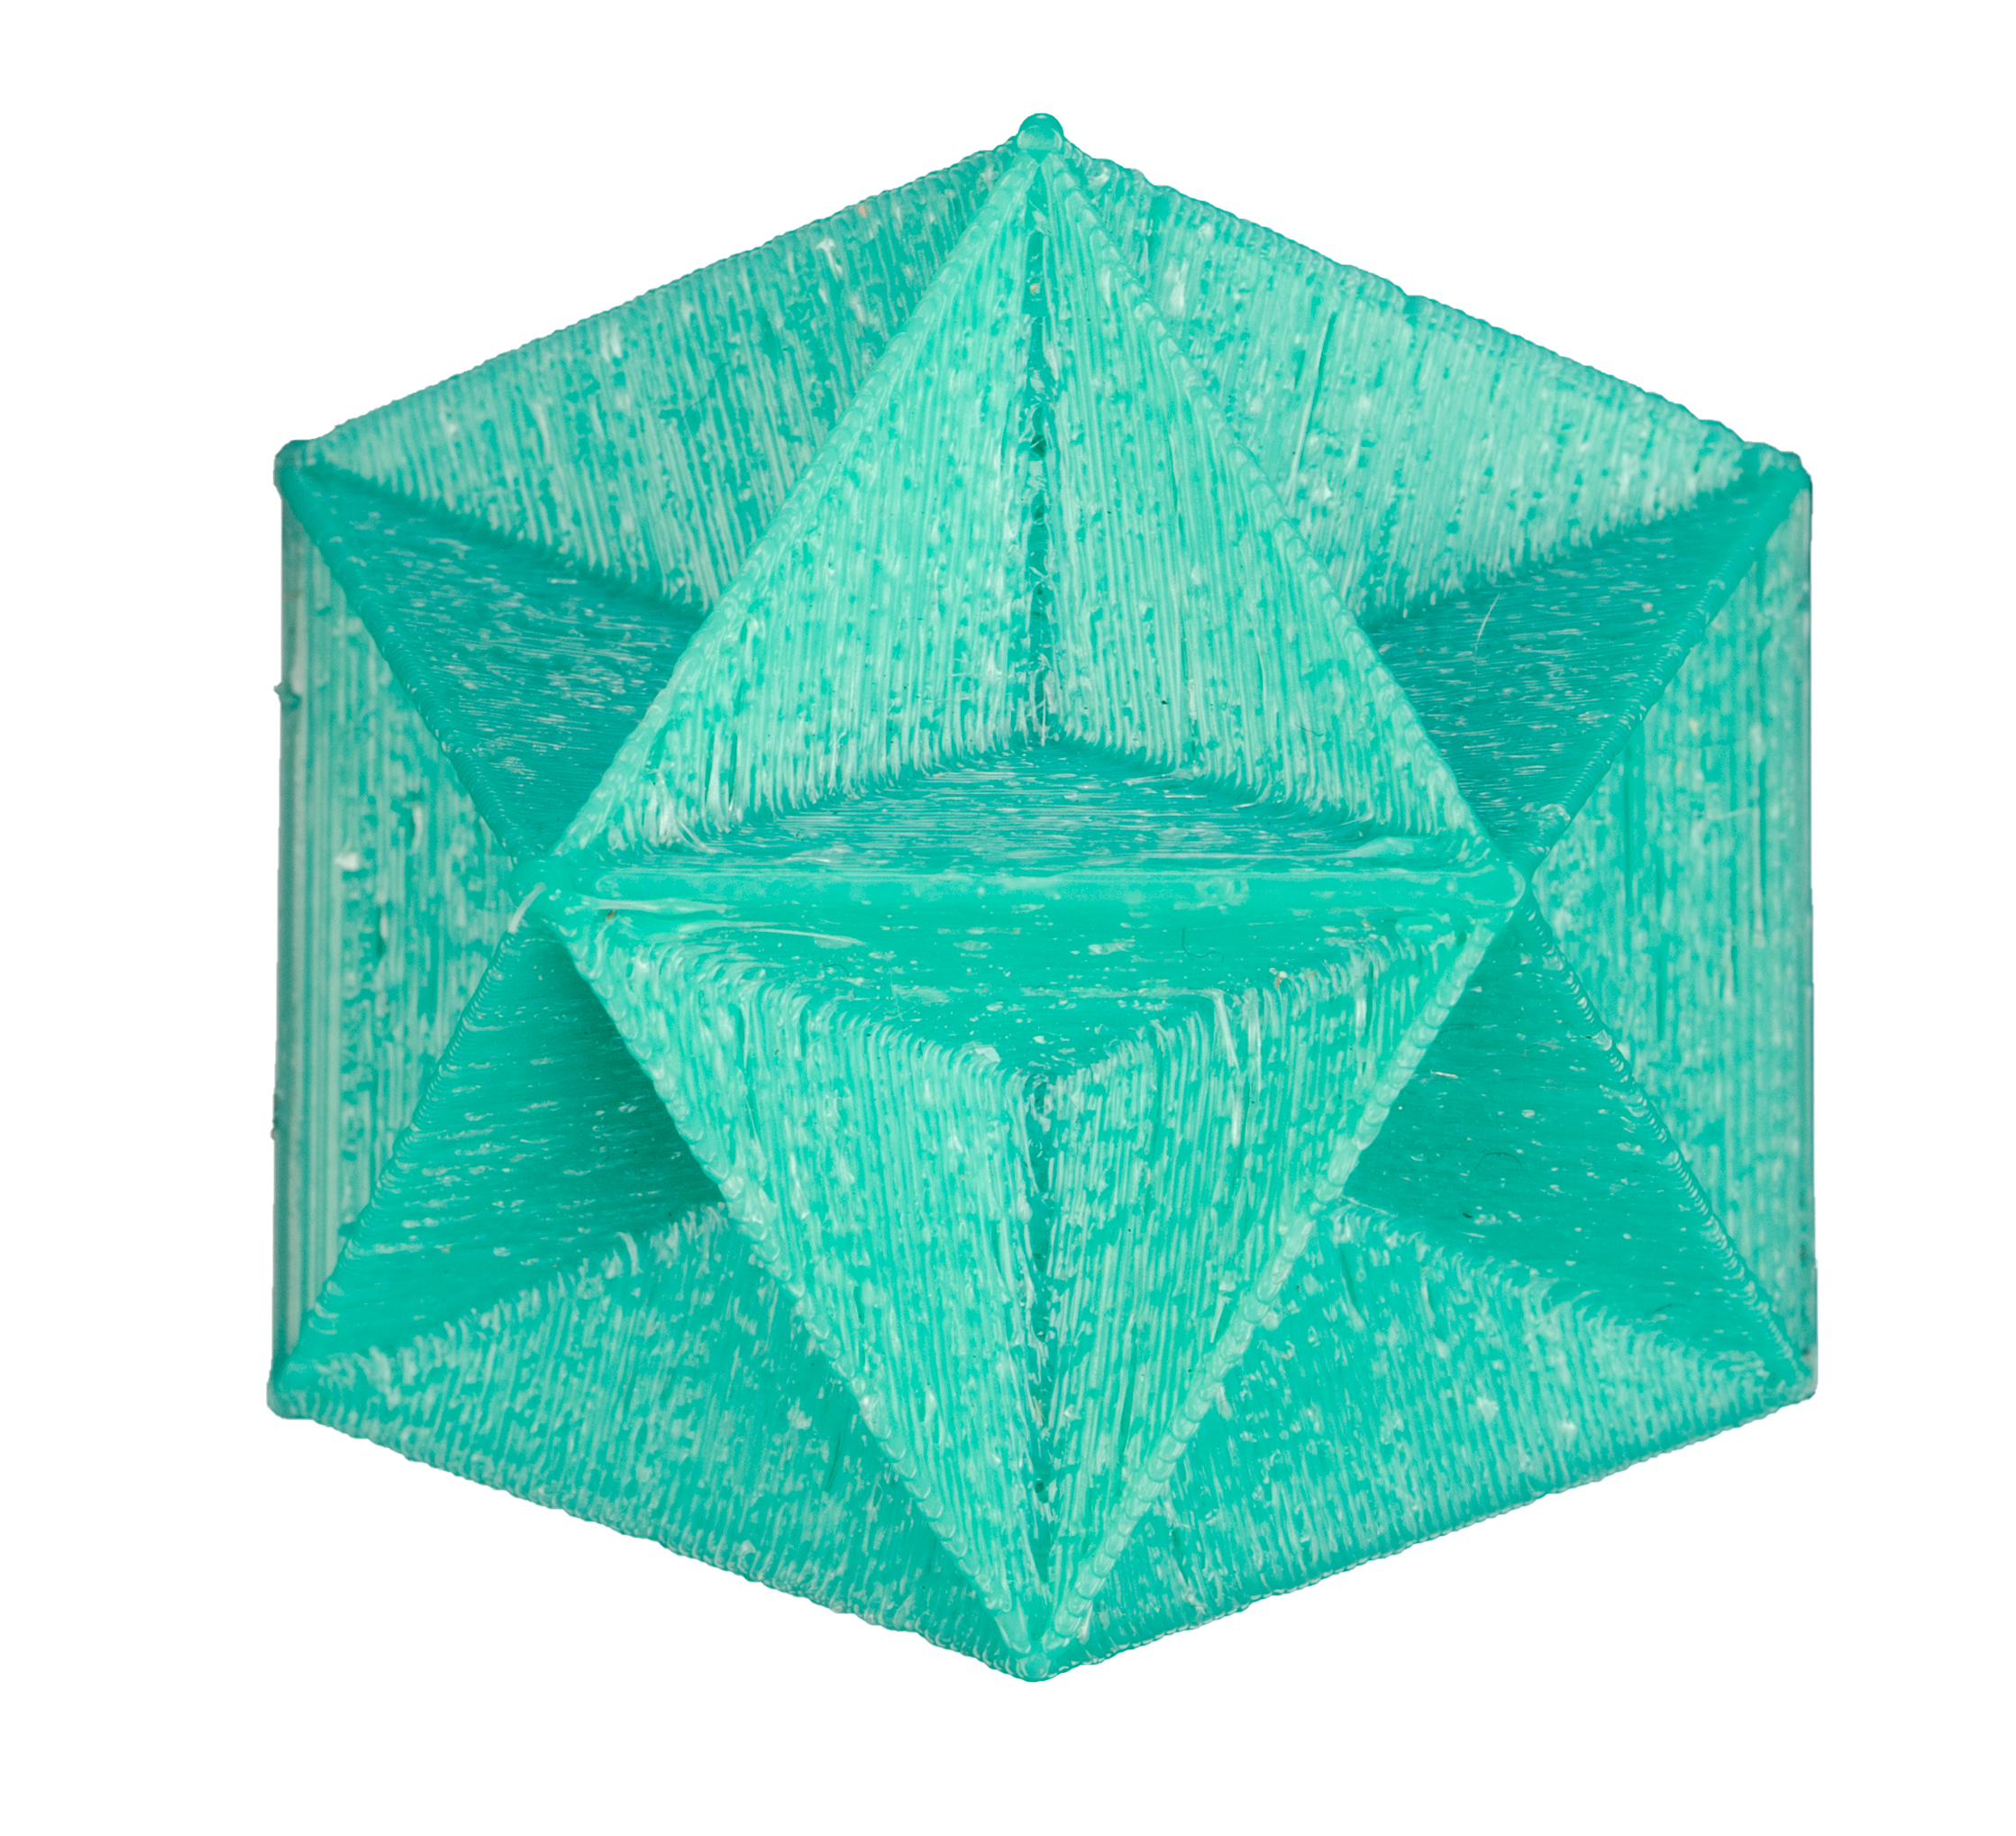
- Poor strength and first layer adhesion
- Bubbles on the print surface
![]() For how to store filaments, see 3.1 Filament Overview.
For how to store filaments, see 3.1 Filament Overview.
How to Dry Filaments
Use a filament dryer. Put your damp filament into the filament dryer, select the proper settings, and leave the dryer to do its job. After the dryer finishes, recheck if the filament adequately dried.
Use an oven. Put your damp filament into the oven, set an appropriate temperature, and leave it dry for hours. After the oven finishes, recheck if the filament is adequately dried. Note that drying temperature and drying time vary with filament types, brands, and quantities. Before drying, check the optimal drying temperature and drying time for your damp filament.
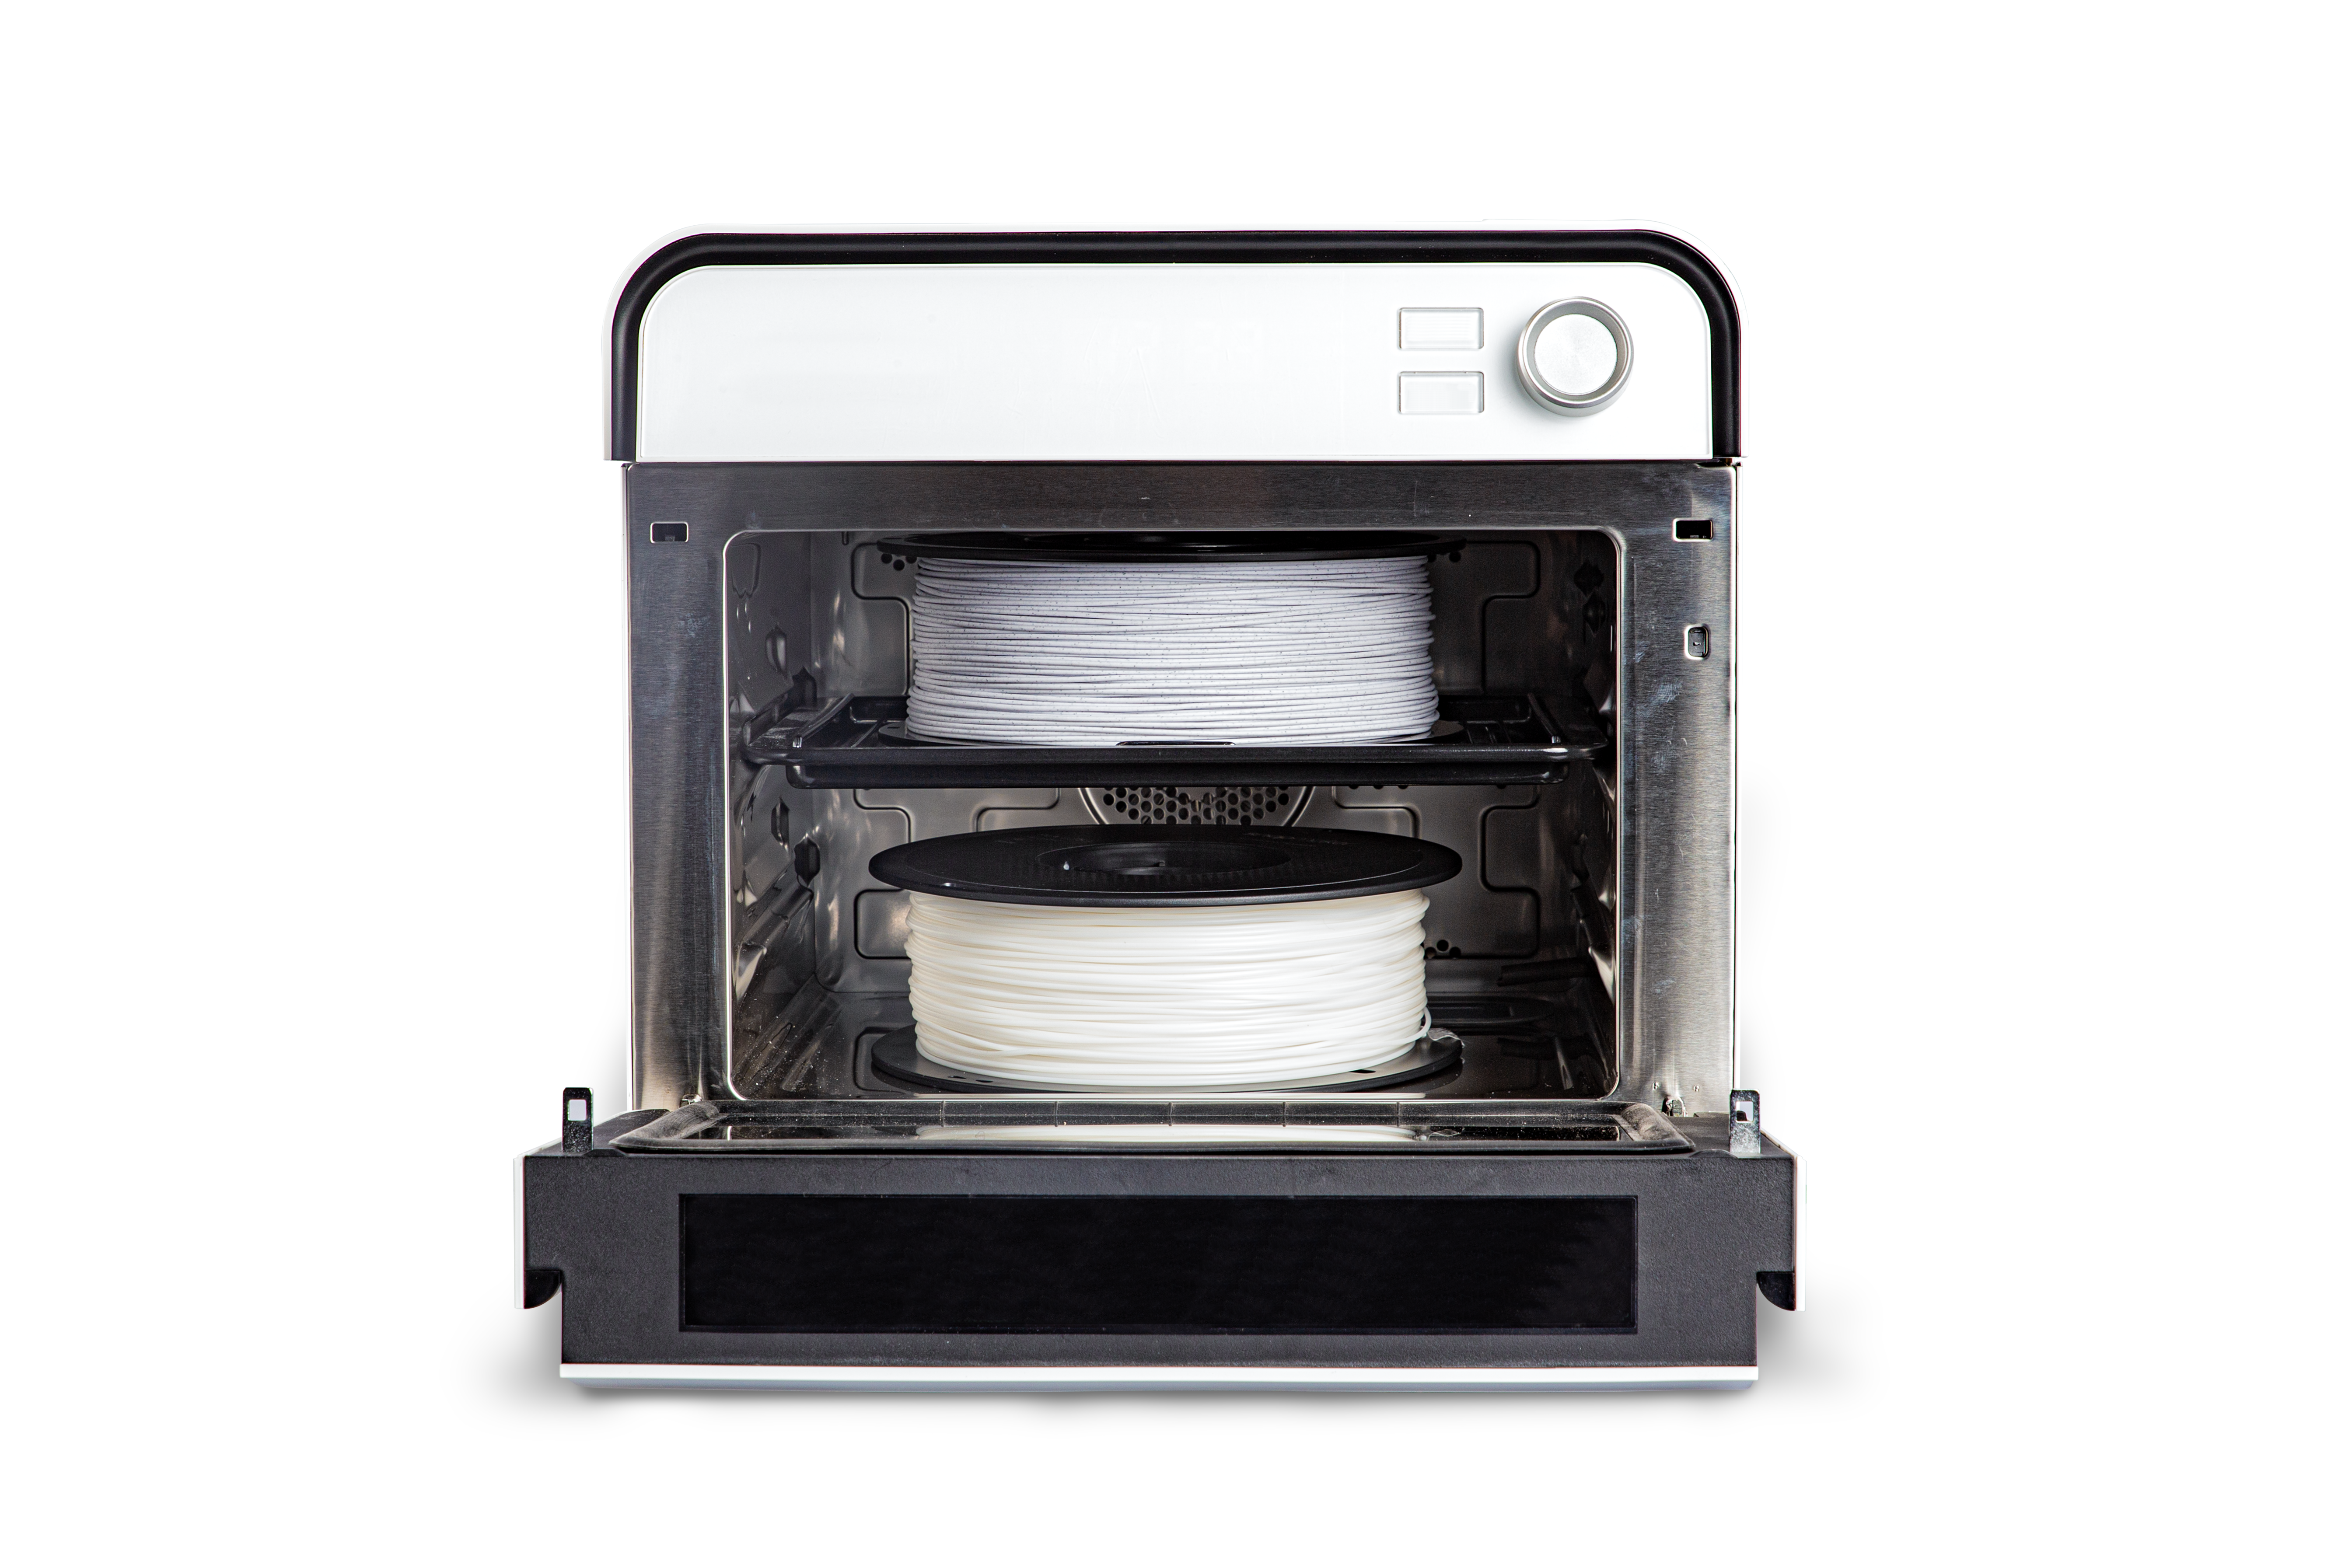
![]() If the filament is still damp, you can buy new filaments from Snapmaker's online store.
If the filament is still damp, you can buy new filaments from Snapmaker's online store.
6.3 Every Month
6.3.1 Clean the Linear Modules
Keeping all Linear Modules freed of dust and other foreign matters can reduce friction and noise while the 3D printer is moving. To do so, gently wipe the Linear Module surface using a dry cotton cloth.
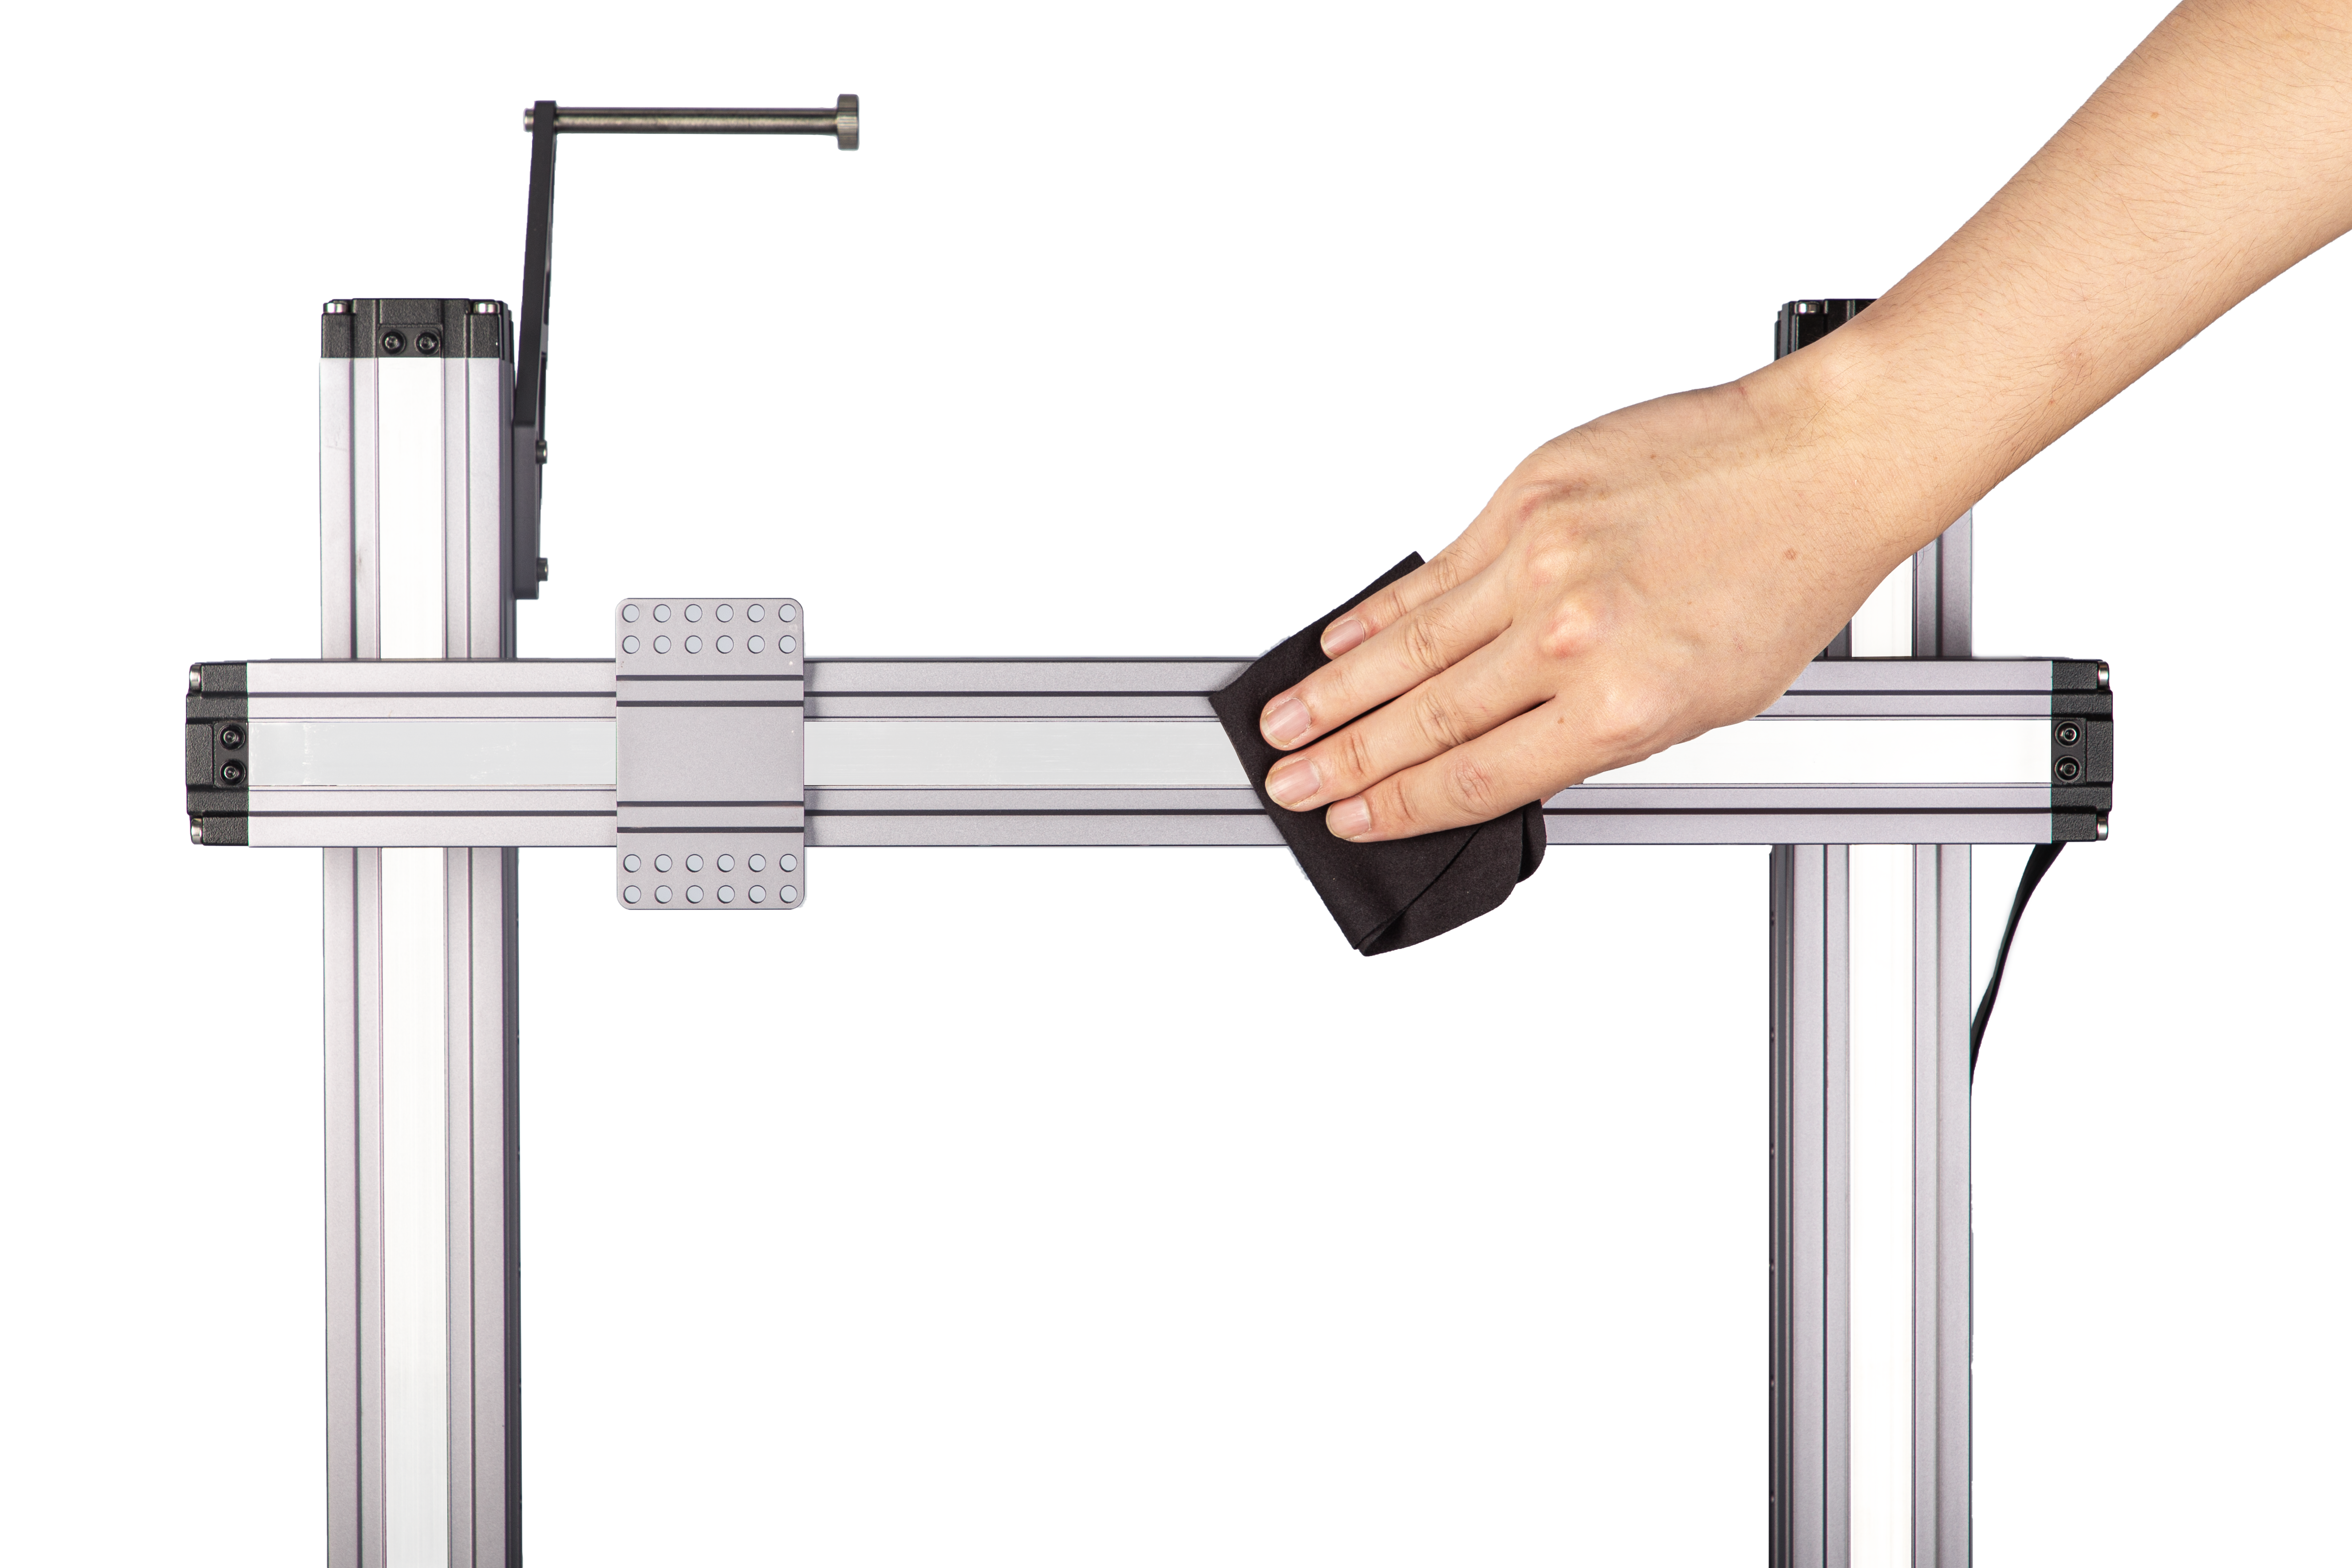
![]() While cleaning, do not press the steel strip. Do not dismantle the Linear Modules yourself, as doing so will void your Snapmaker’s Limited Warranty.
While cleaning, do not press the steel strip. Do not dismantle the Linear Modules yourself, as doing so will void your Snapmaker’s Limited Warranty.
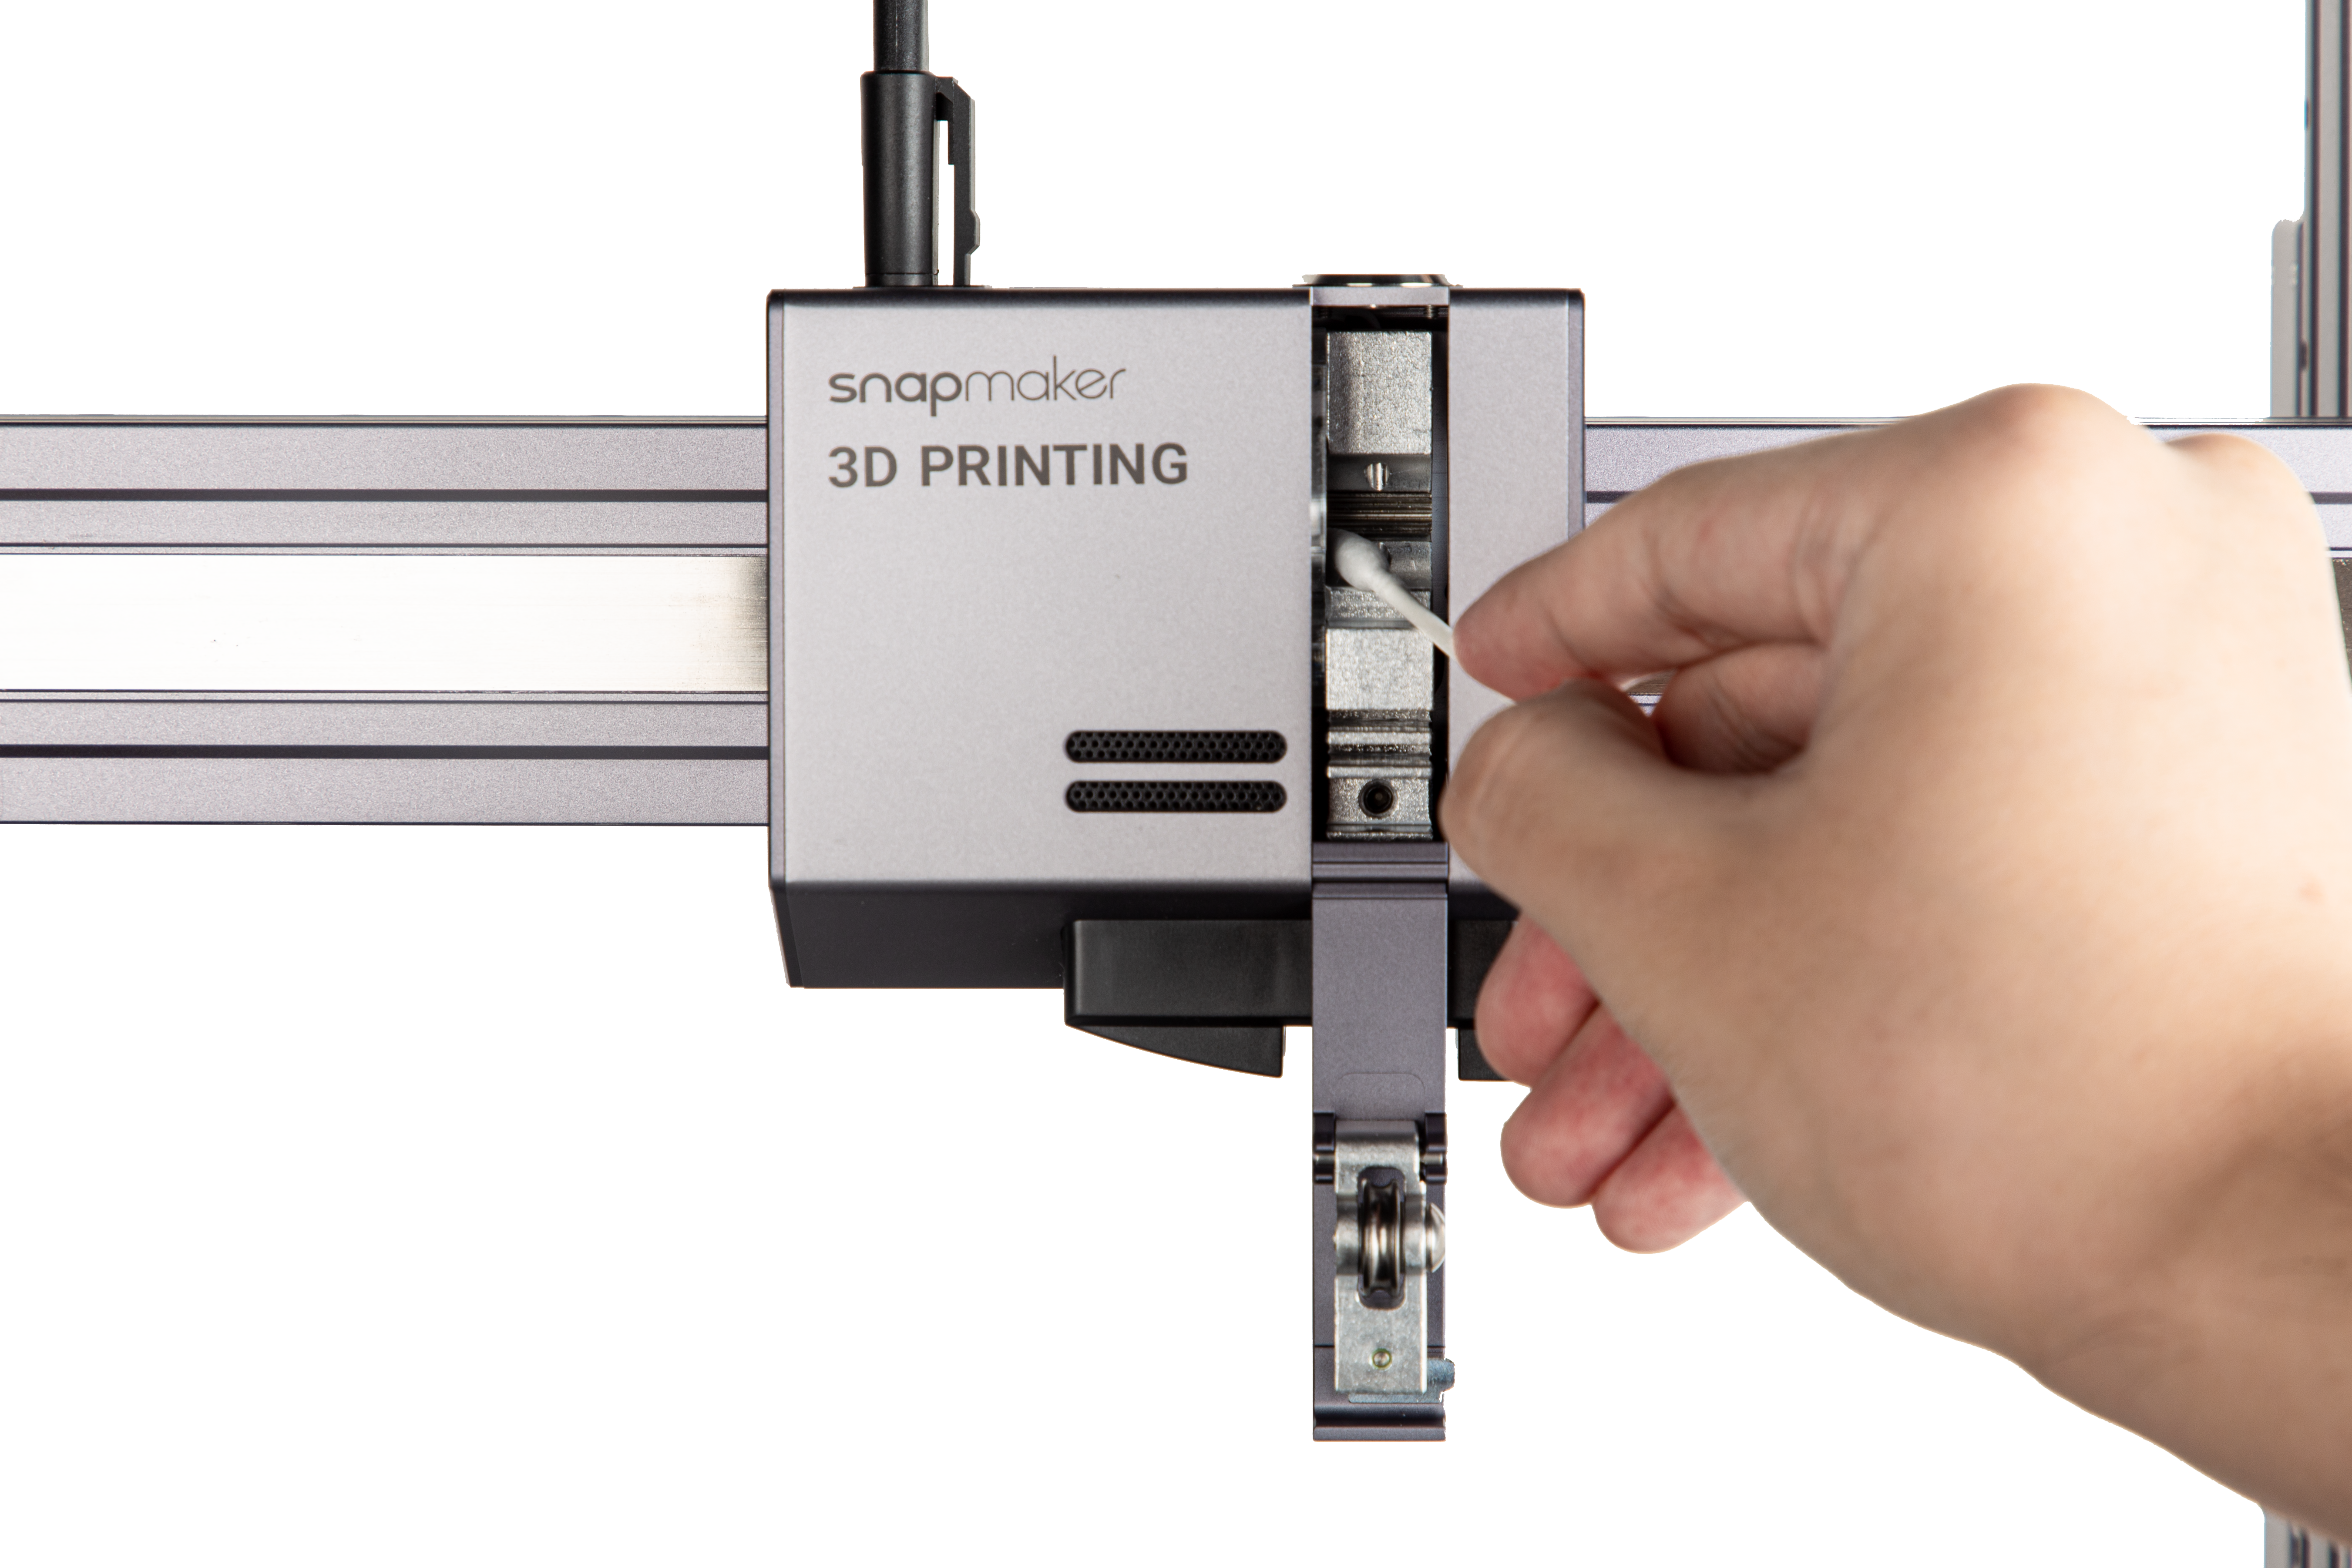
6.3.2 Clean the Gear in the 3D Printing Module
While driving the filament into the extruder, the gear encounters strong friction, which more or less produces scraps. As scraps accumulate, the friction reduces between the filament and the gear or U-shaped bearing bracket. Consequently, reduced friction compromises the extruding efficiency, and eventually causes slip during extrusion. Another adverse effect is that the accumulated scraps will fall into the nozzle and block it. In this case, you need to clean the nozzle or even replace it.

To avoid the trouble, follow these steps to clean the U-shaped bearing bracket and gear:
(1) Clean the U-shaped bearing bracket. Open the 3D Printing Module, and clear the accumulated scraps on the U-shaped bearing bracket using a swab or vacuum.
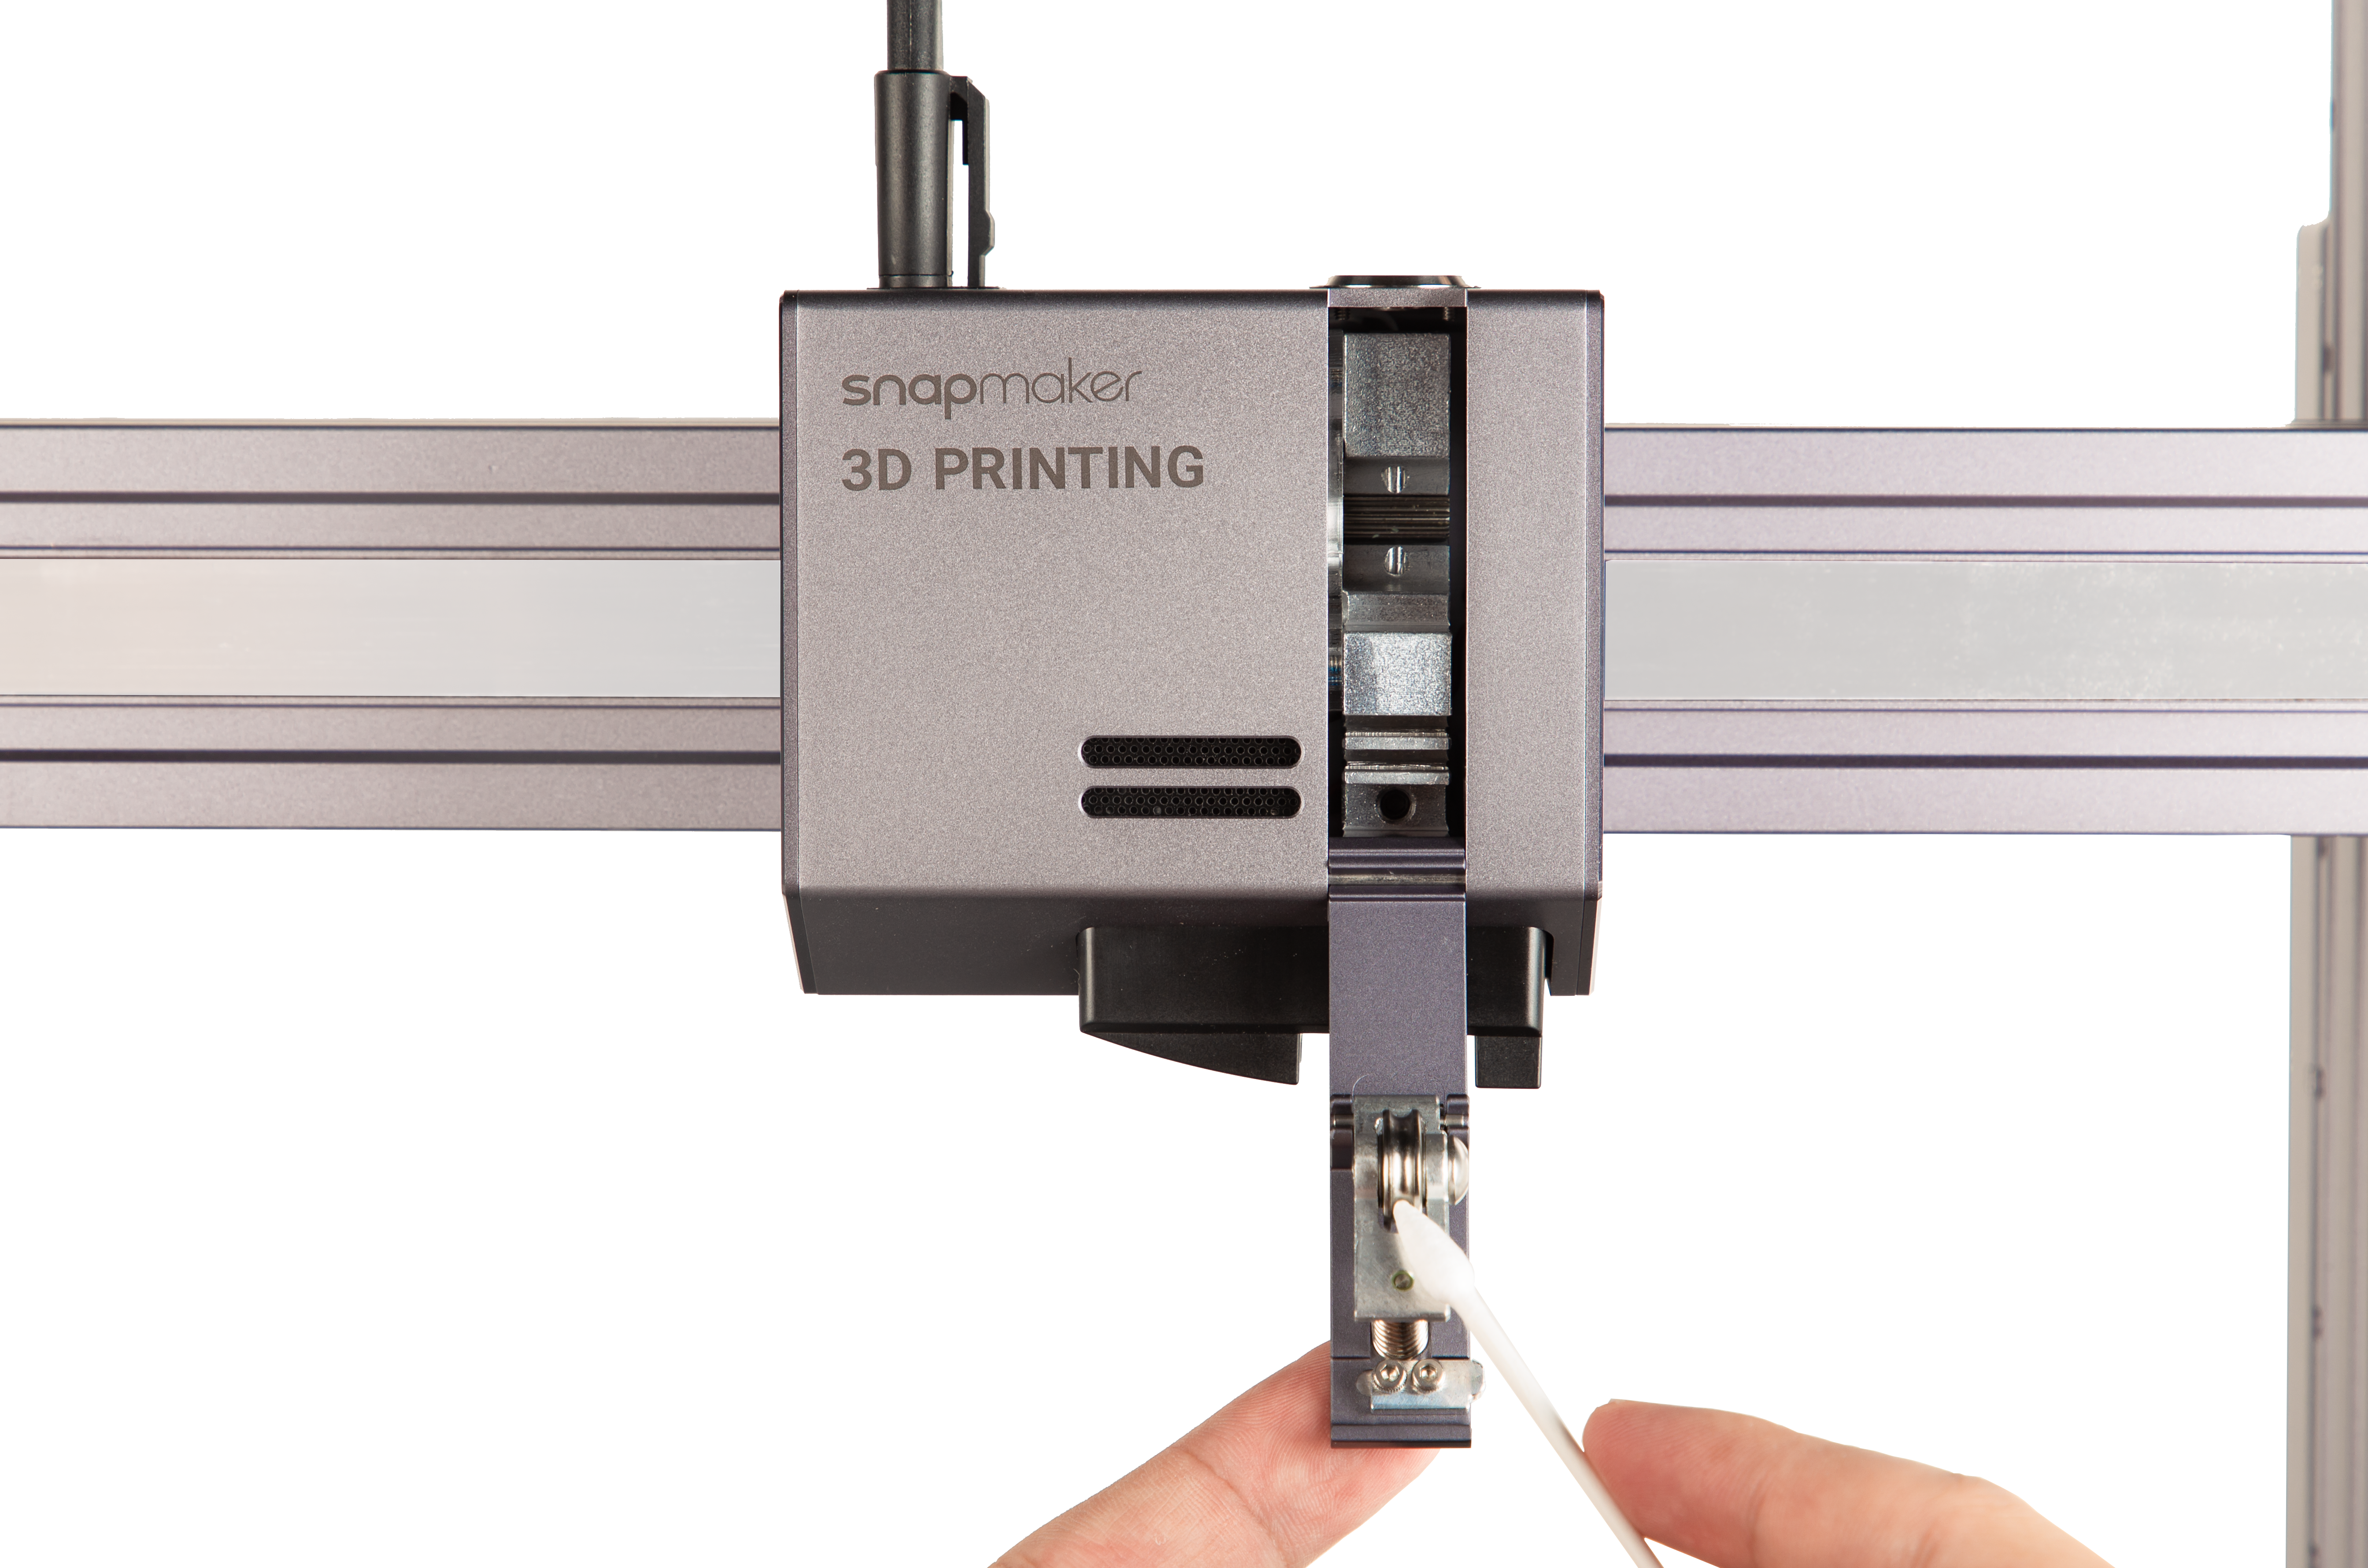
(2) Clean the gear. Clear the accumulated scraps on the gear and its surrounding area using a swab. Close the 3D Printing Module.
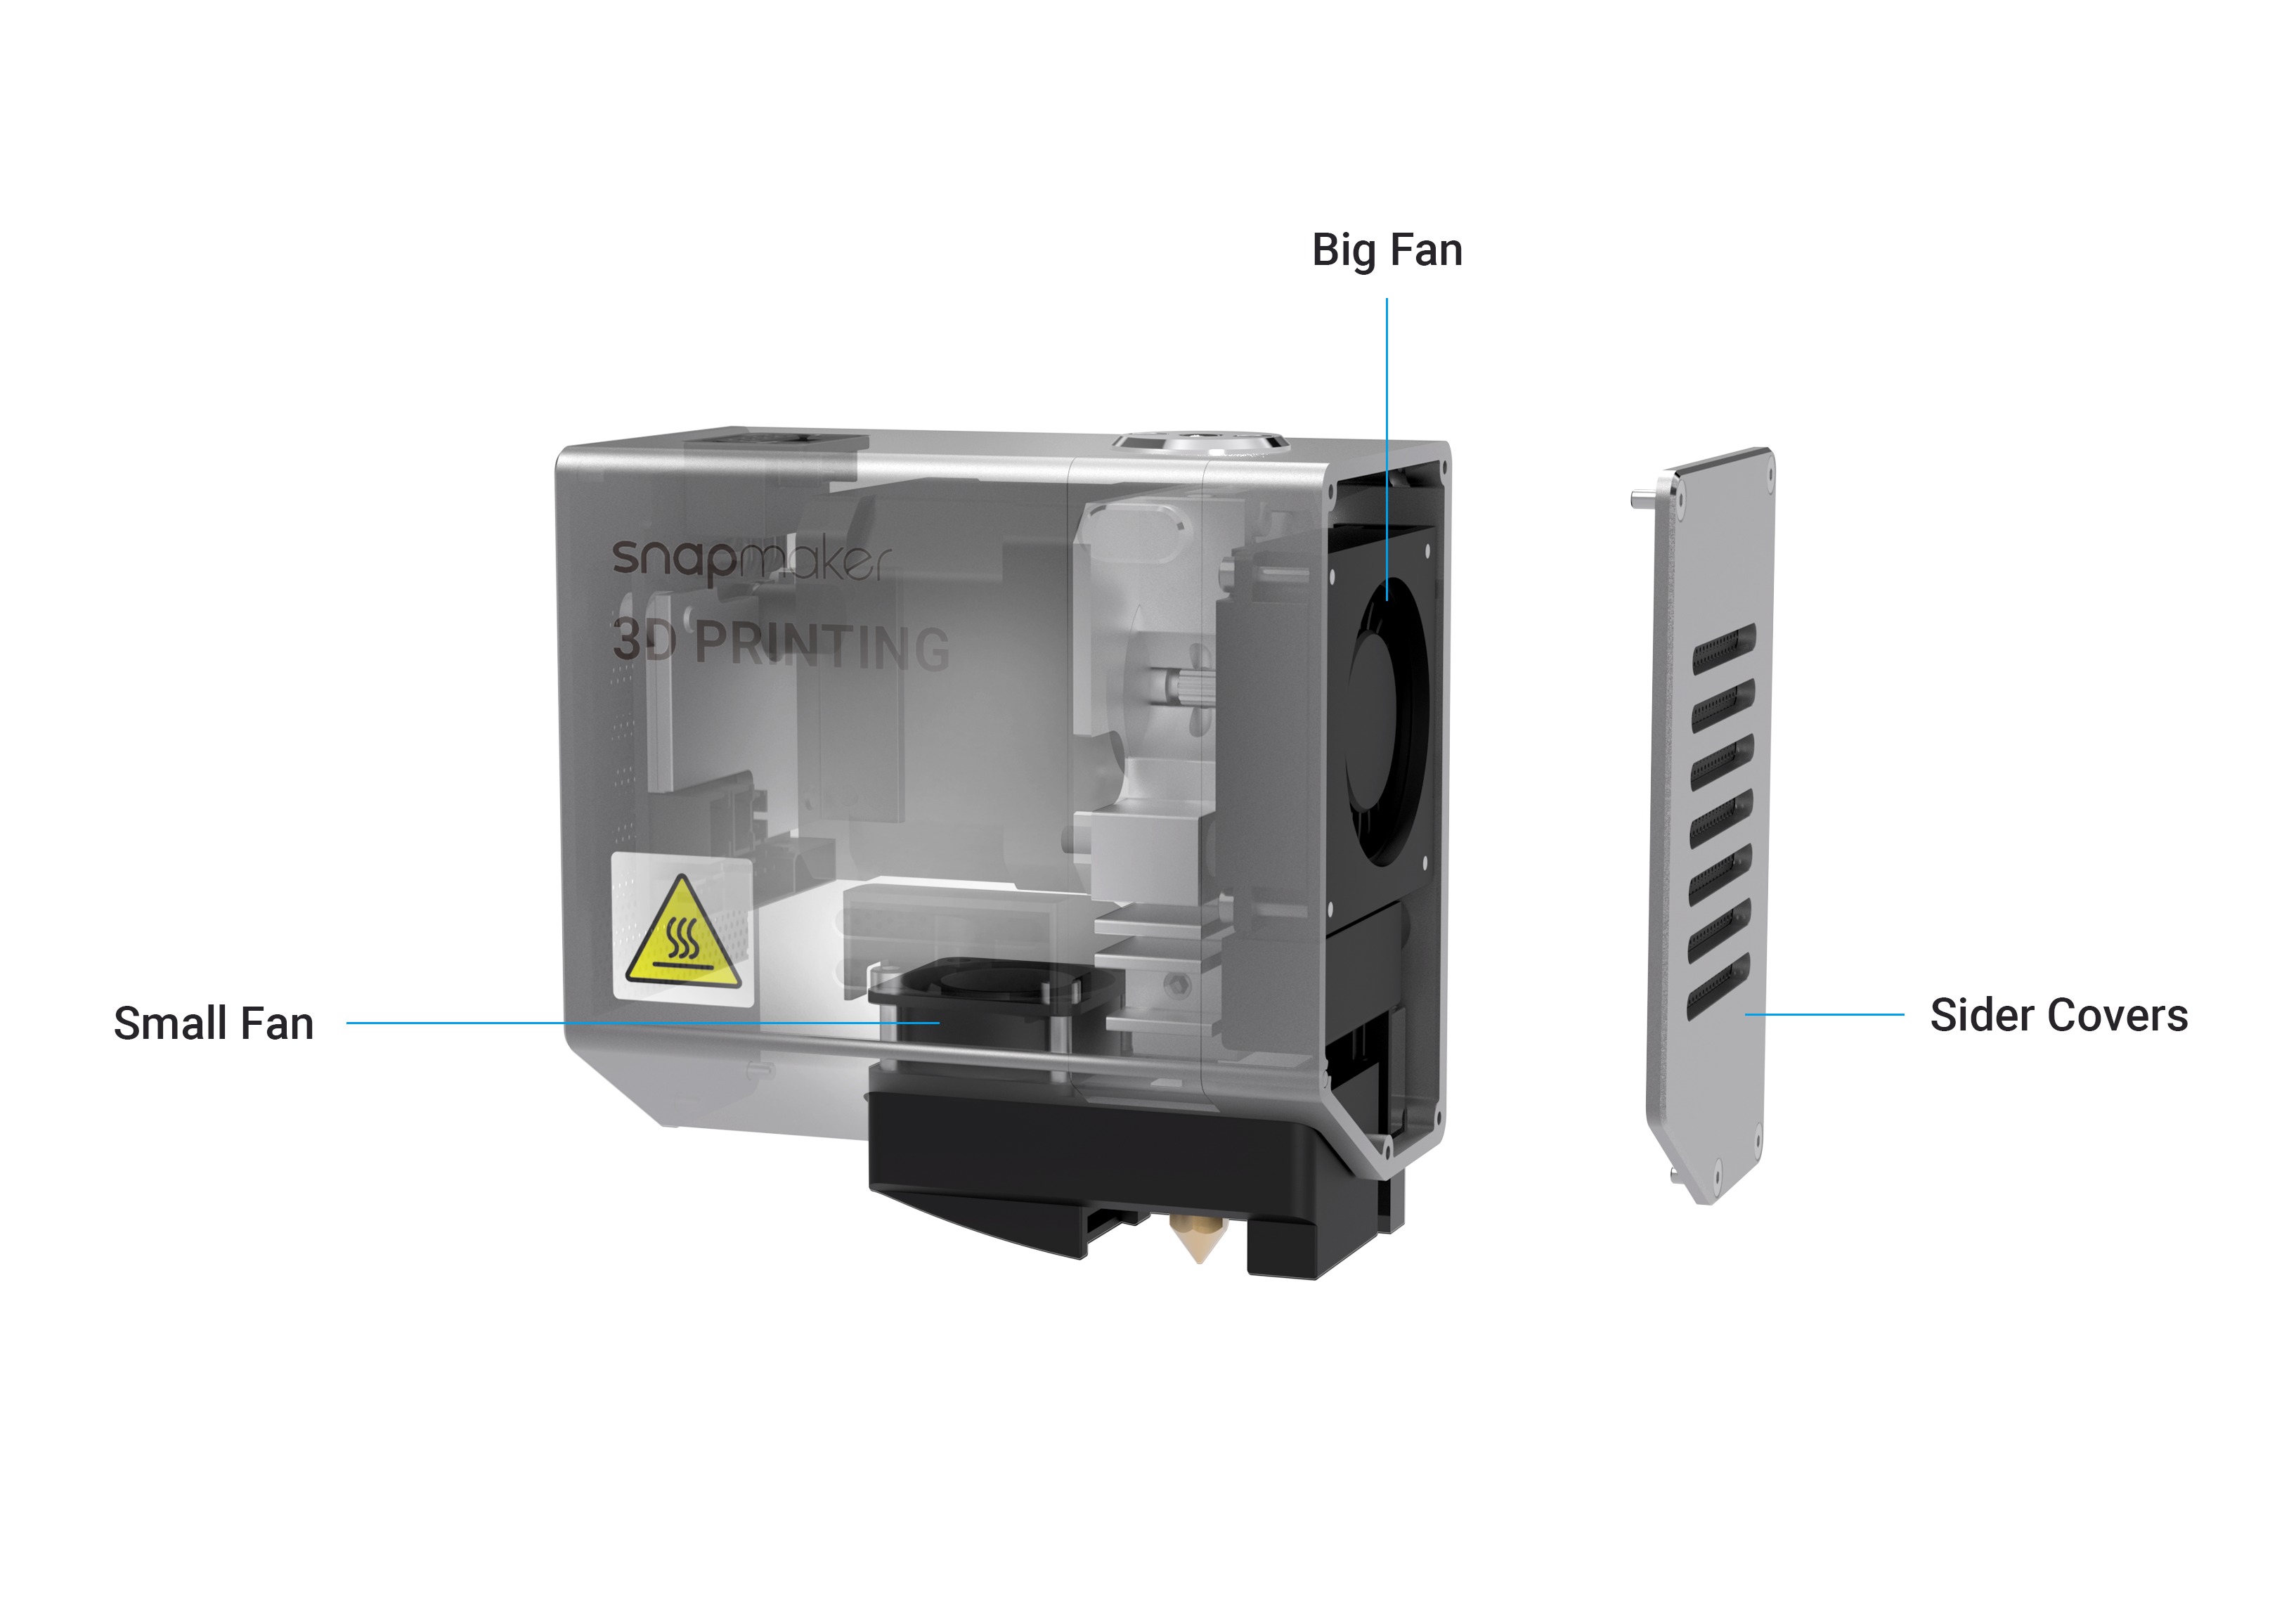
6.3.3 Clean the Side Covers
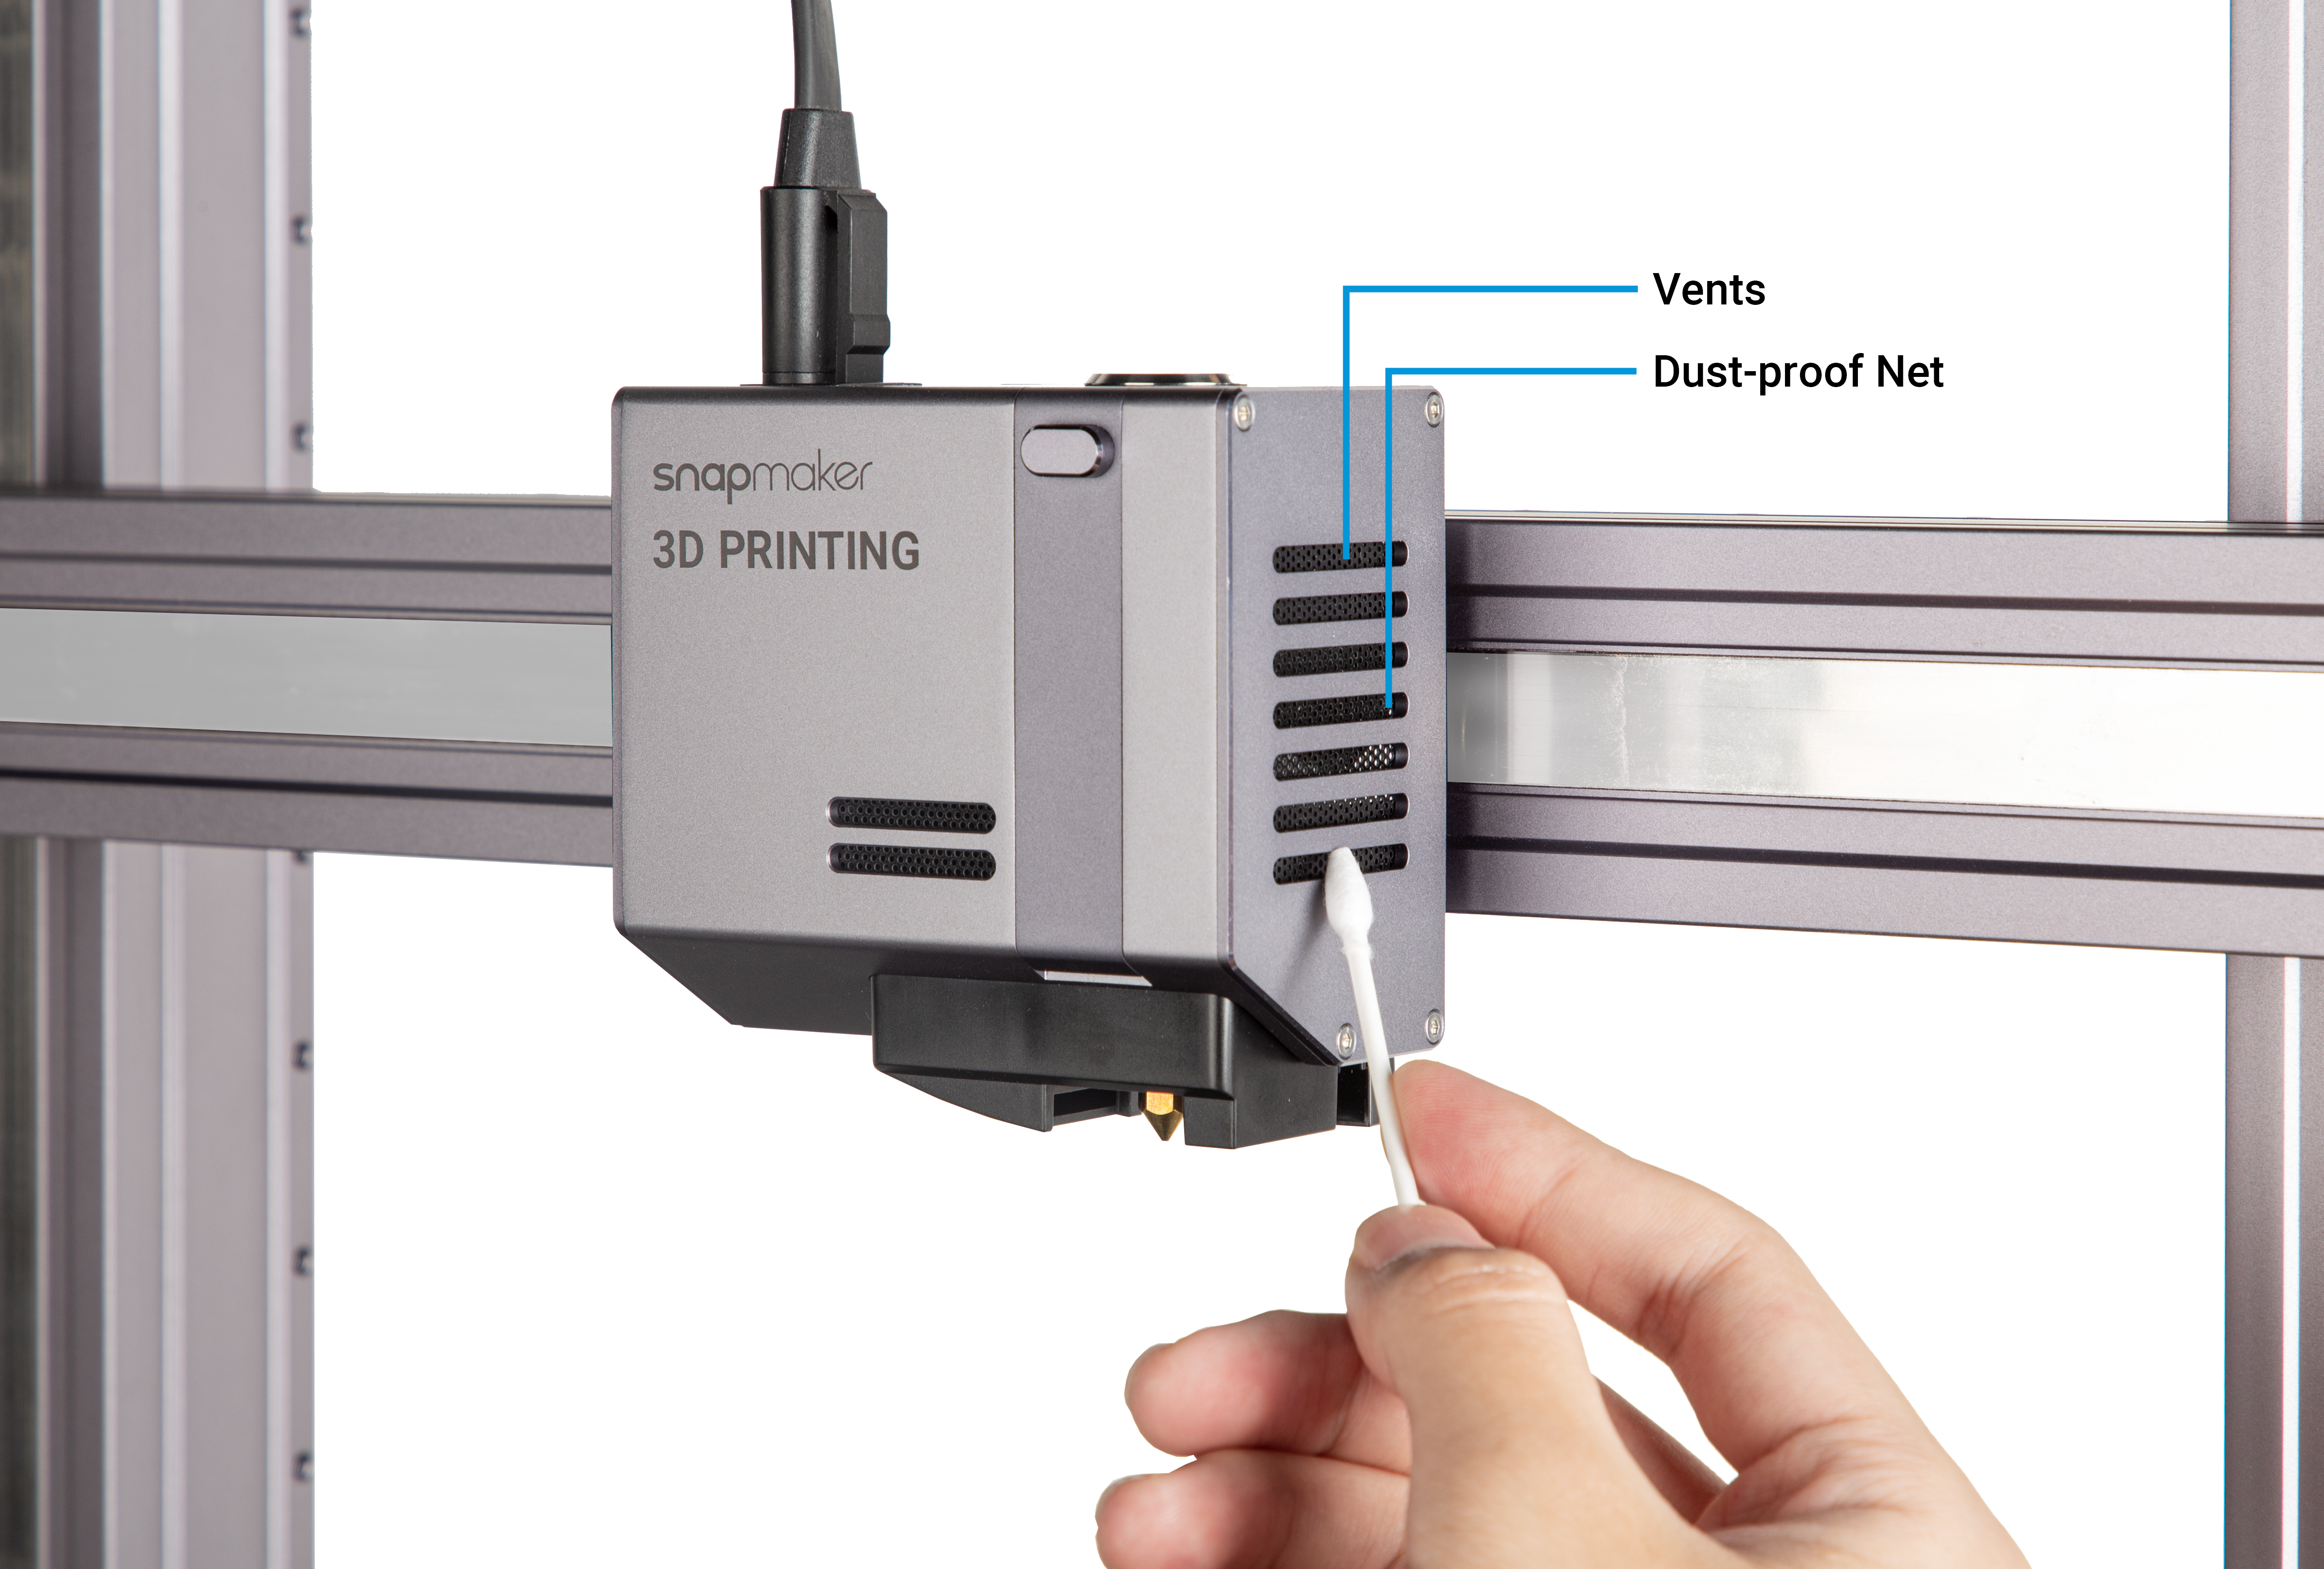
The 3D Printing Module has two side covers, each with vents and a dust-proof net for heat dissipation. If the side covers are clogged by foreign matters, it will affect the airflow inside the 3D Printing Module. Consequently, the internal components will be overheated, and the 3D Printing Module will malfunction.
To avoid this, you should check the vents and dust-proof nets monthly. Use a swab or vacuum to clean the foreign matters.
6.4 Every Three Months
To keep your 3D printer and Luban up to date, update your firmware and software every three months.