
7.1 Maintenance Schedule
This maintenance schedule is for reference only. Should you use the CNC carver more frequently, adjust your schedule according to your use frequency. Before maintenance, check Snapmaker’s Limited Warranty void your warranty by self-servicing your CNC carver.
![]() Cut the power supply before maintenance.
Cut the power supply before maintenance.
Before You Carve

Every Month

Every Three Months

7.2 Before You Carve
7.2.1 Check the Cables
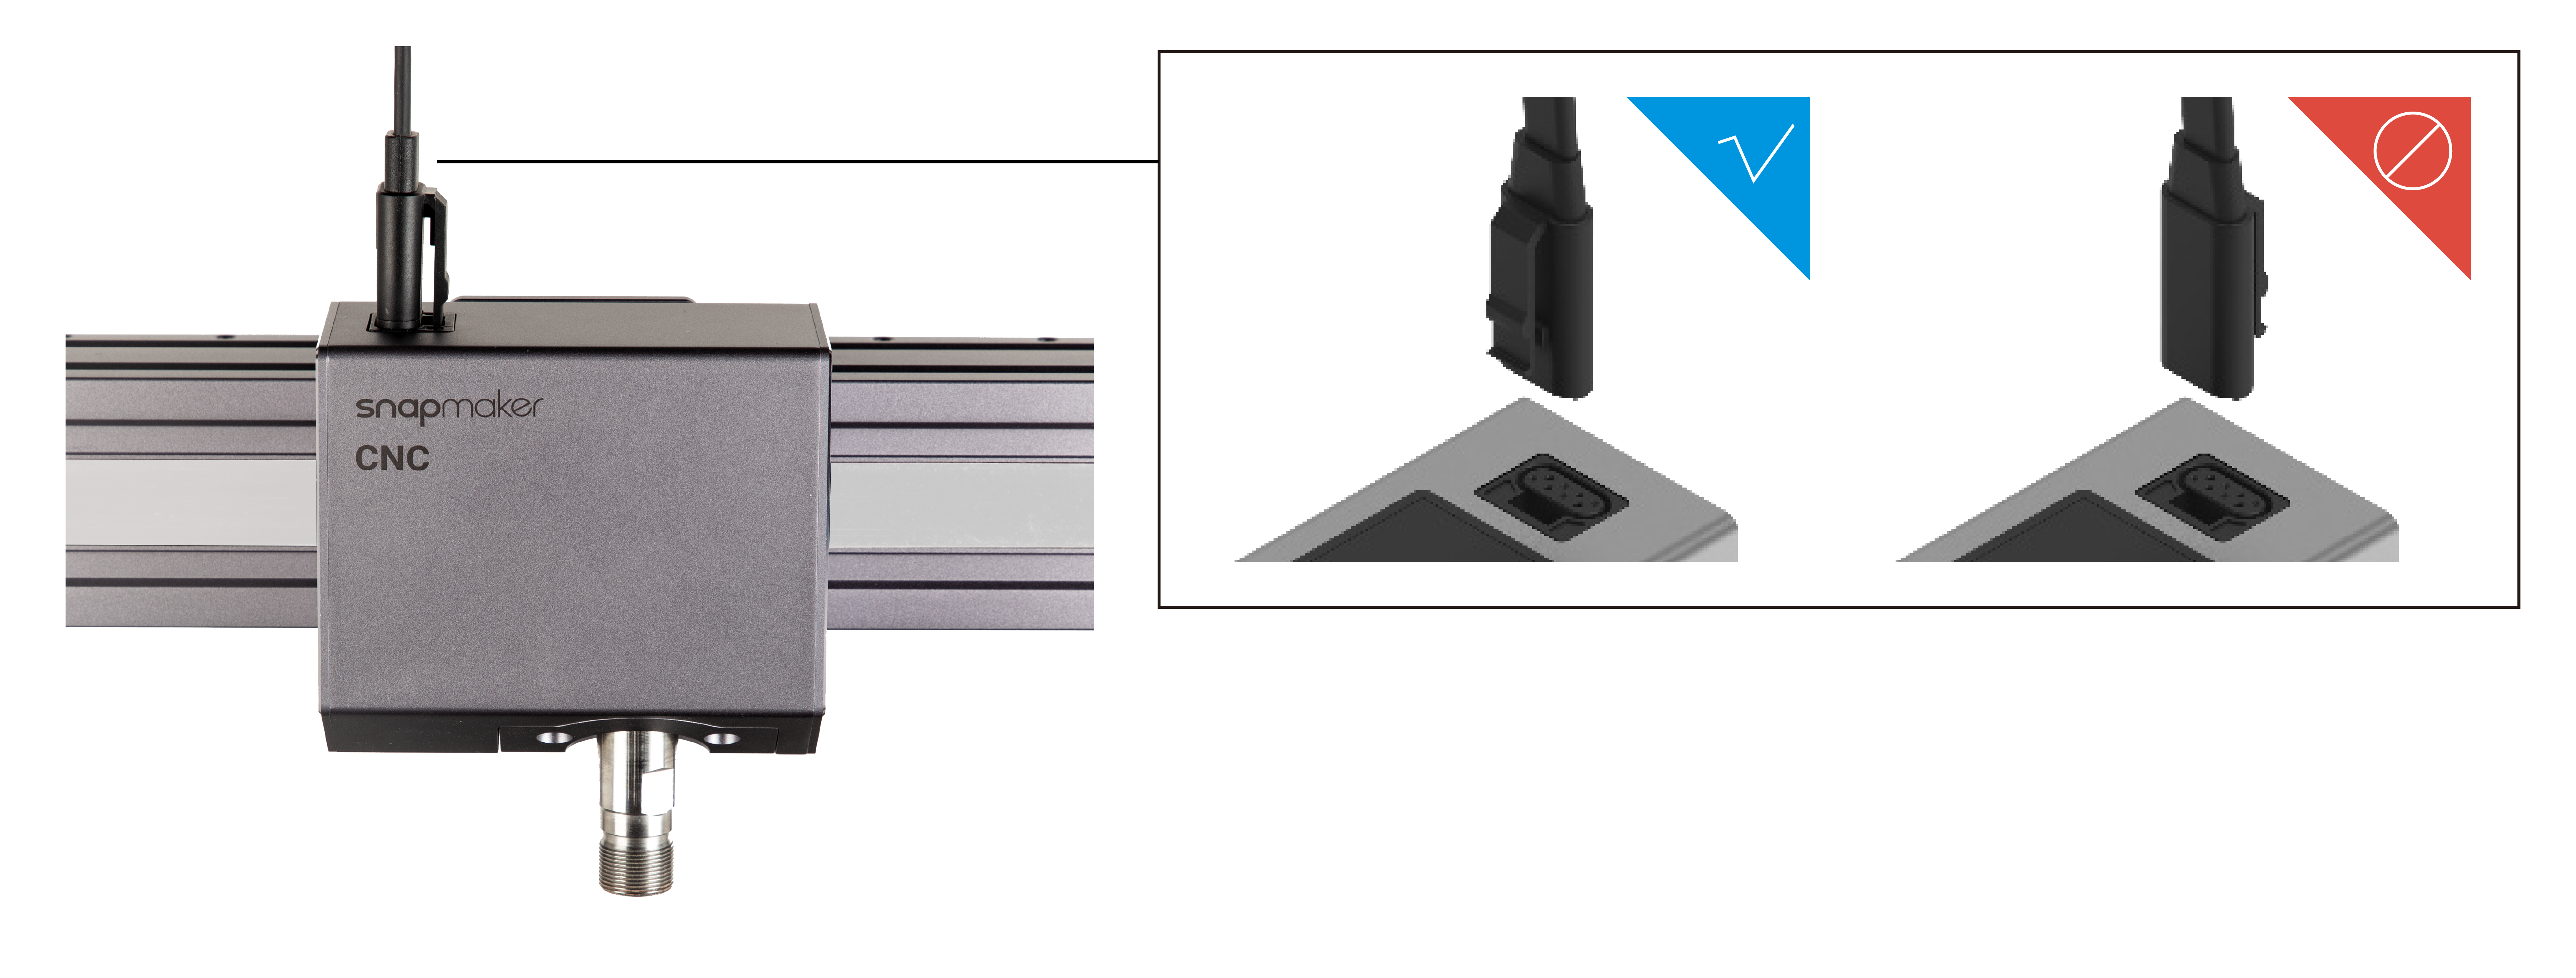
Check if every cable is plugged into the right socket in the right direction.
- Into the Controller (A150)
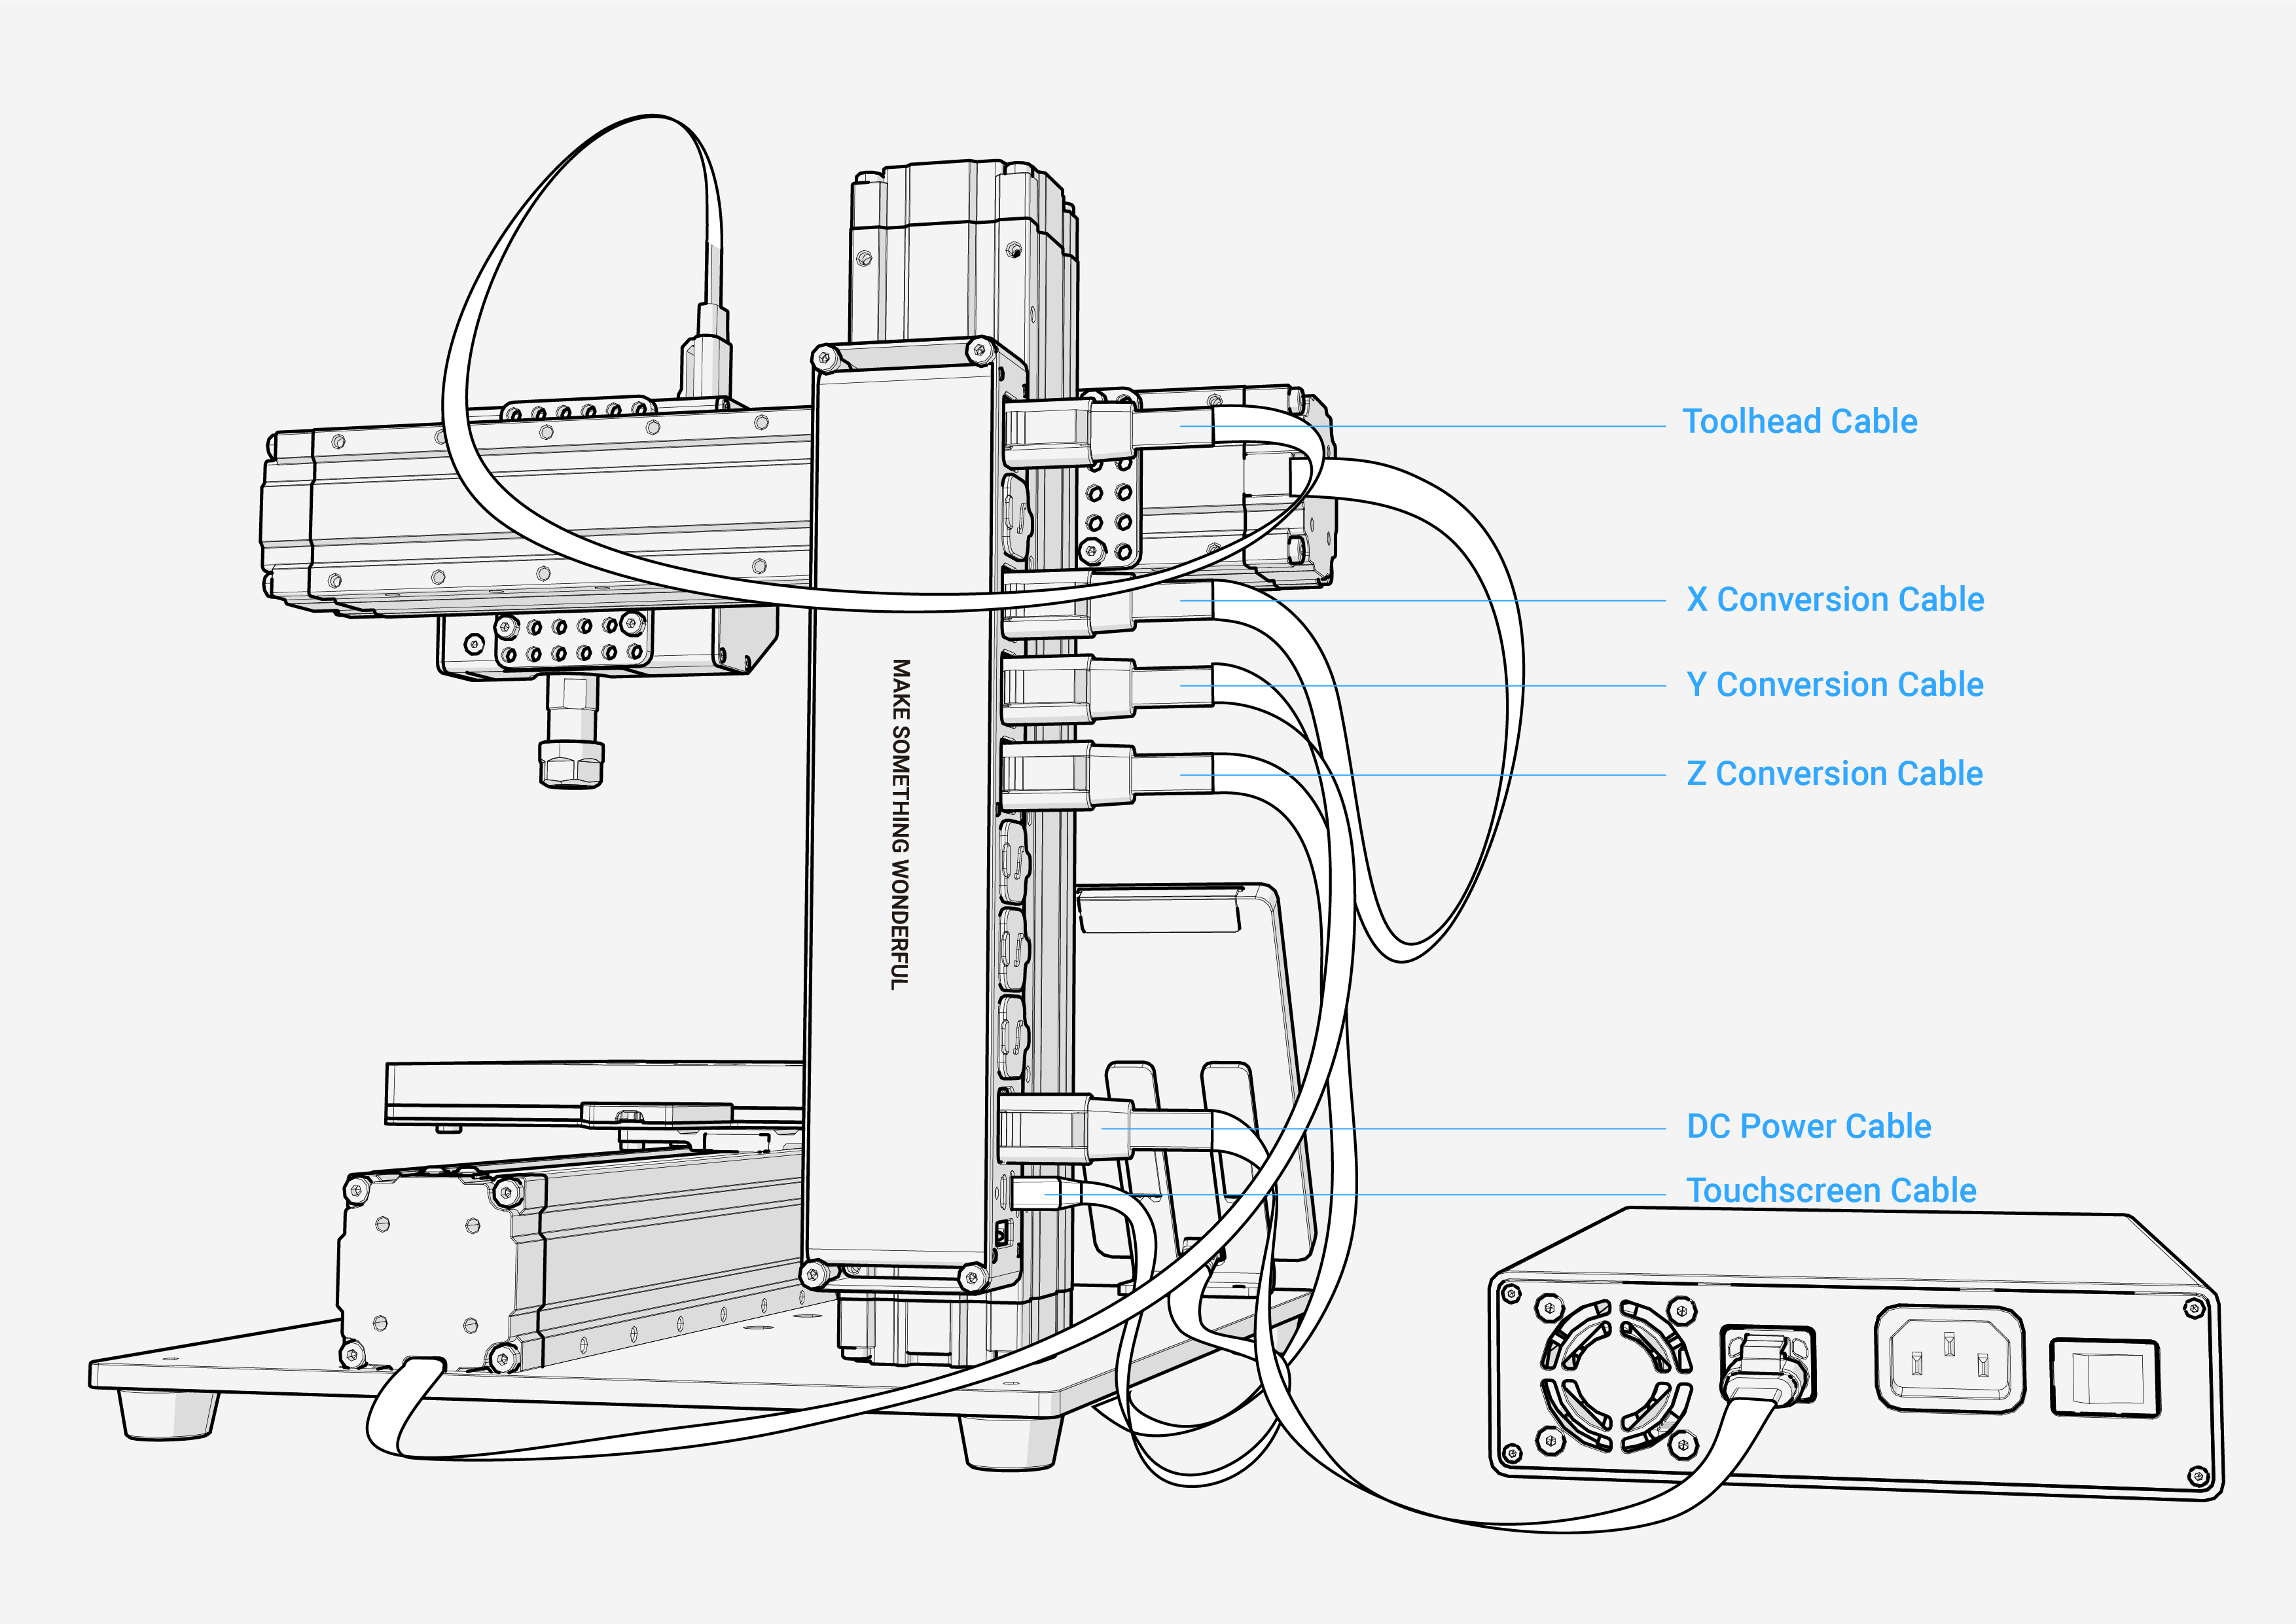
- Into the Controller (A250 & A350)
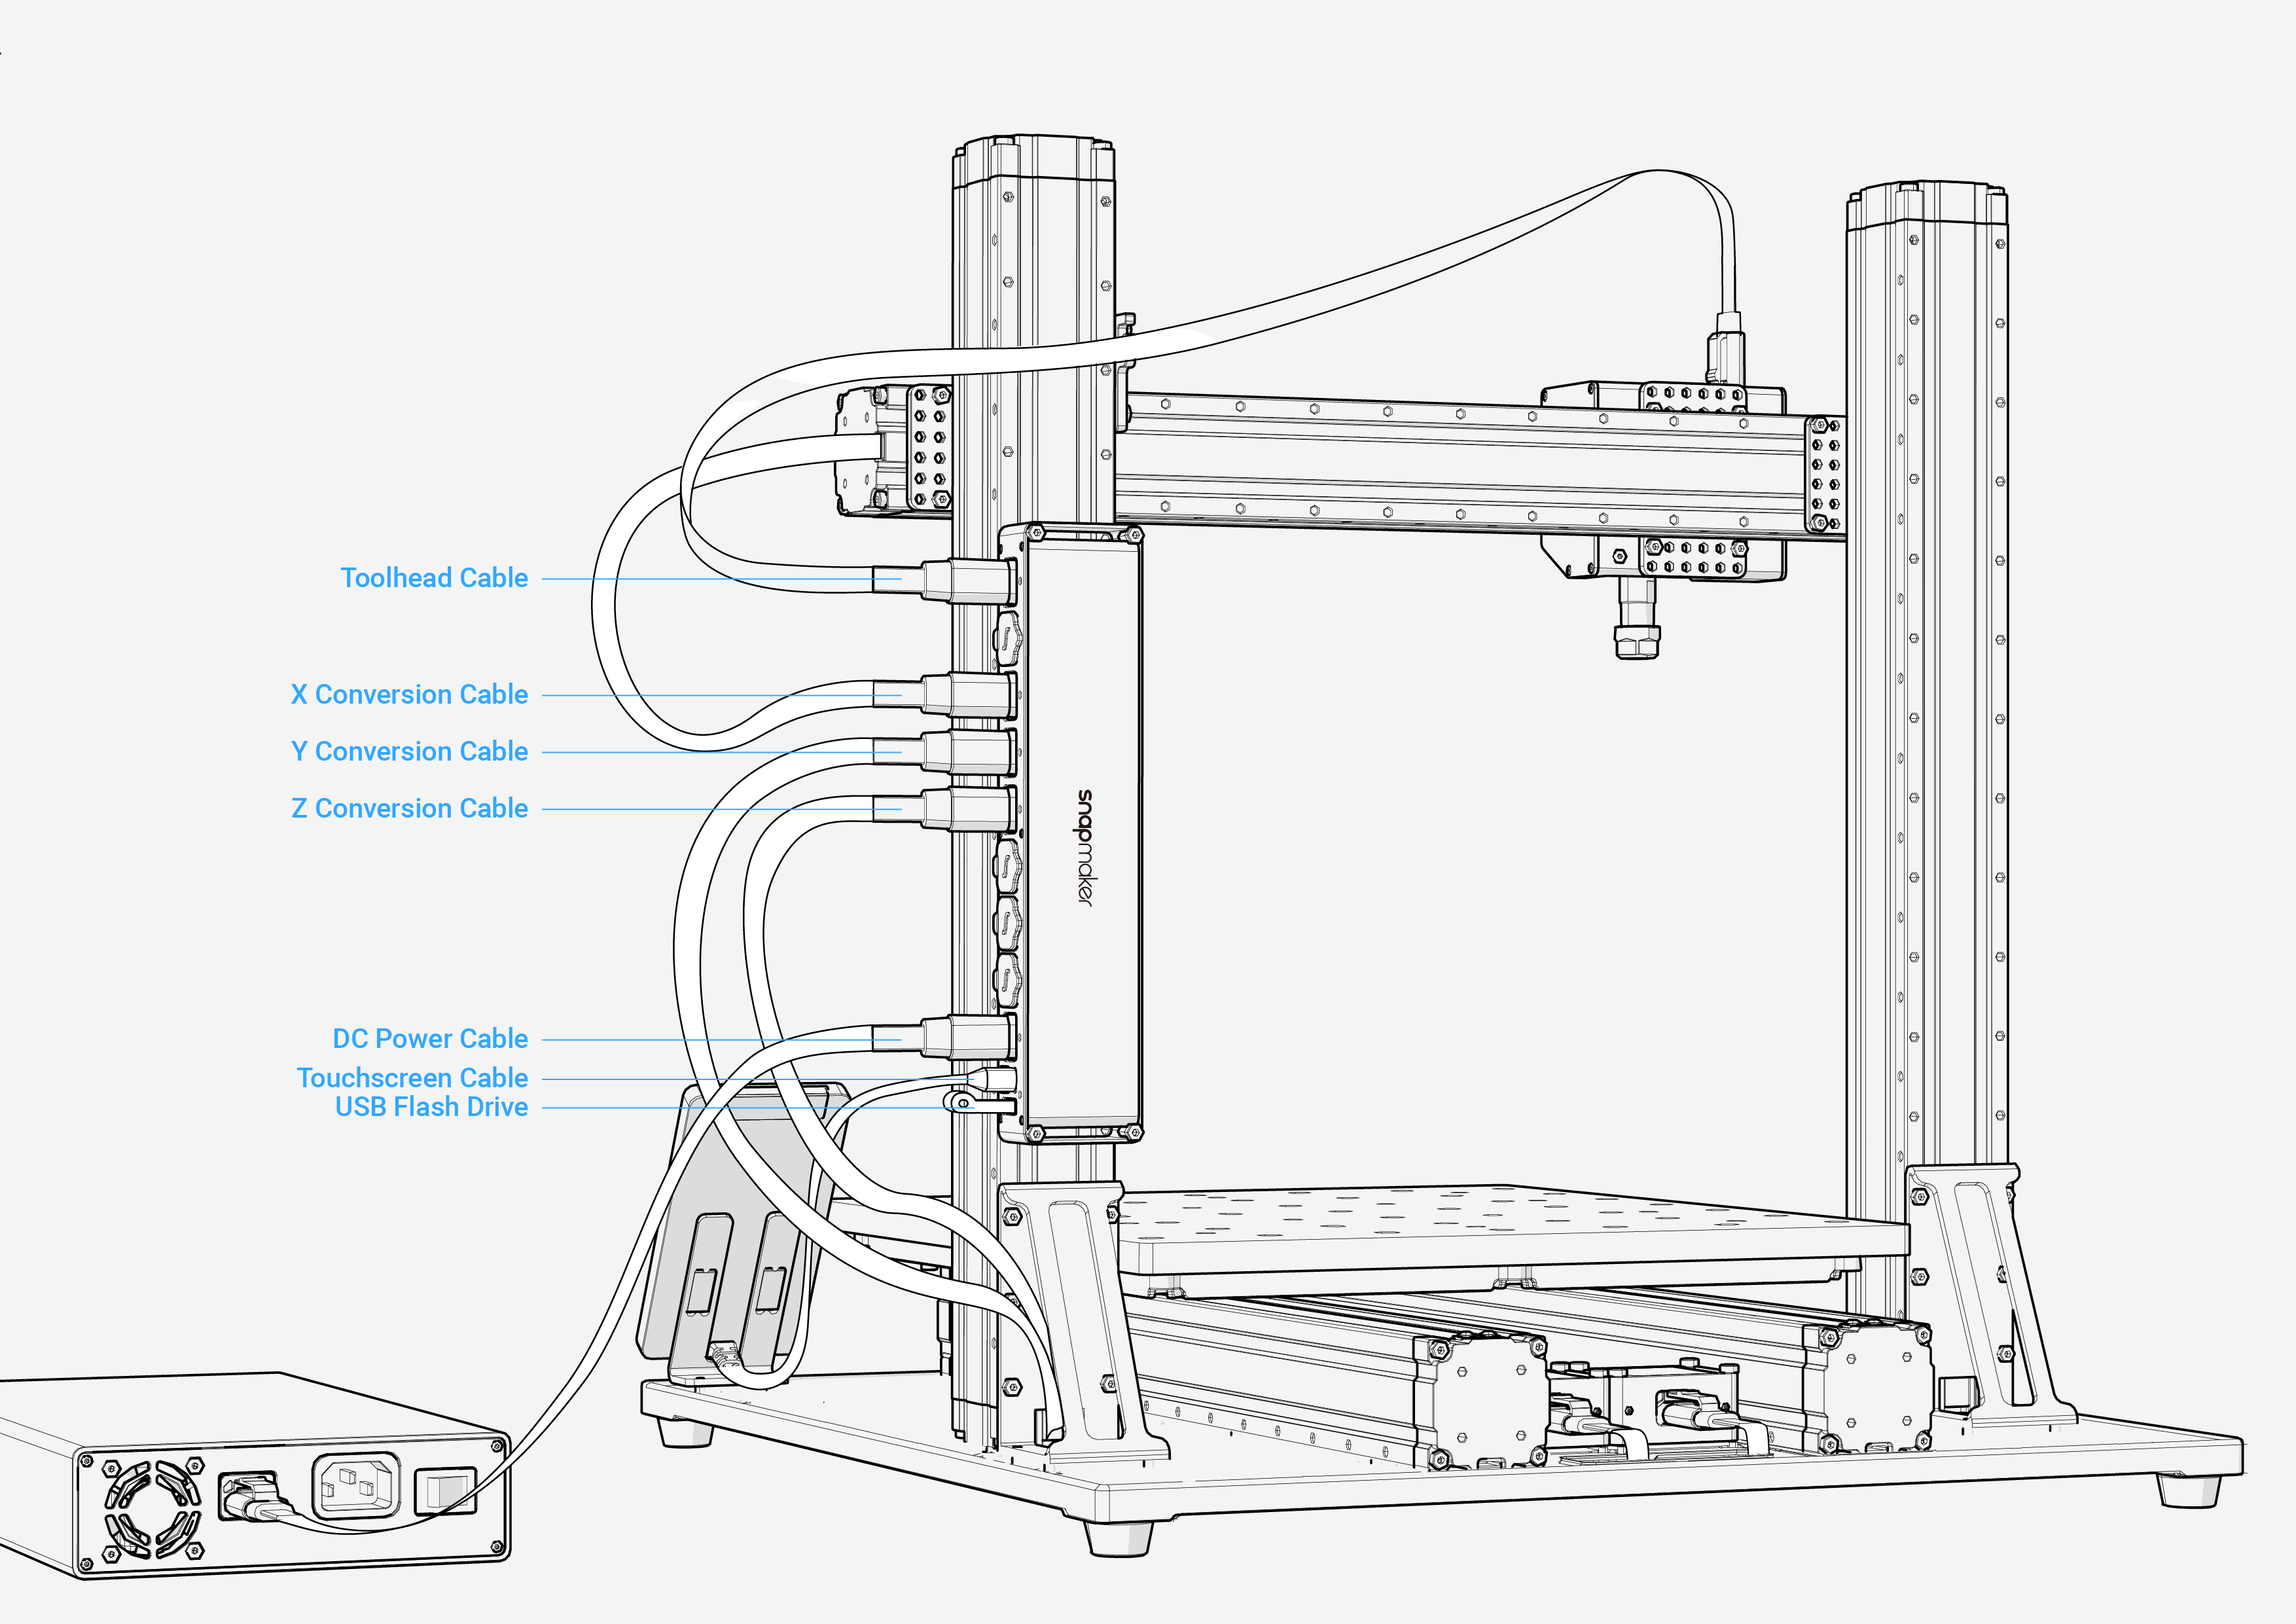
- Into the Converters
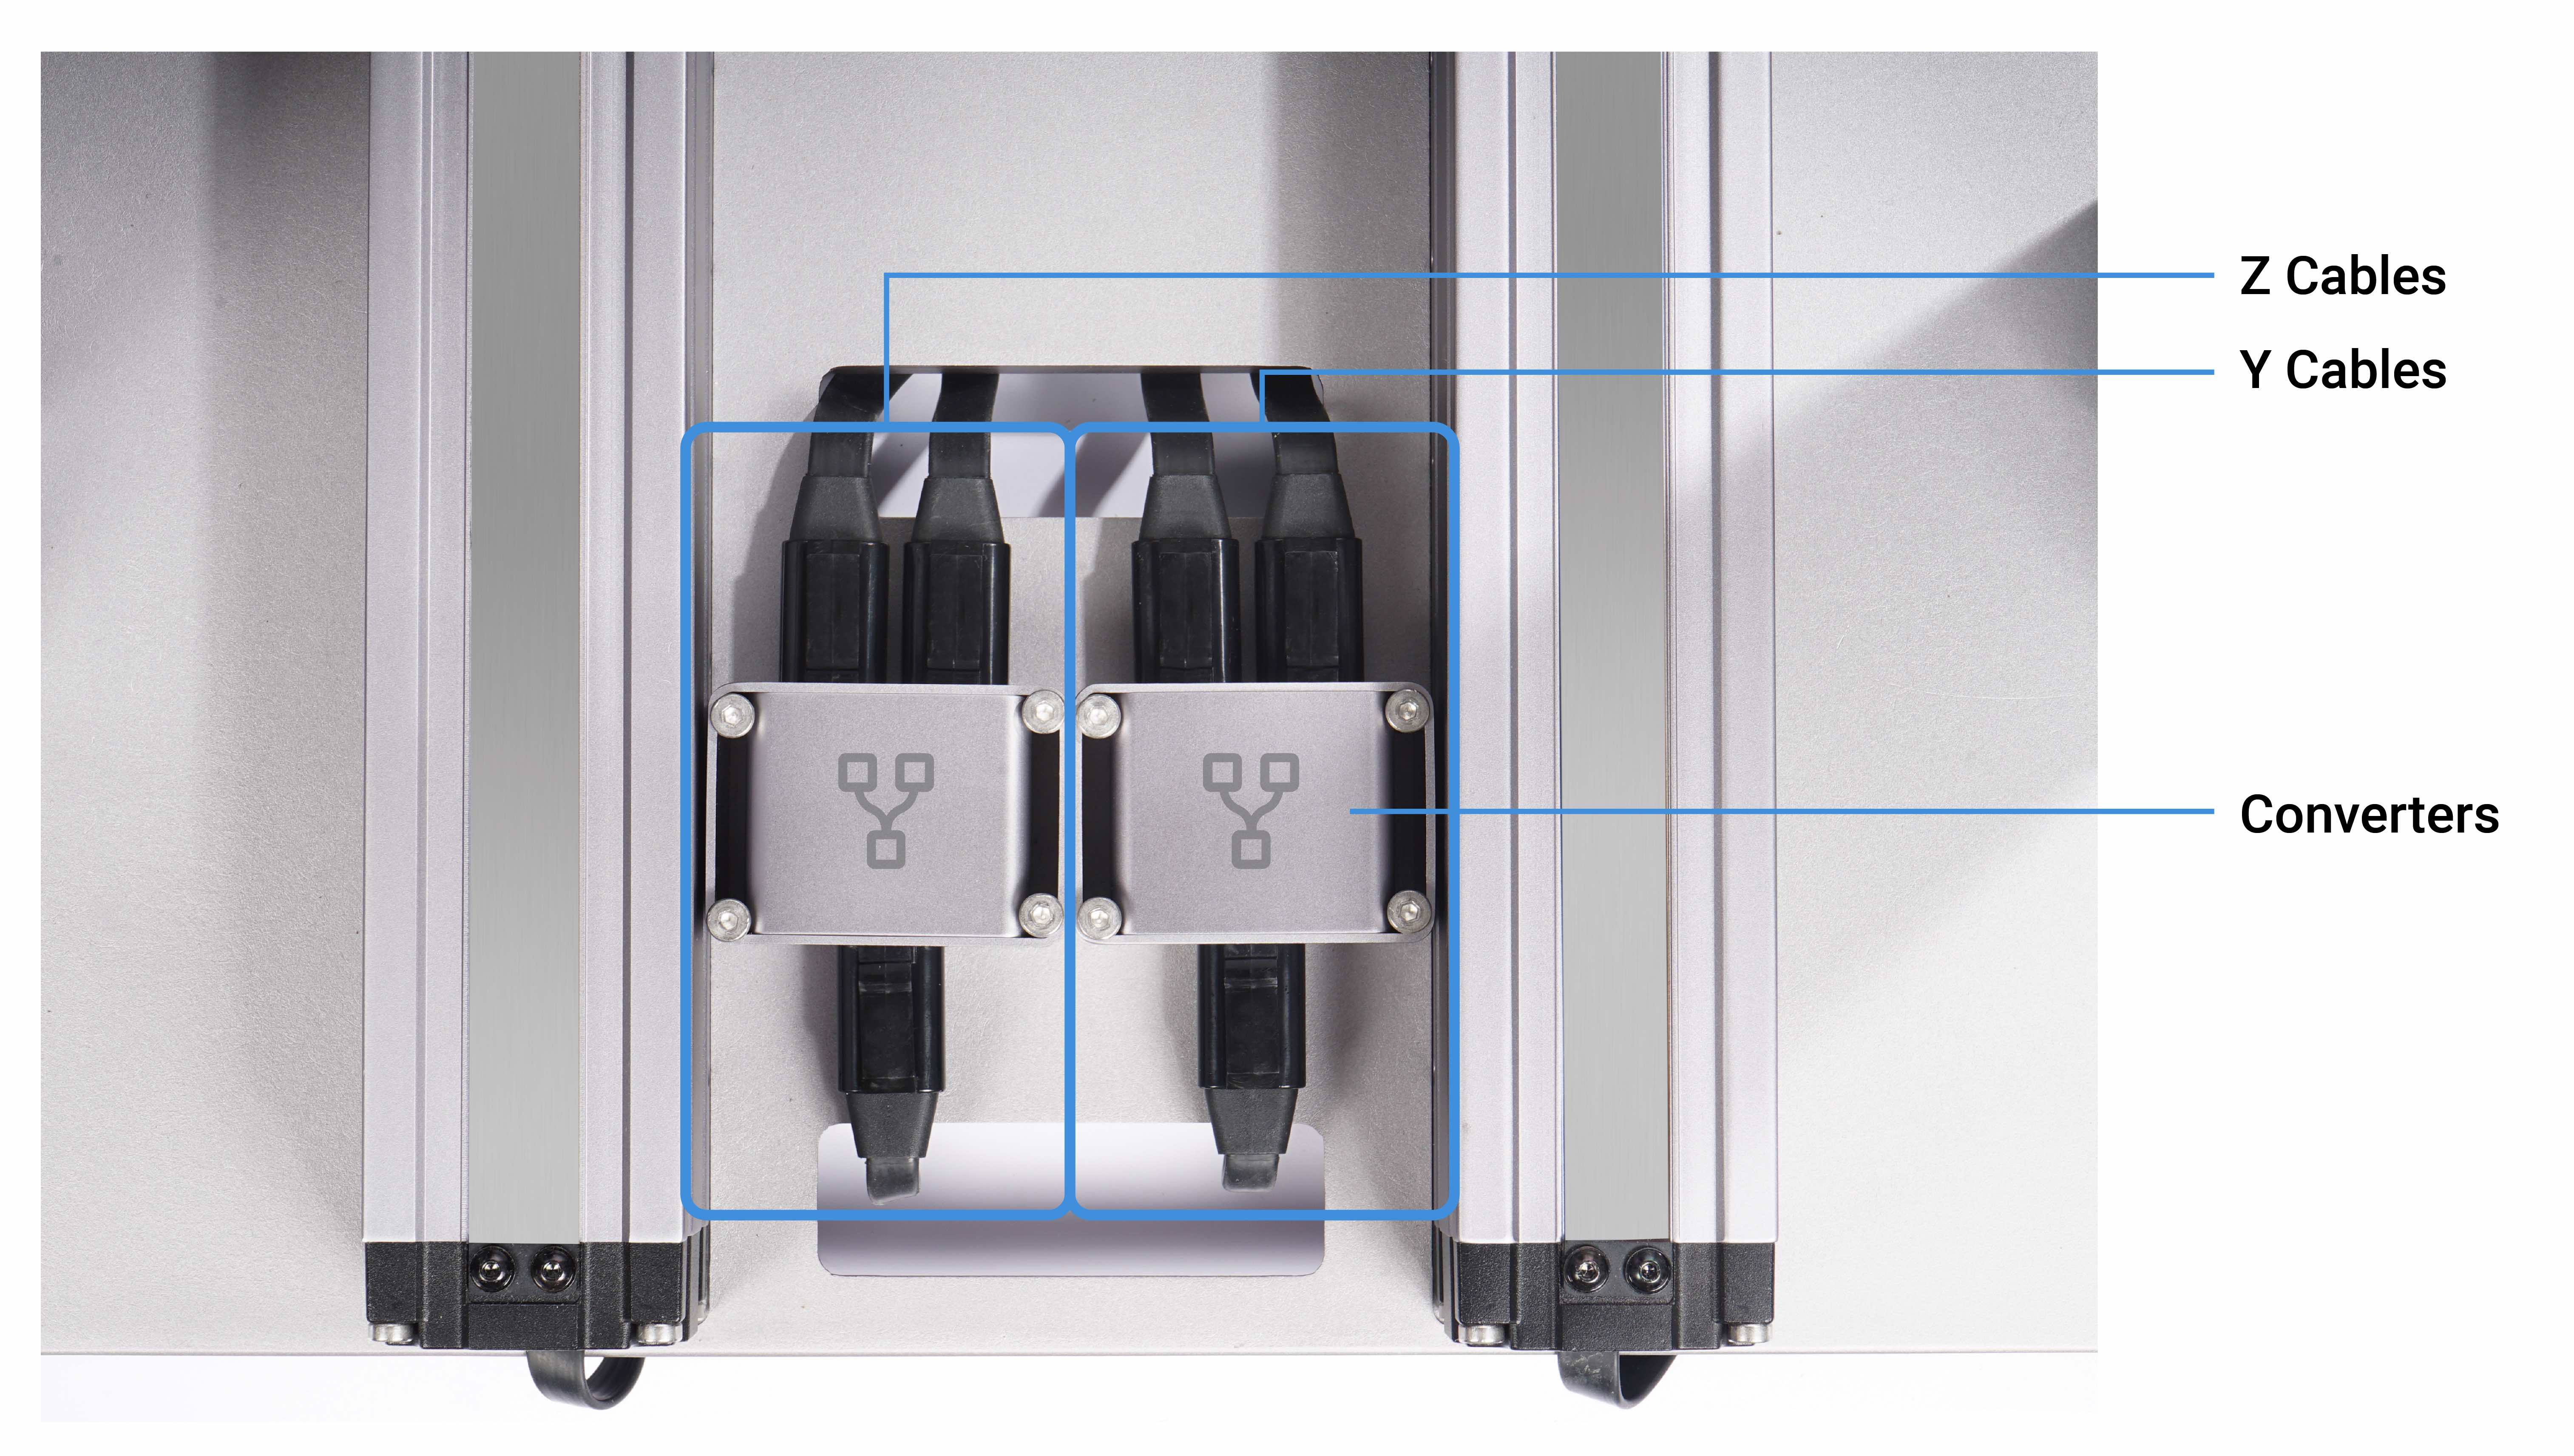
![]() Snapmaker 2.0 A150 has no Converters.
Snapmaker 2.0 A150 has no Converters.
- Into the CNC Carving Module
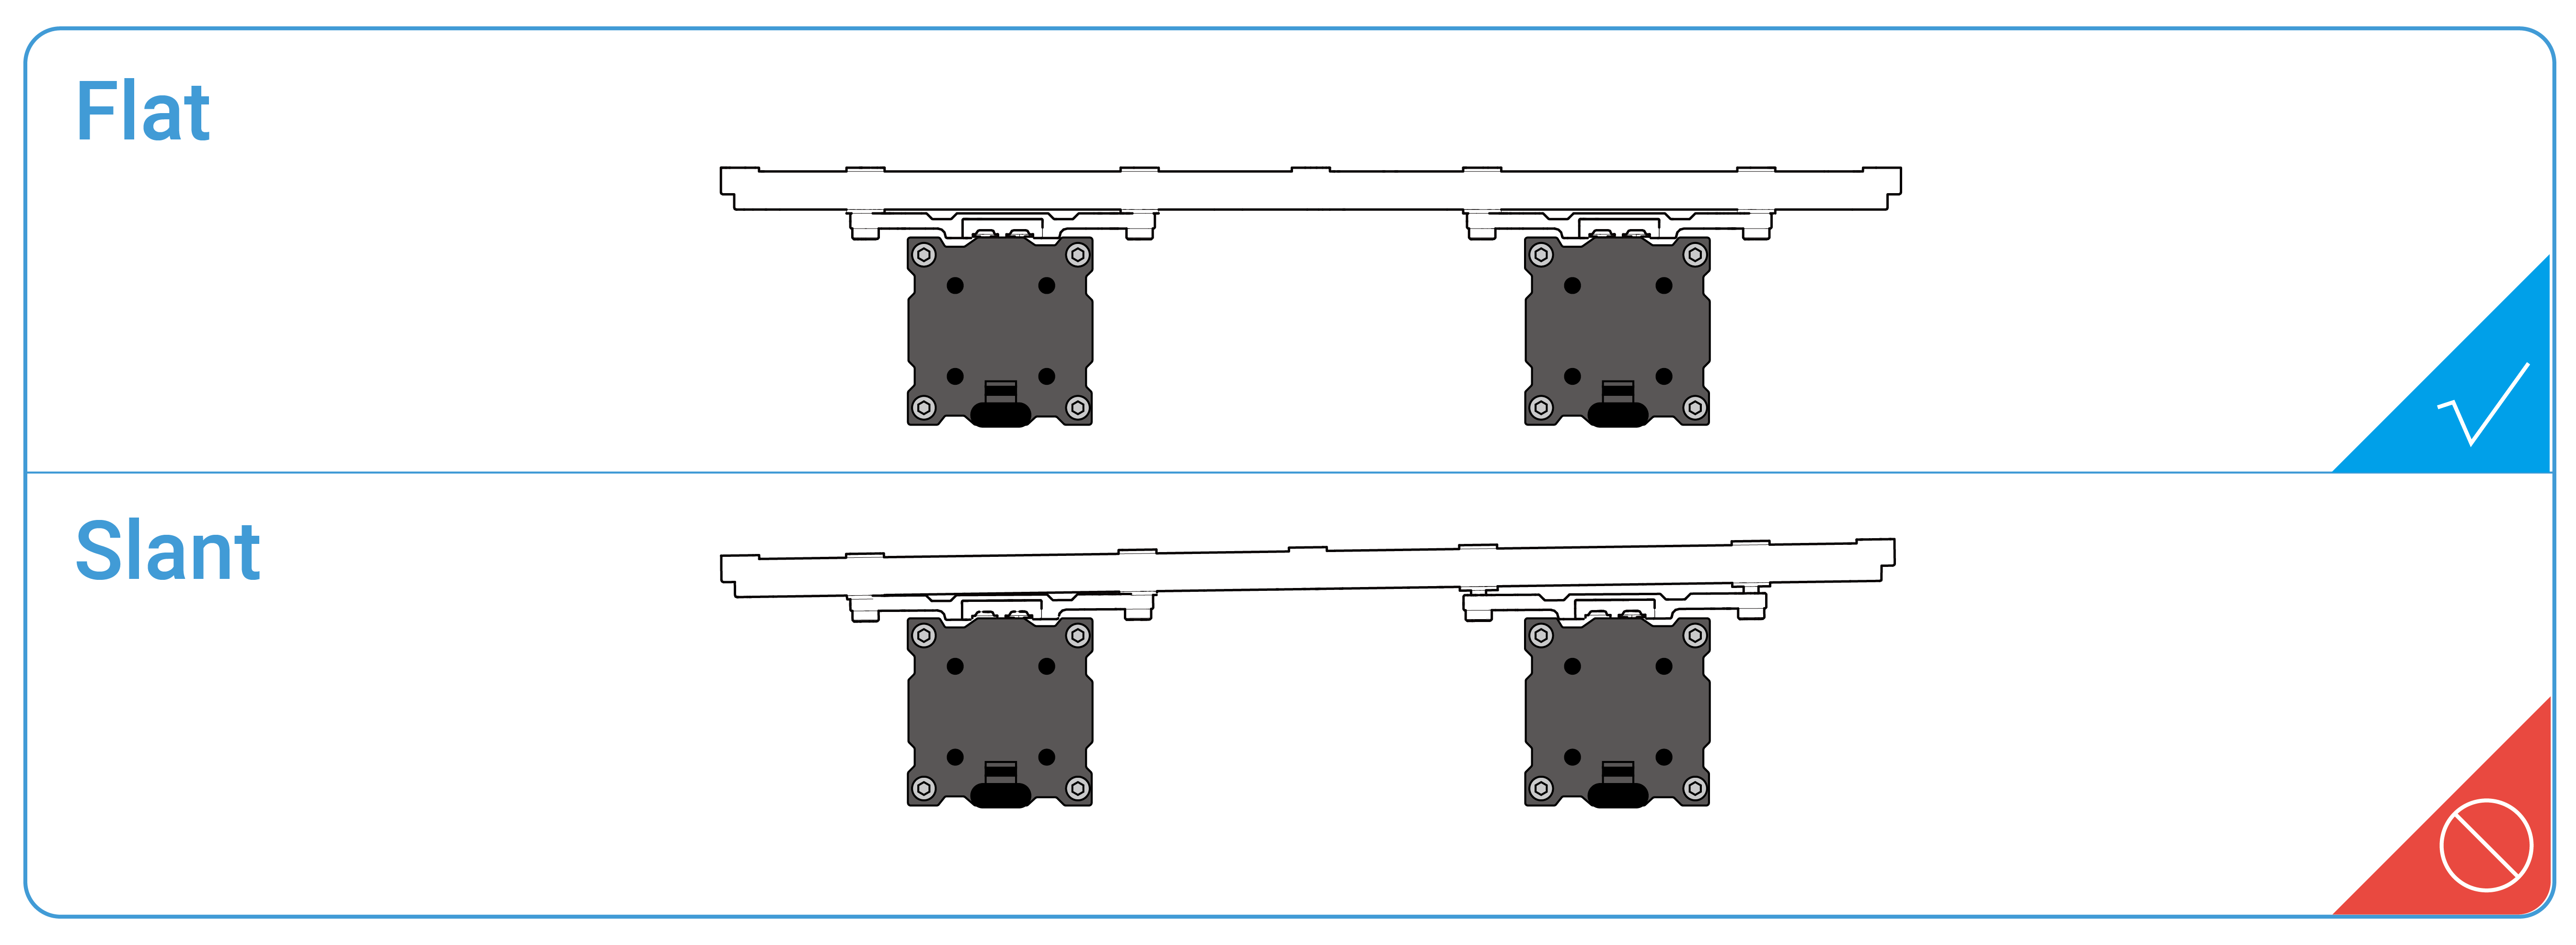
7.2.2 Check the Support Platform
Check if the Support Platform is assembled in the correct direction. The front without screws should face up, and the rear with some screws faces down.
Check if the Support Platform is flat and stable, fully tightened with screws. If not, loosen all screws and reassemble the Platform.
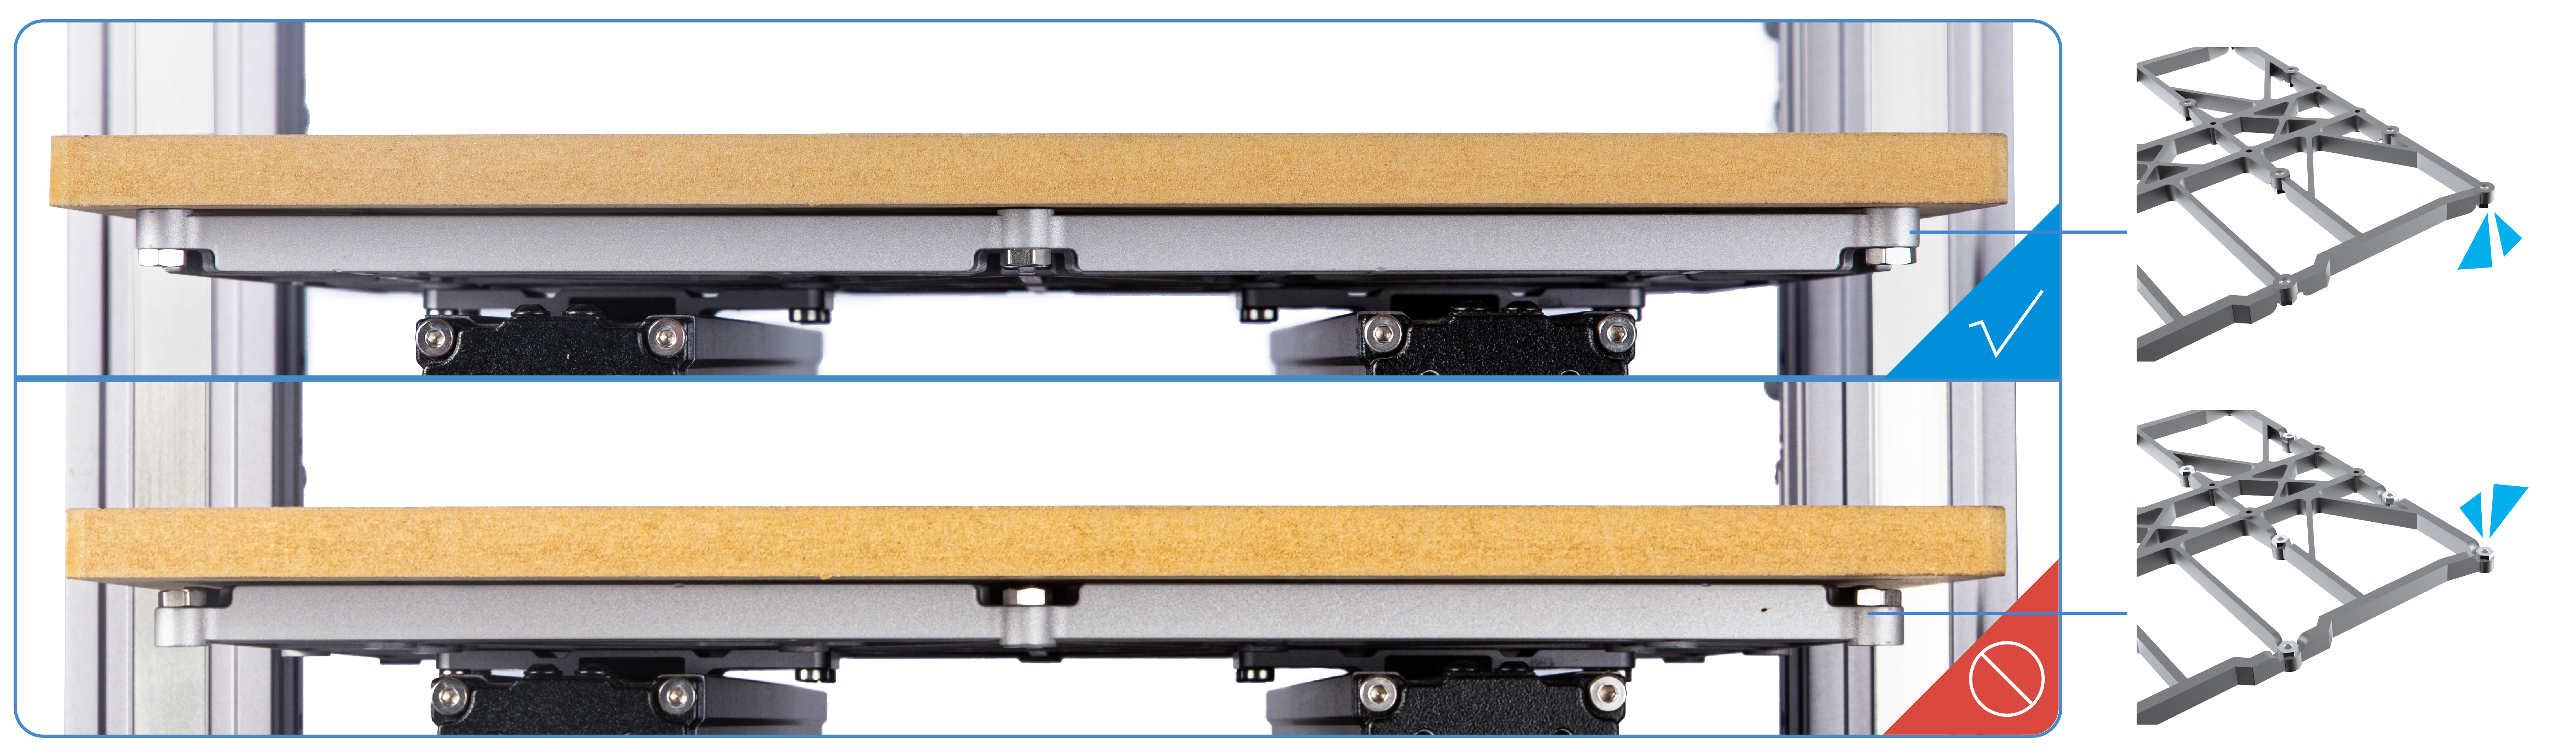
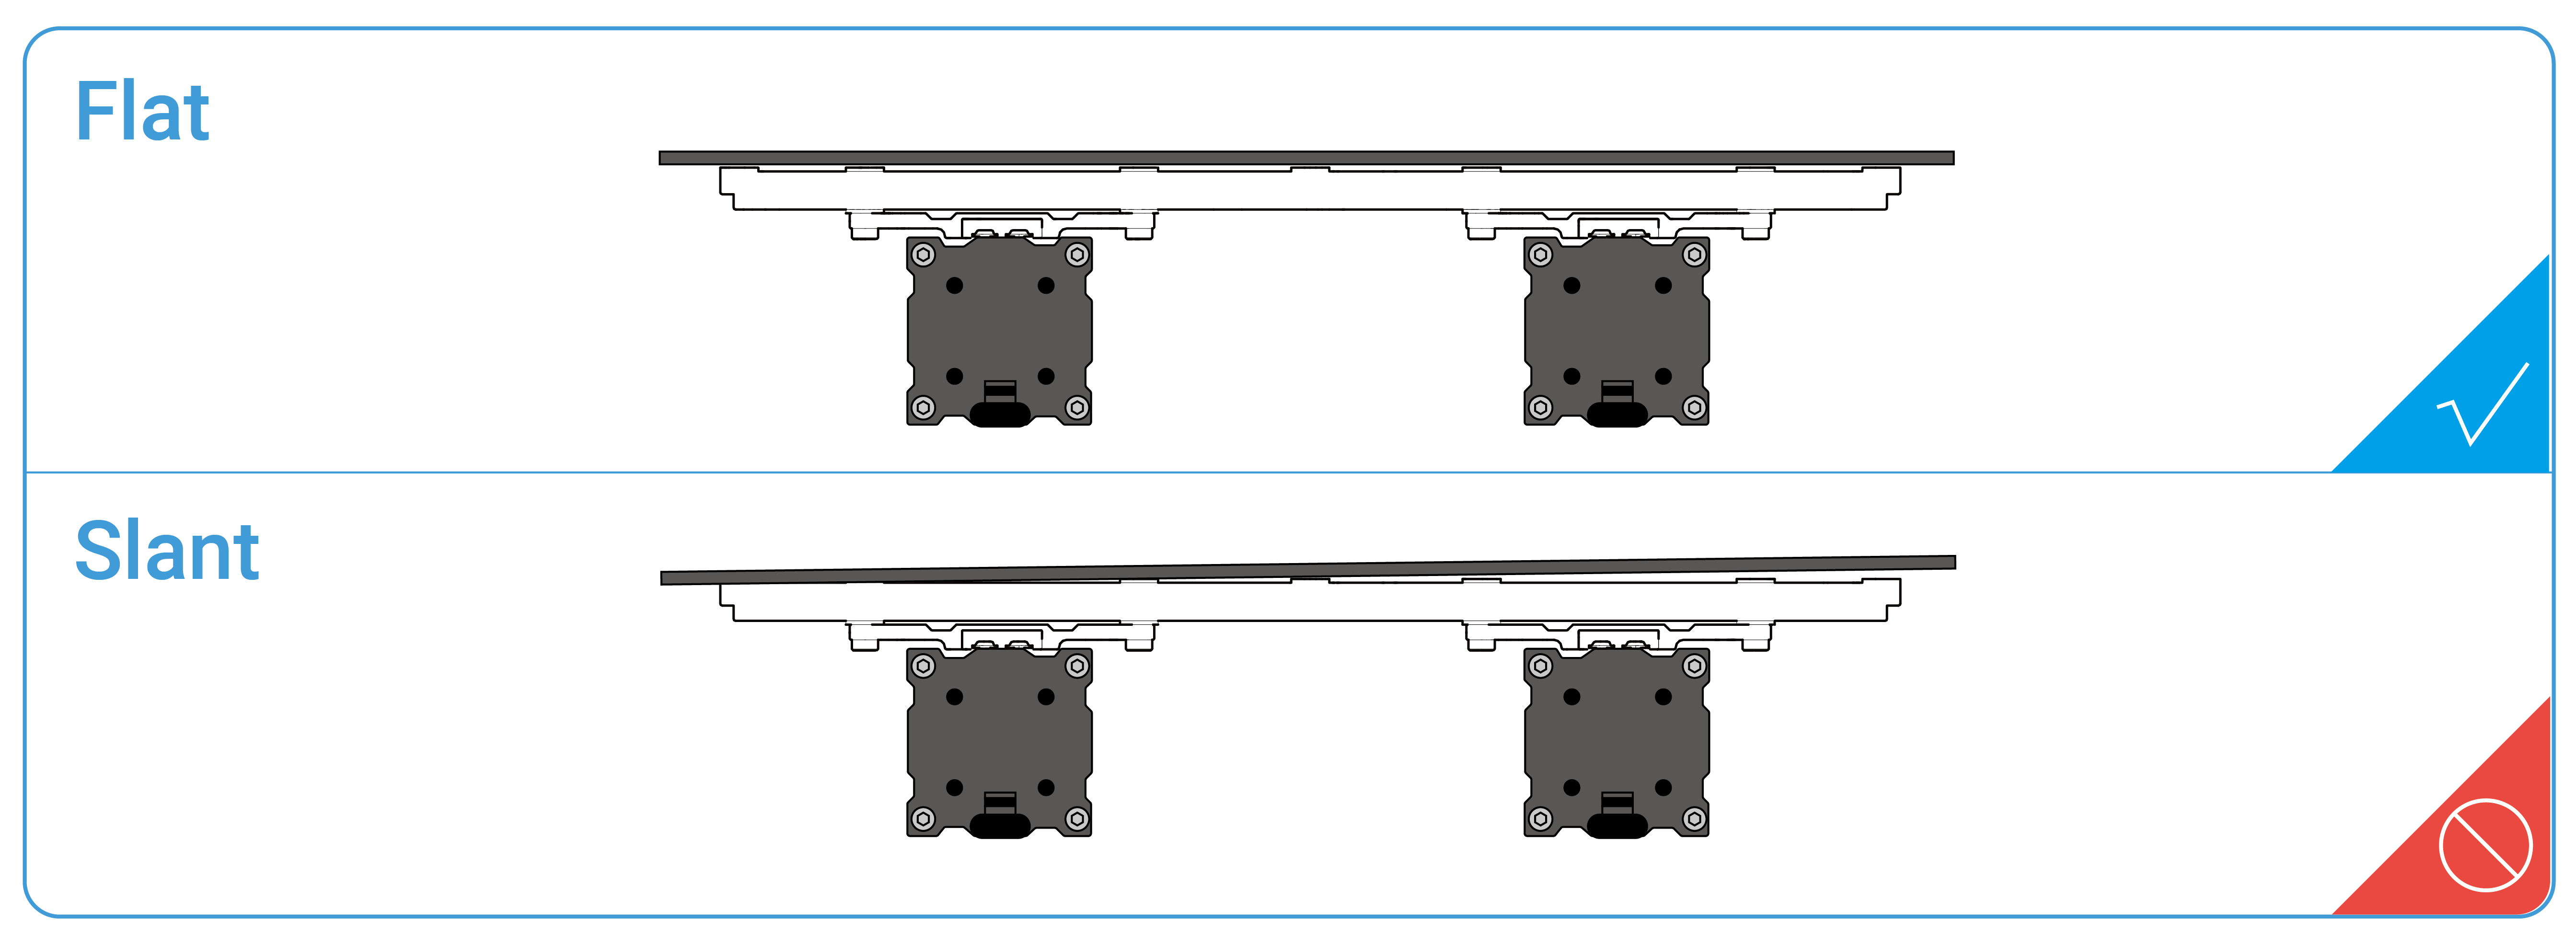
7.2.3 Check the CNC Carving Platform
Check if the CNC Carving Platform is flat and stable, fully tightened with screws. If not, reassemble the CNC Carving Platform.
7.2.4 Check the ER11 Nut and CNC Bit
Check if the ER11 collet securely clamps the CNC bit.
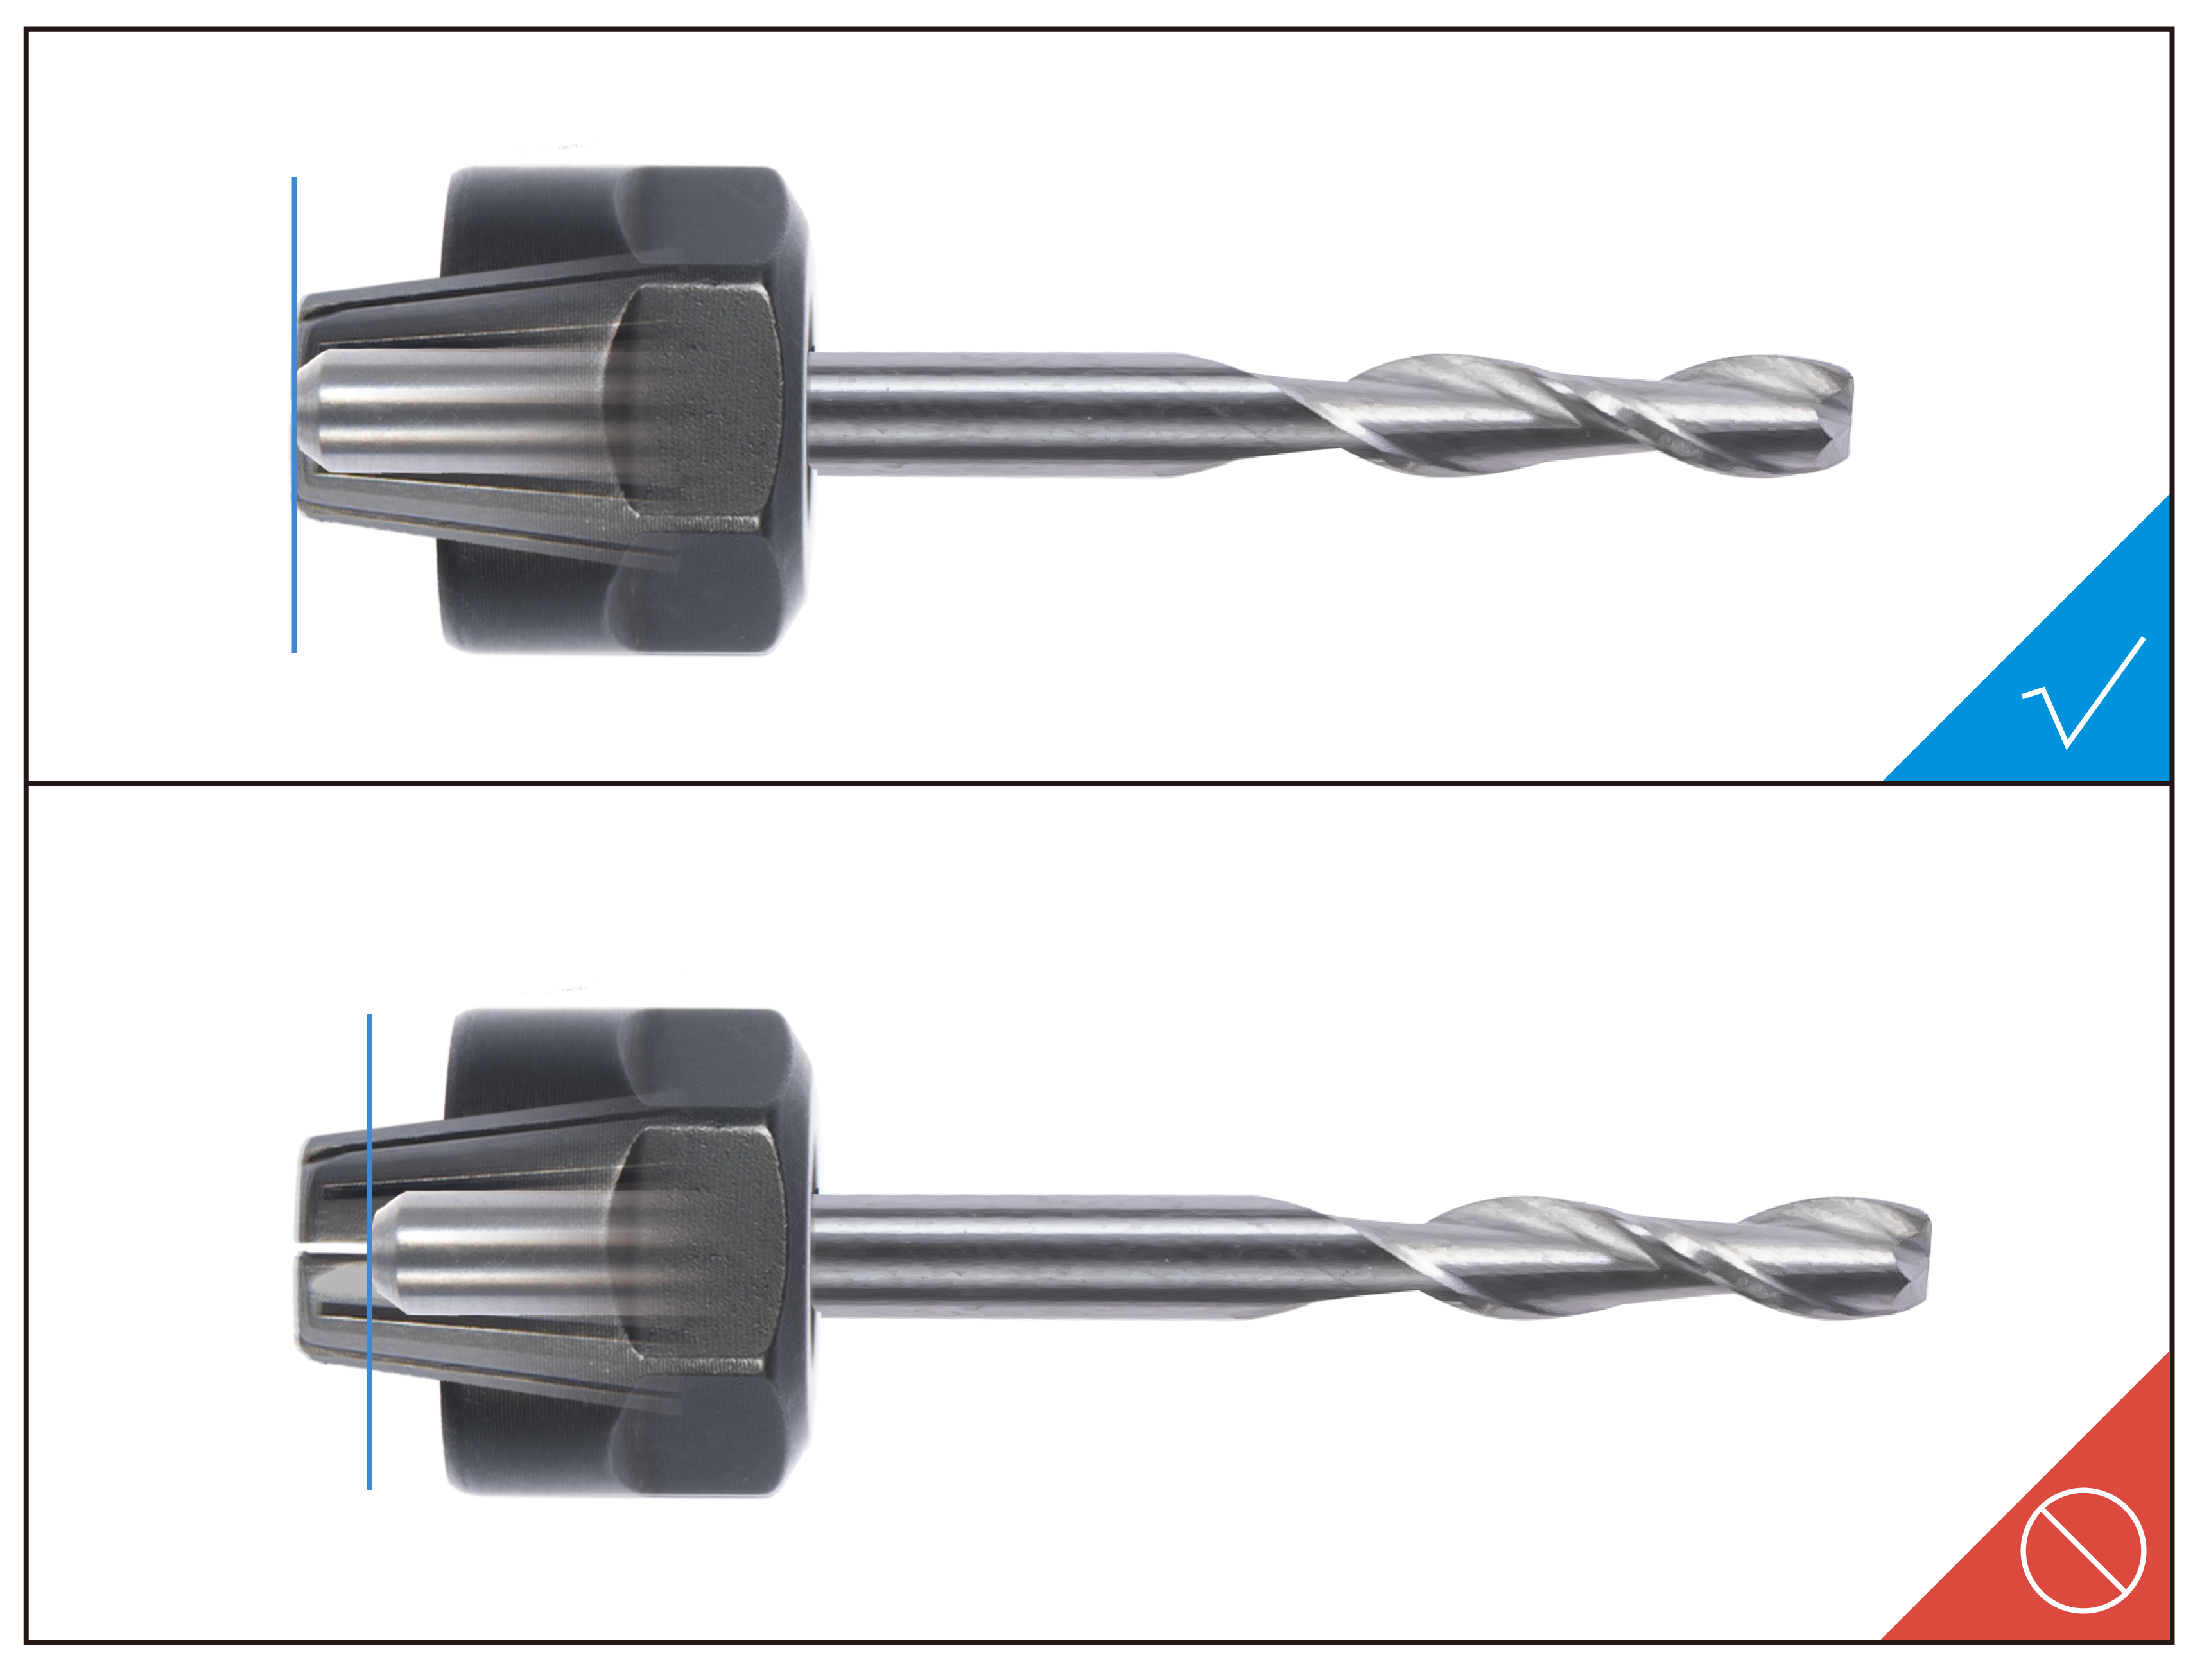
Check if the ER11 nut is tightened onto the CNC Module using open-end wrenches.
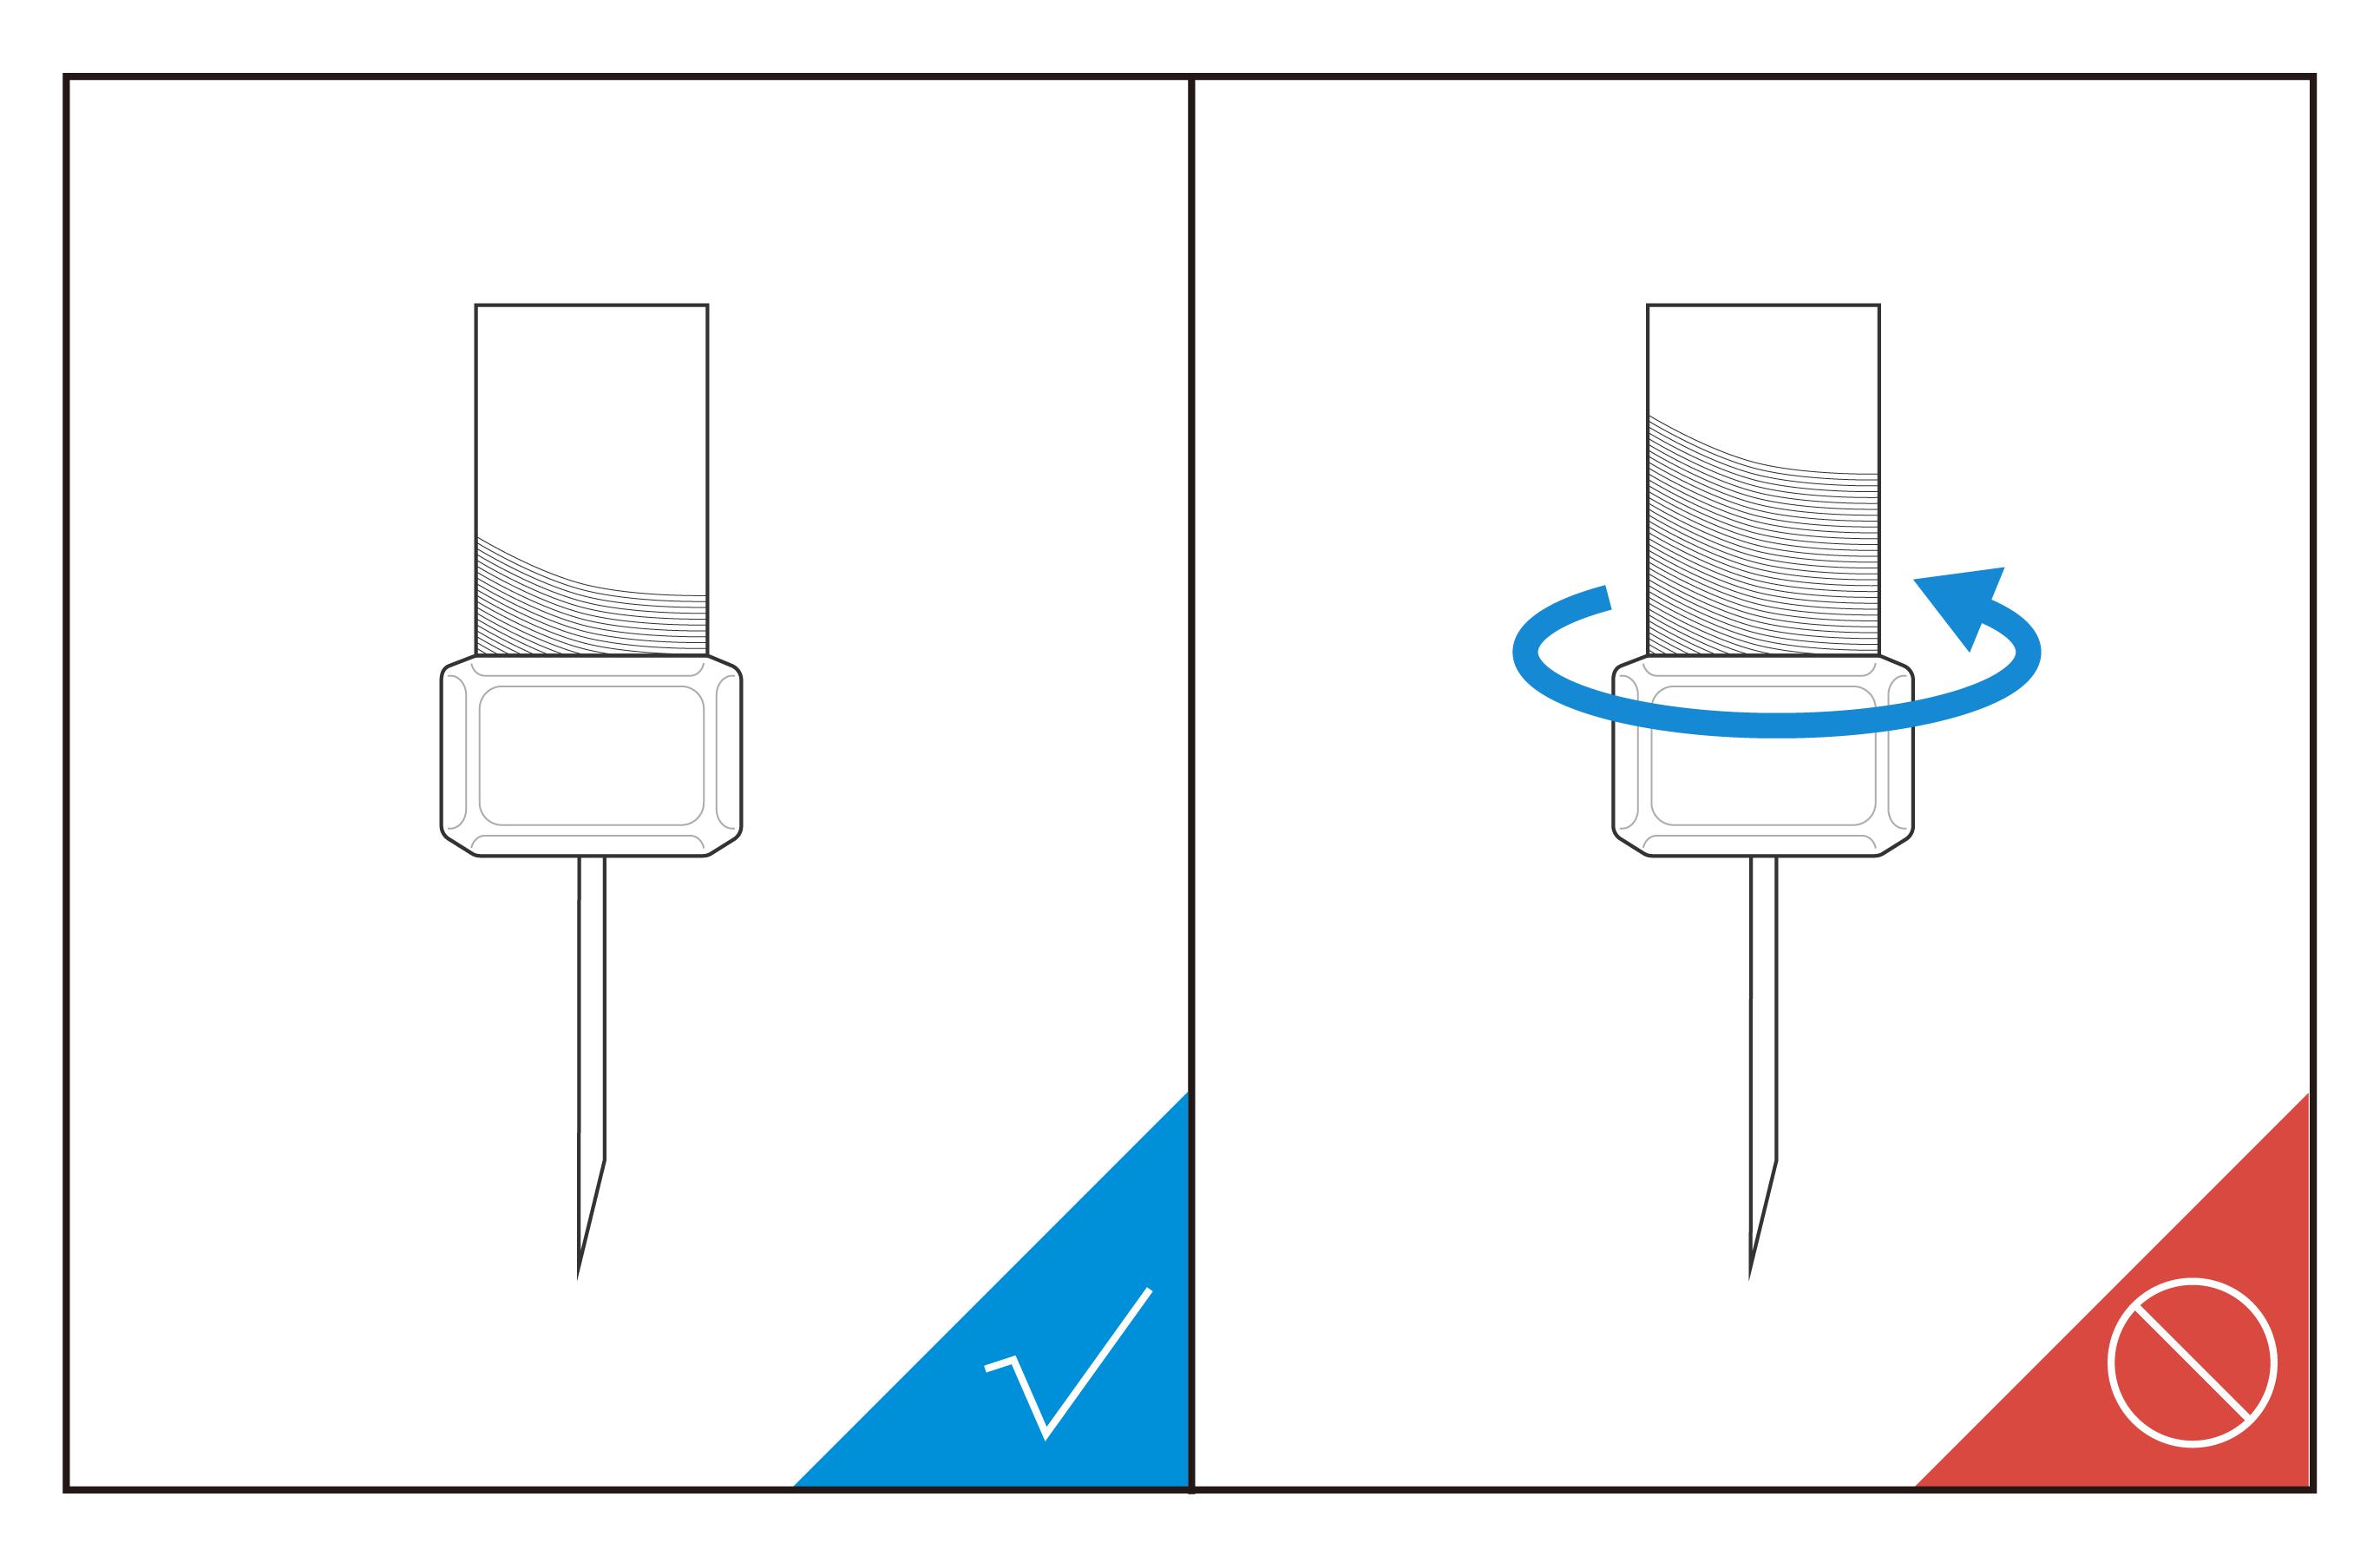
Check if the CNC bit is broken or worn out. If it is, replace the old CNC bit with a new one.
7.3 Every Month
7.3.1 Clean the Linear Modules
Keeping all Linear Modules free of dust and other foreign matters can reduce friction and noise while the CNC carver is moving. To do so, gently wipe the Linear Module surface using a dry cotton cloth.

Usually, you should clean the CNC carver after each carving job. To always keep it free of sawdust, we recommend you to give the machine a thorough cleaning, especially of the Base Plate, Y-axis Linear Modules, and Support Platform.
![]() While cleaning, do not press the steel strip. Do not dismantle the Linear Modules yourself, as doing so will void Snapmaker’s Limited Warranty.
While cleaning, do not press the steel strip. Do not dismantle the Linear Modules yourself, as doing so will void Snapmaker’s Limited Warranty.
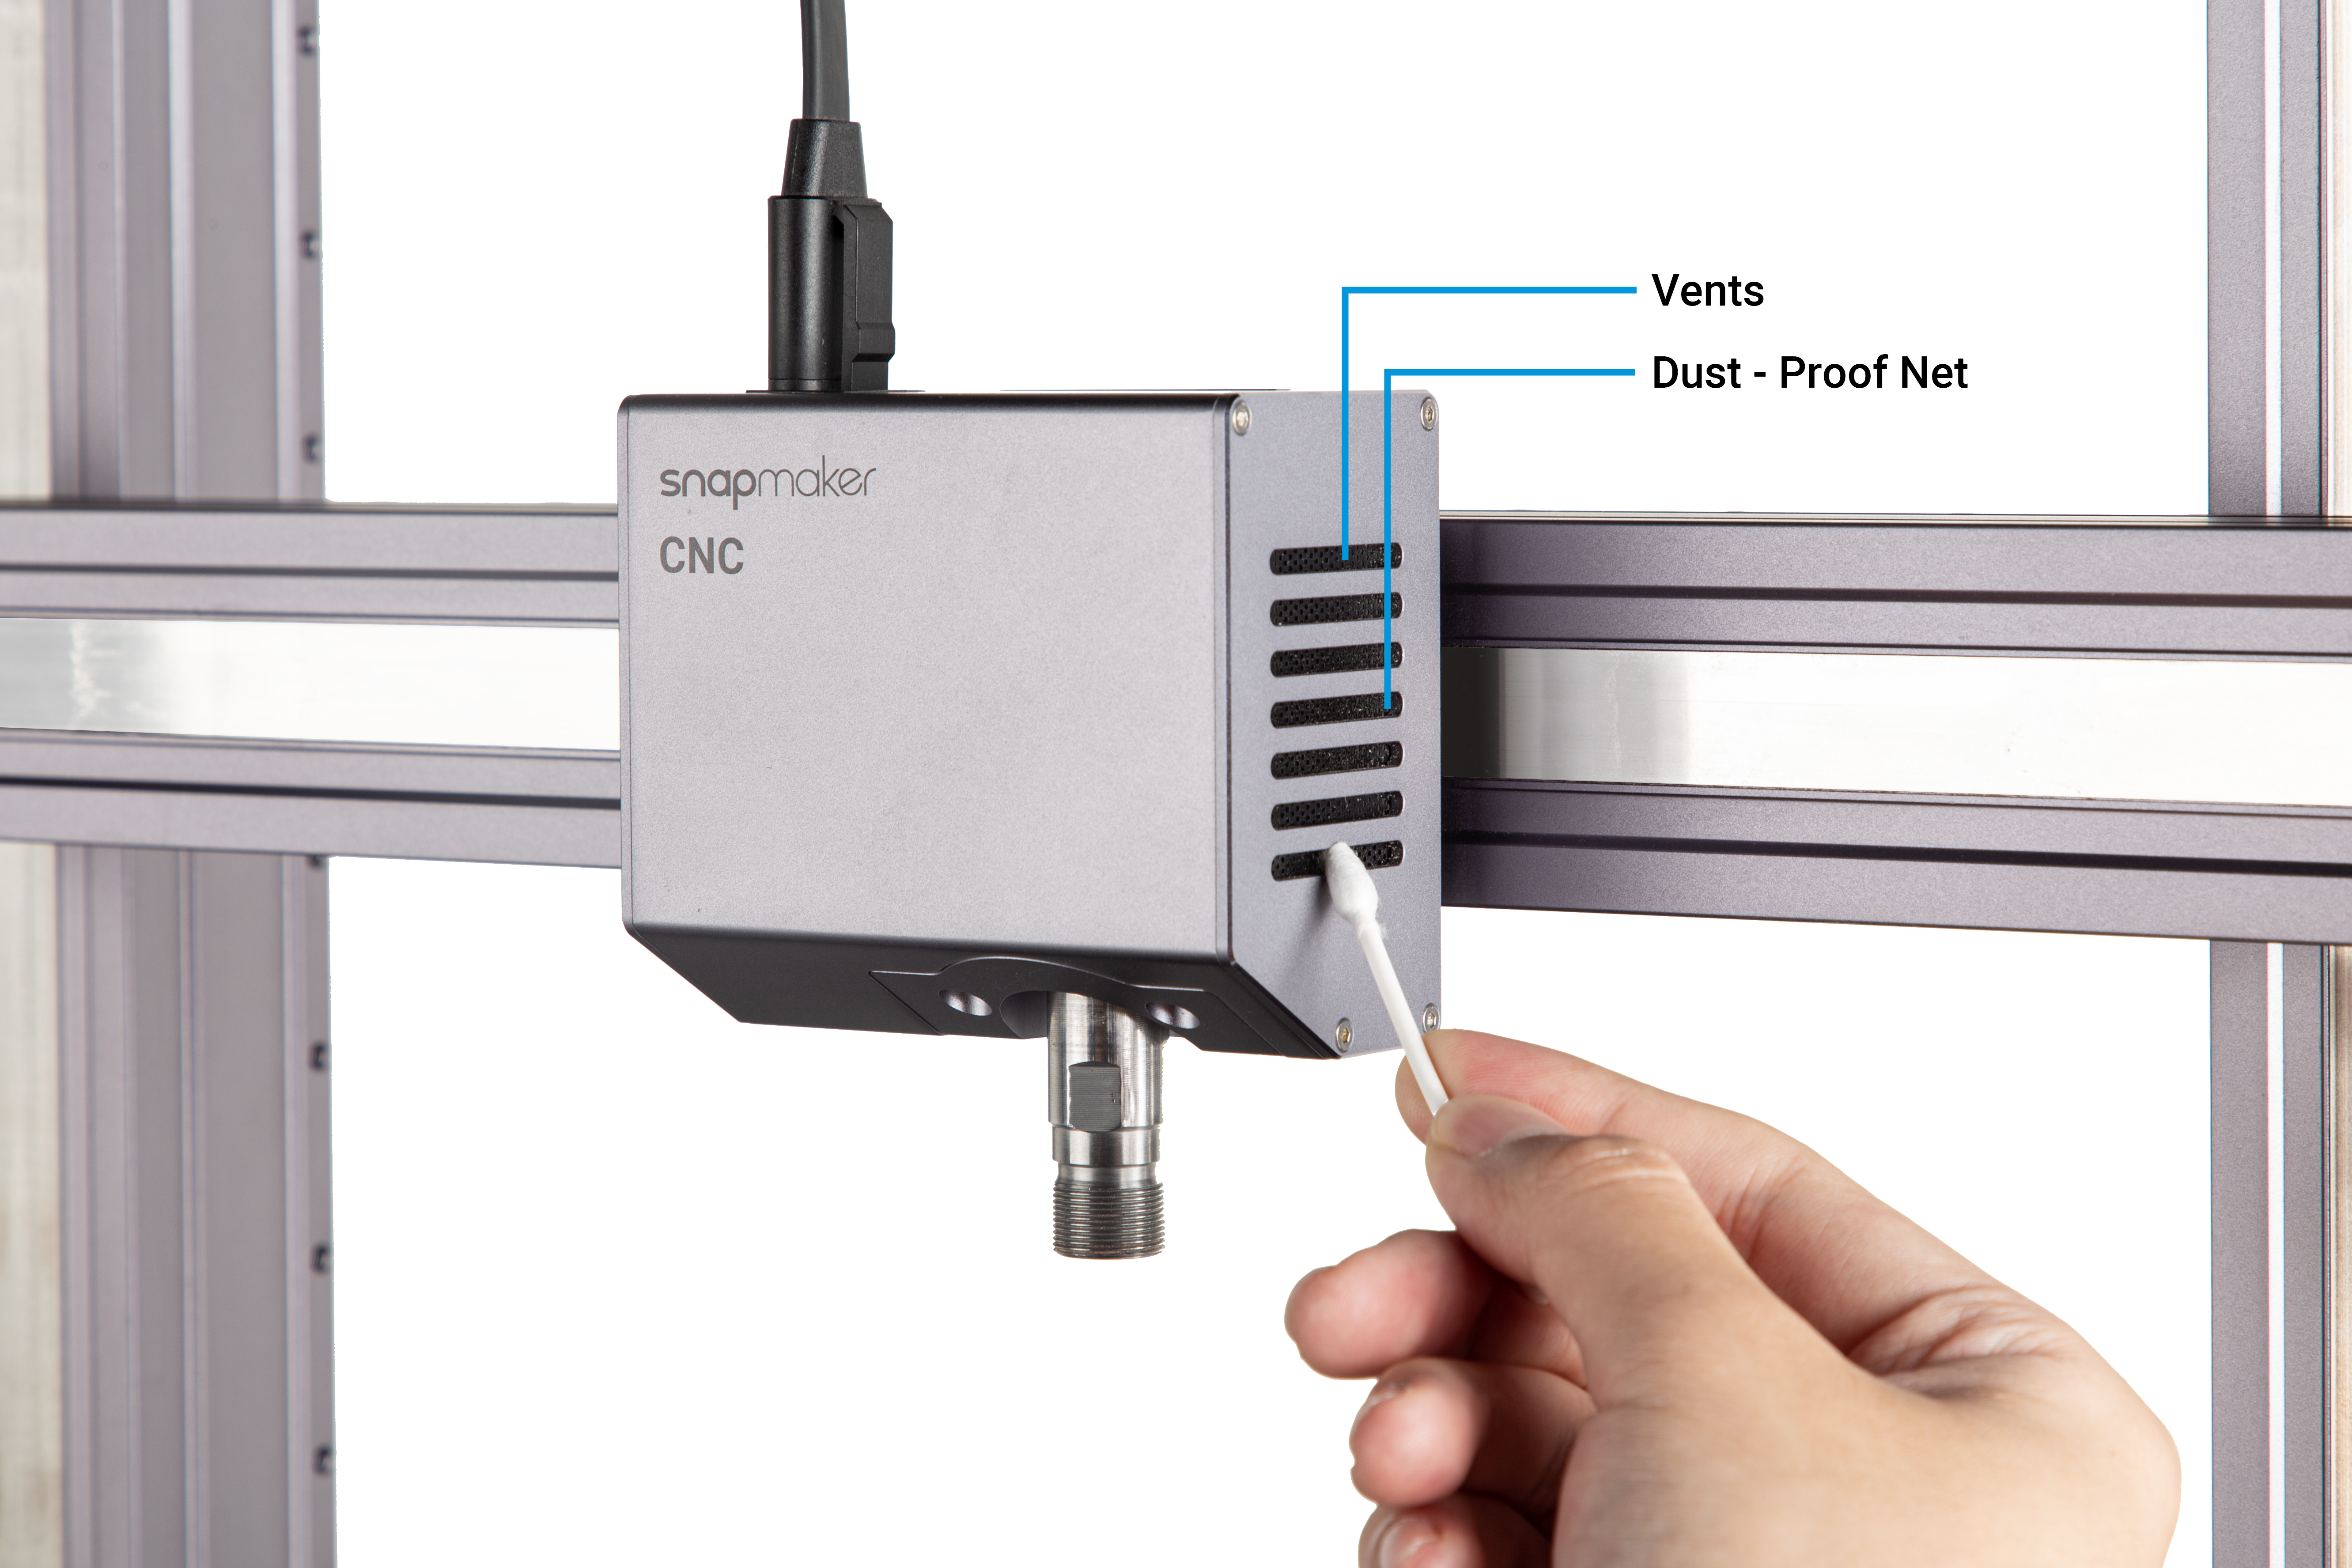
7.3.2 Clean the Side Covers
The CNC Carving Module has two side covers, each with vents and a dust-proof net for heat dissipation. If the side covers are clogged by foreign matters, it will affect the airflow inside the 3D Printing Module. Consequently, the internal components will be overheated, and the CNC Module will malfunction.

To avoid this, you should check the vents and dust-proof nets monthly. Use a swab or vacuum to clean the foreign matters.
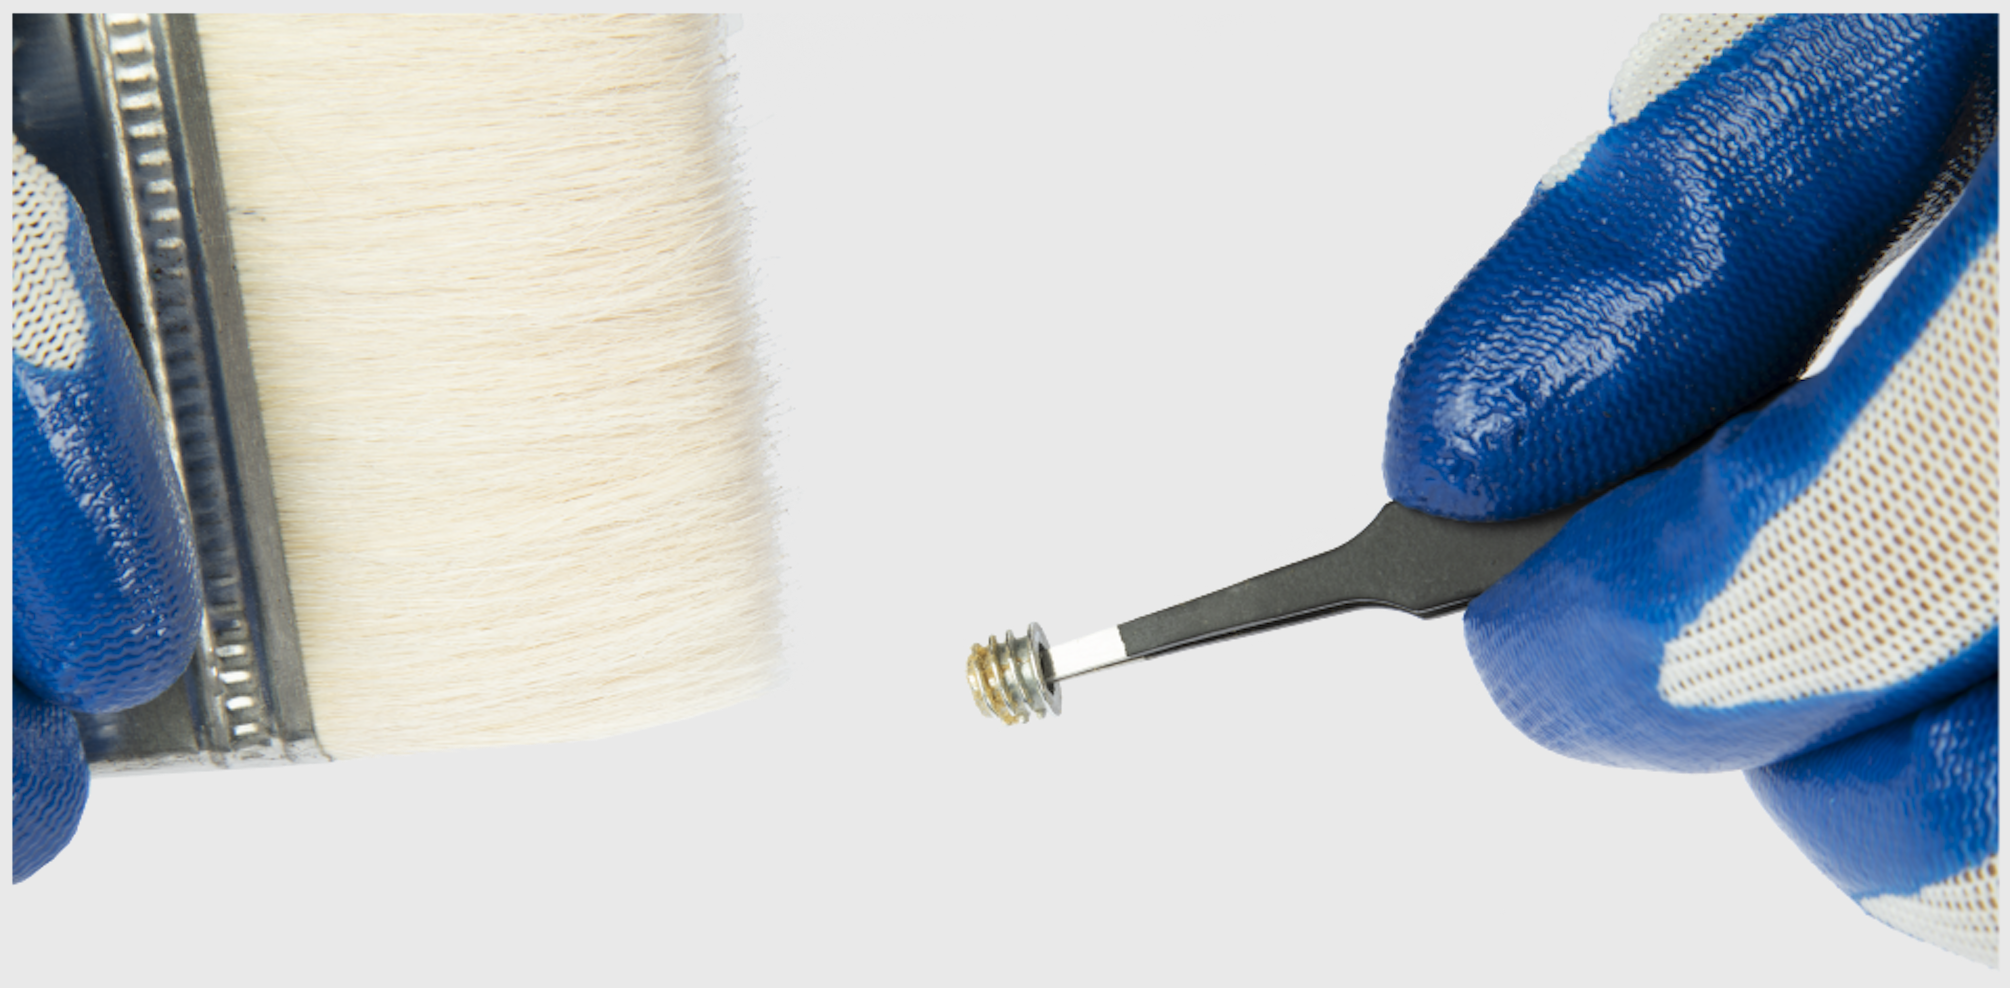
7.3.3 Check the Nuts in the CNC Carving Platform
Check if any nut is screwed out of the CNC Carving Platform. If so, follow these steps to glue it back.
![]() Before operation, wear protective gloves to prevent contact with the toxic AB glue. Wear our provided mask to avoid inhaling the volatile, toxic gases. Do not misuse the A glue lid on the B one.
Before operation, wear protective gloves to prevent contact with the toxic AB glue. Wear our provided mask to avoid inhaling the volatile, toxic gases. Do not misuse the A glue lid on the B one.
(1) Clear the sawdust on the nut.
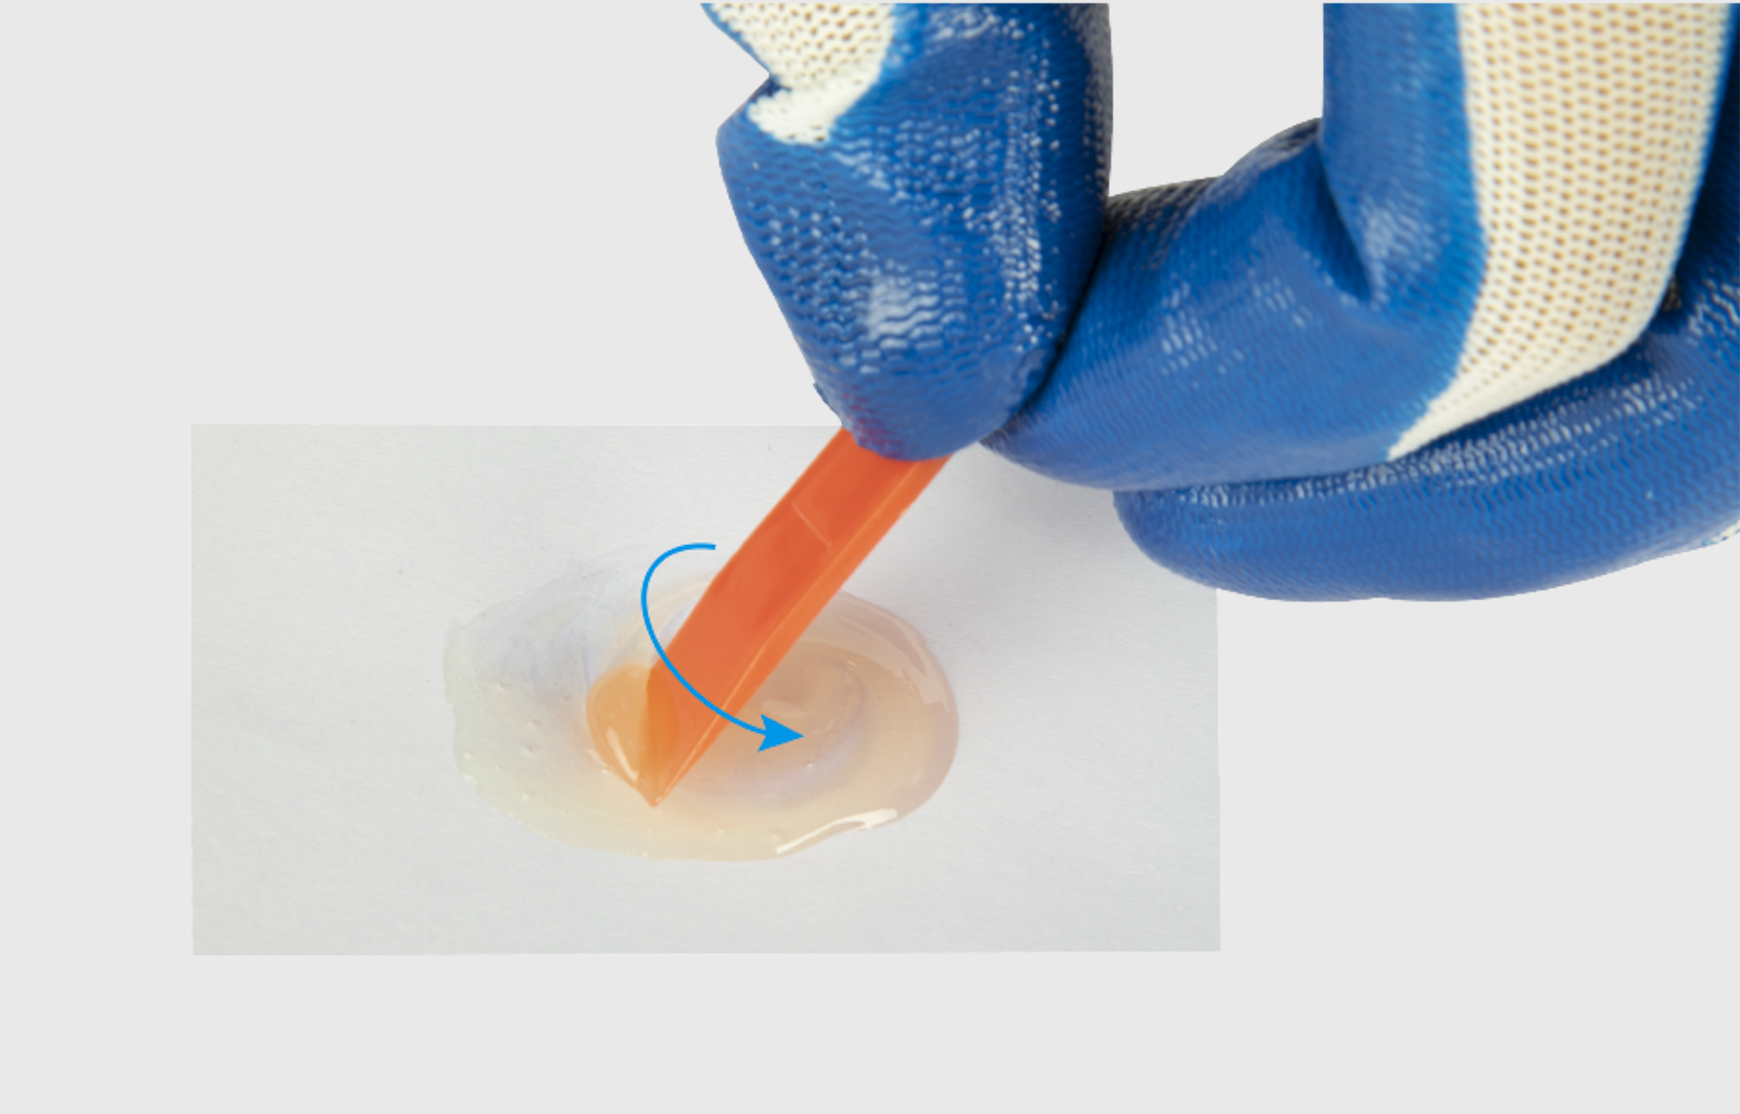
(2) Squeeze out the A glue and B glue in a 1:1 proportion.
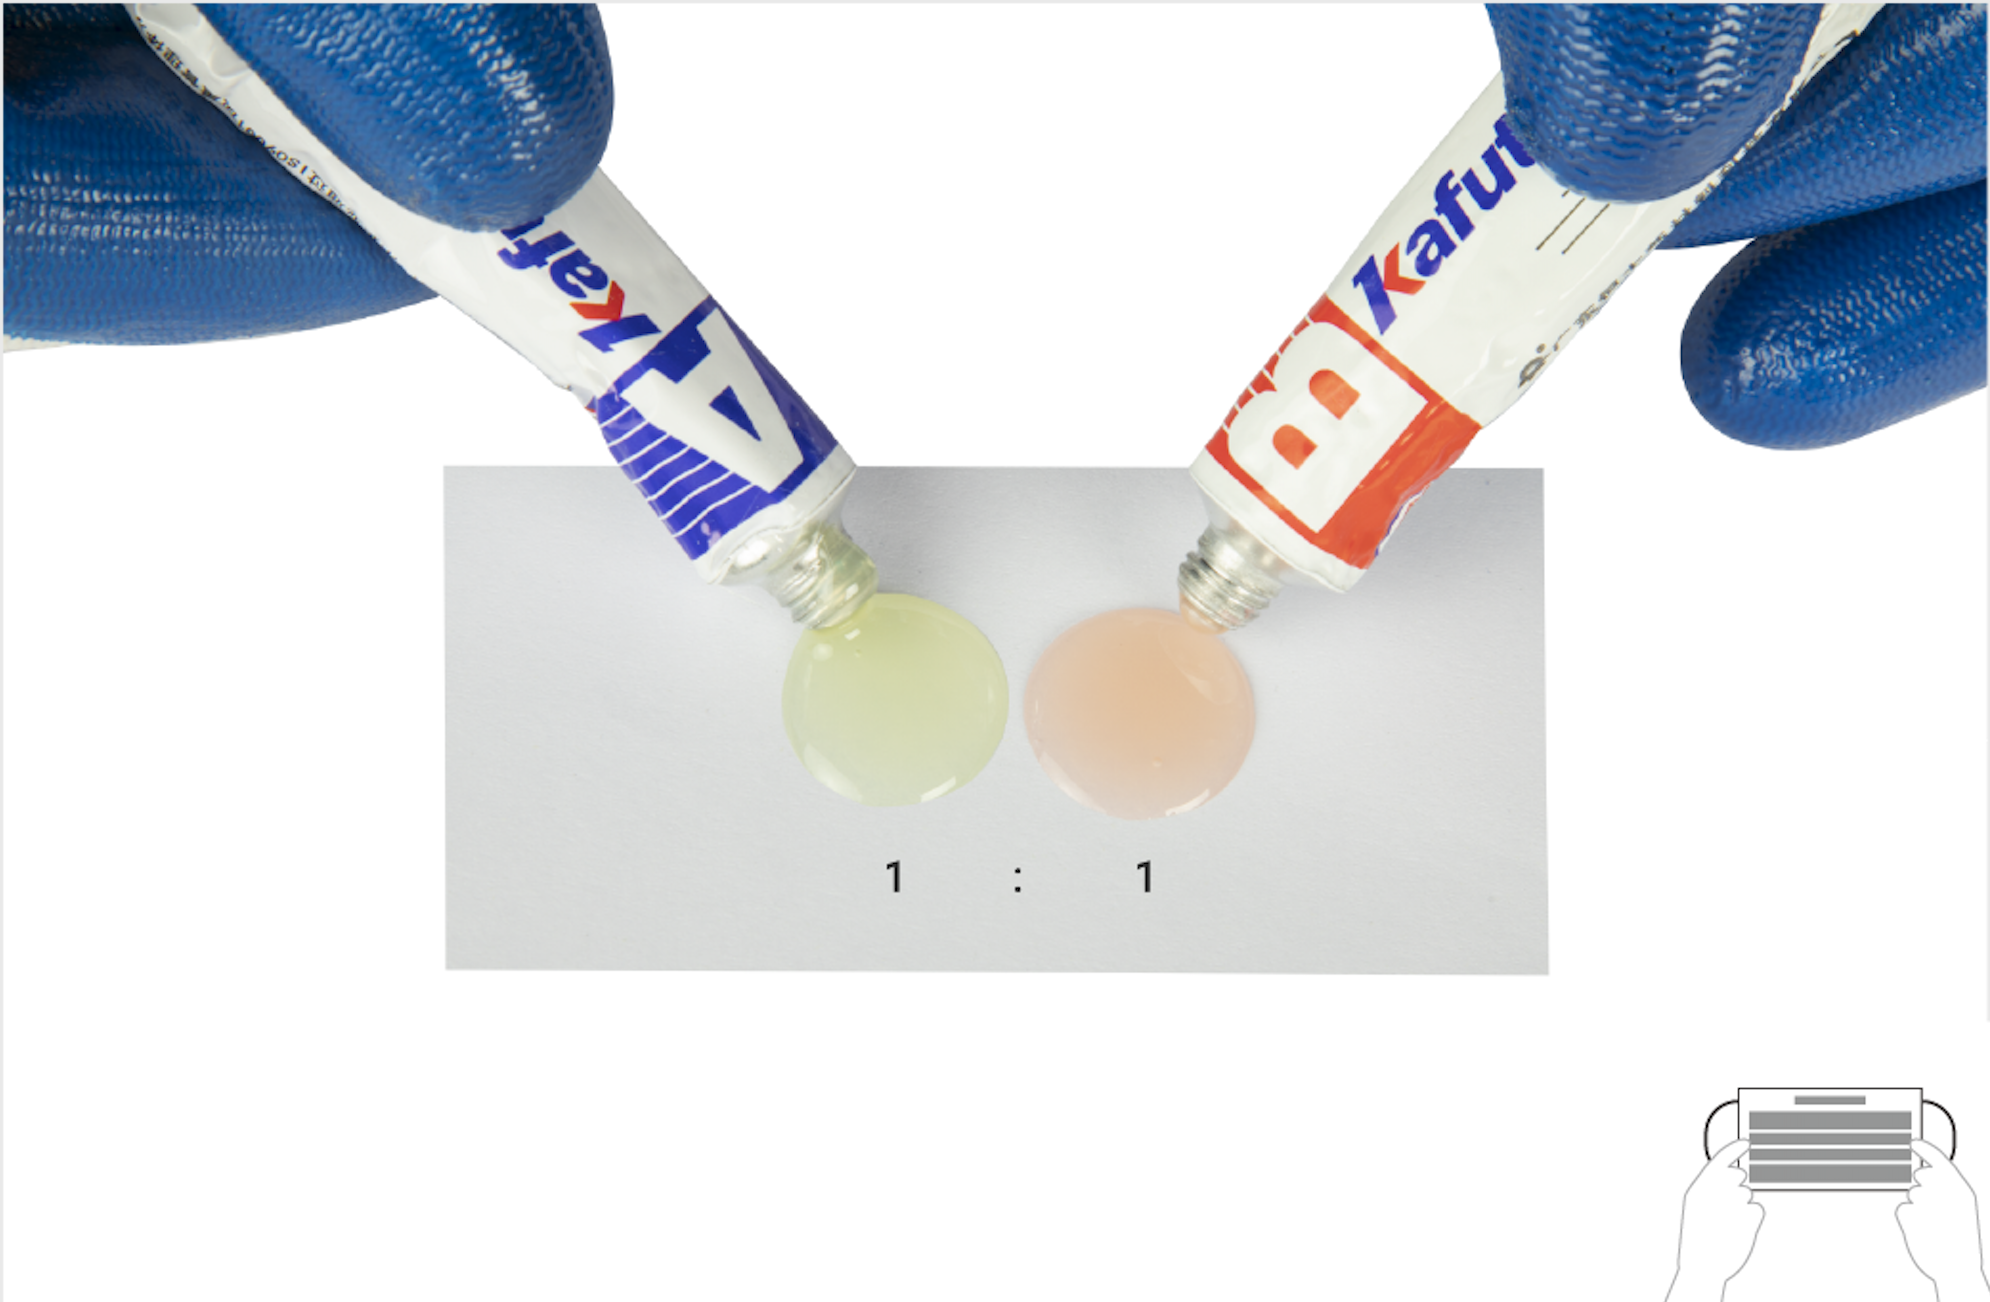
(3) Mix the A glue with the B glue using the red mixing stick, and stir them evenly.
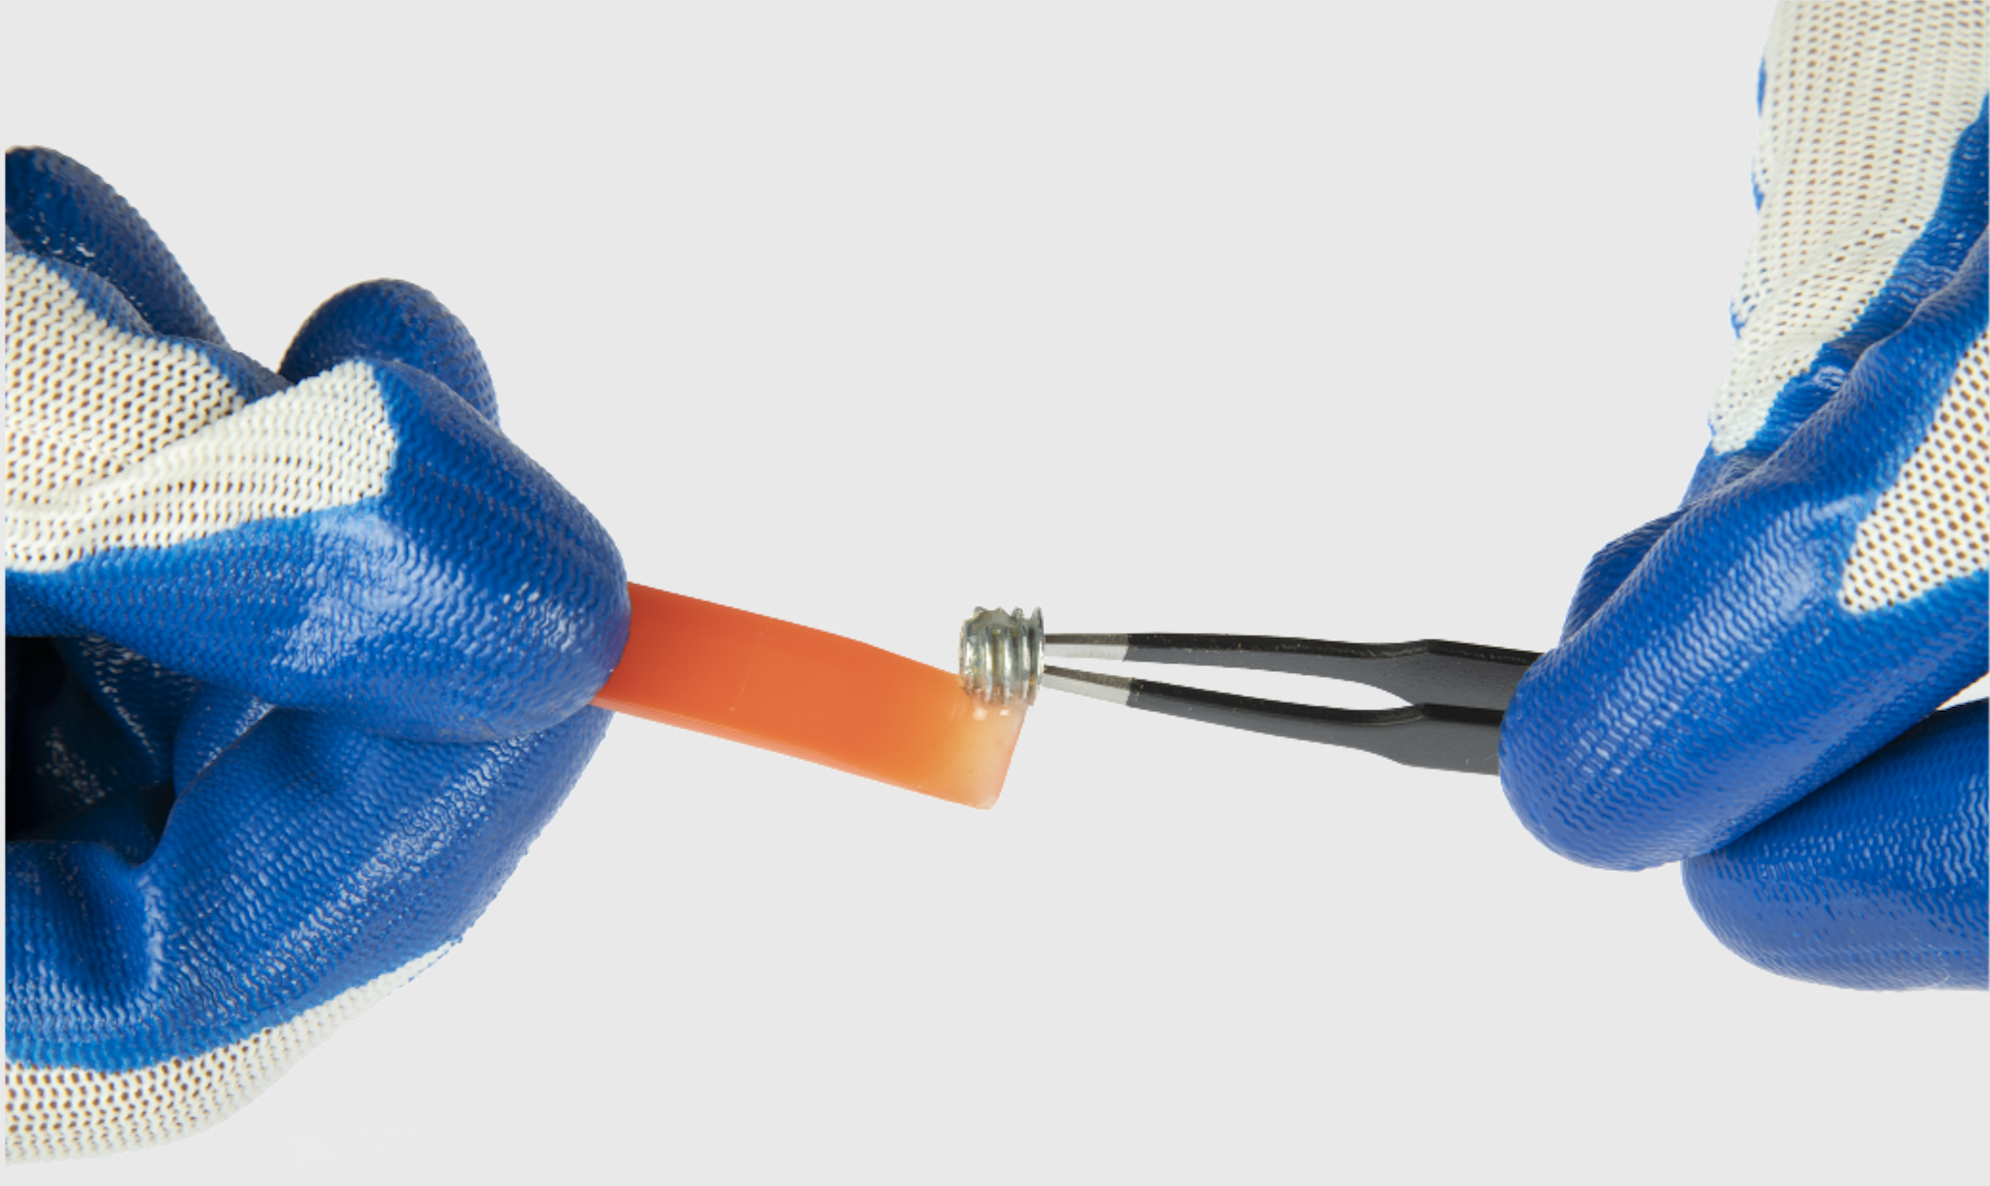
(4) Tweeze the nut out, and apply the mixed glue to the screw thread of the bottom of the nut.
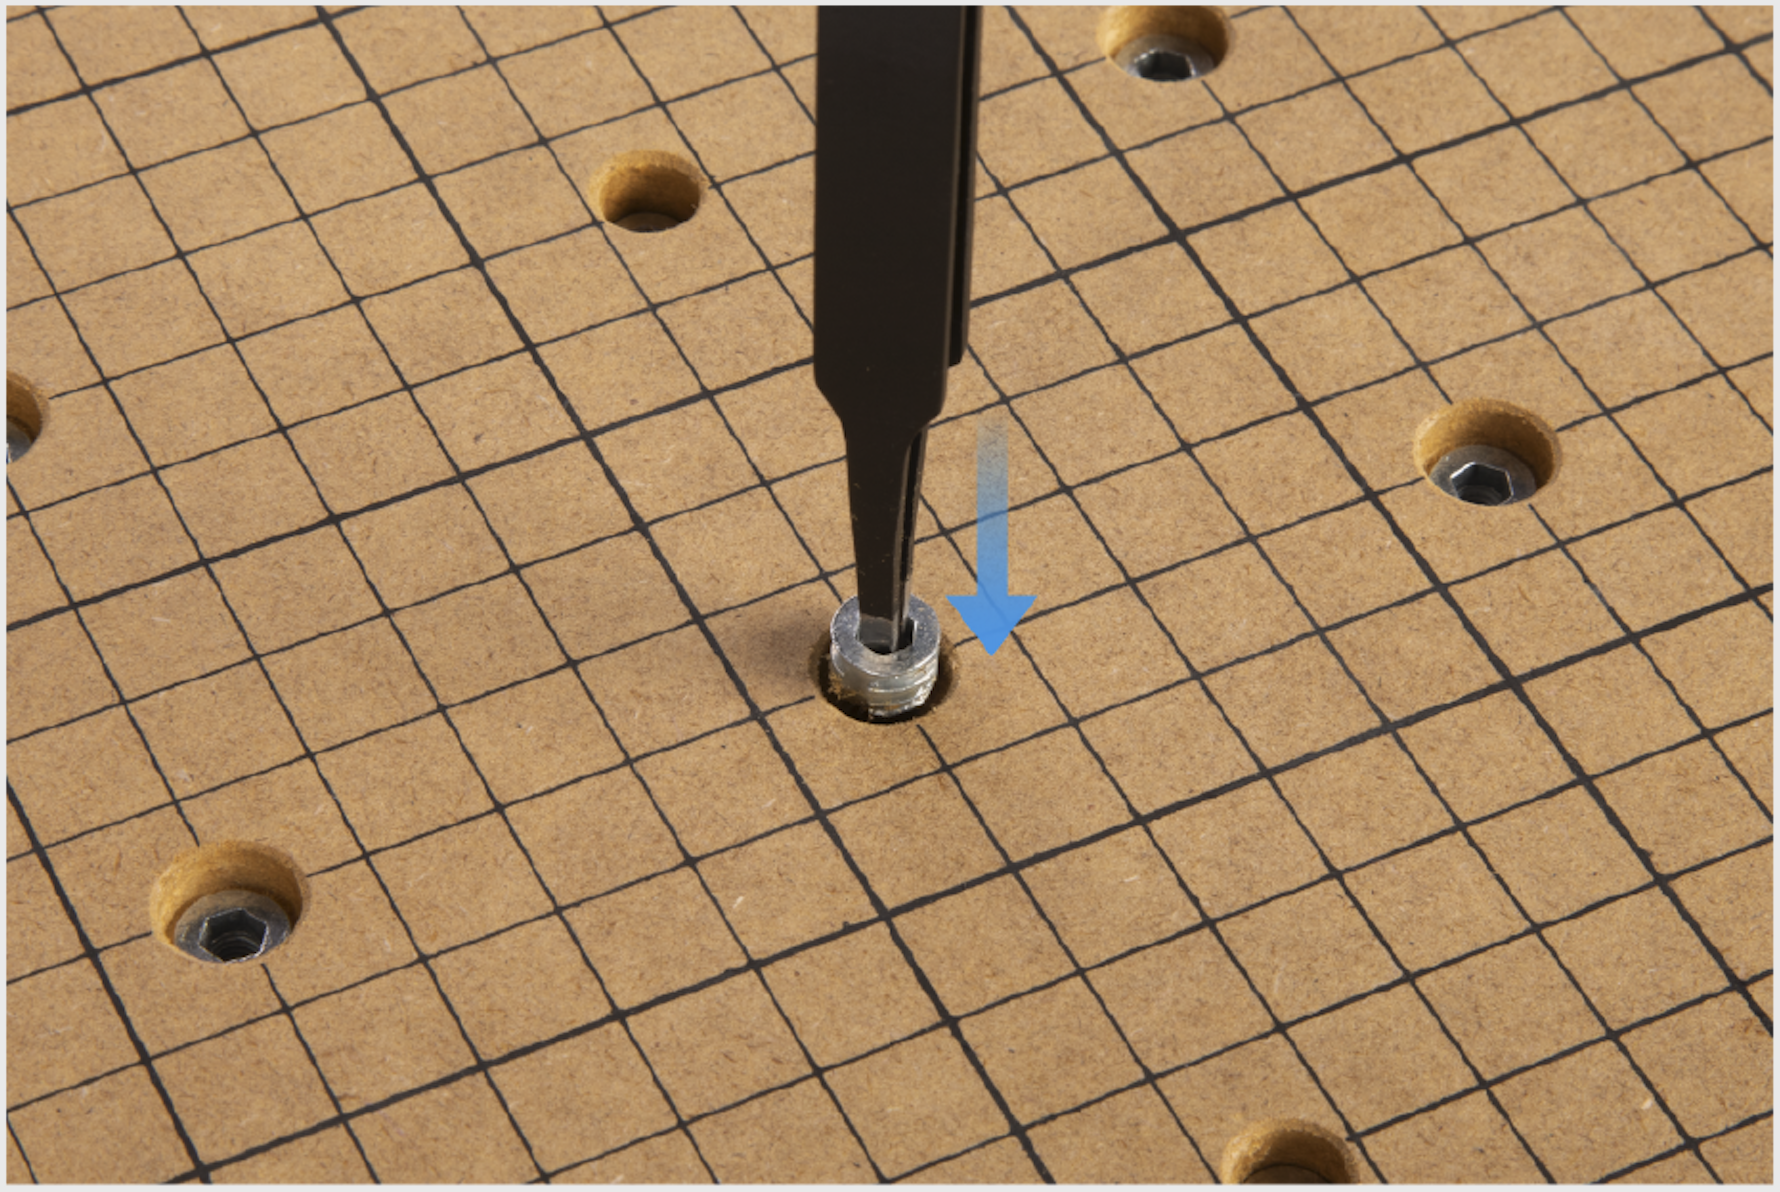
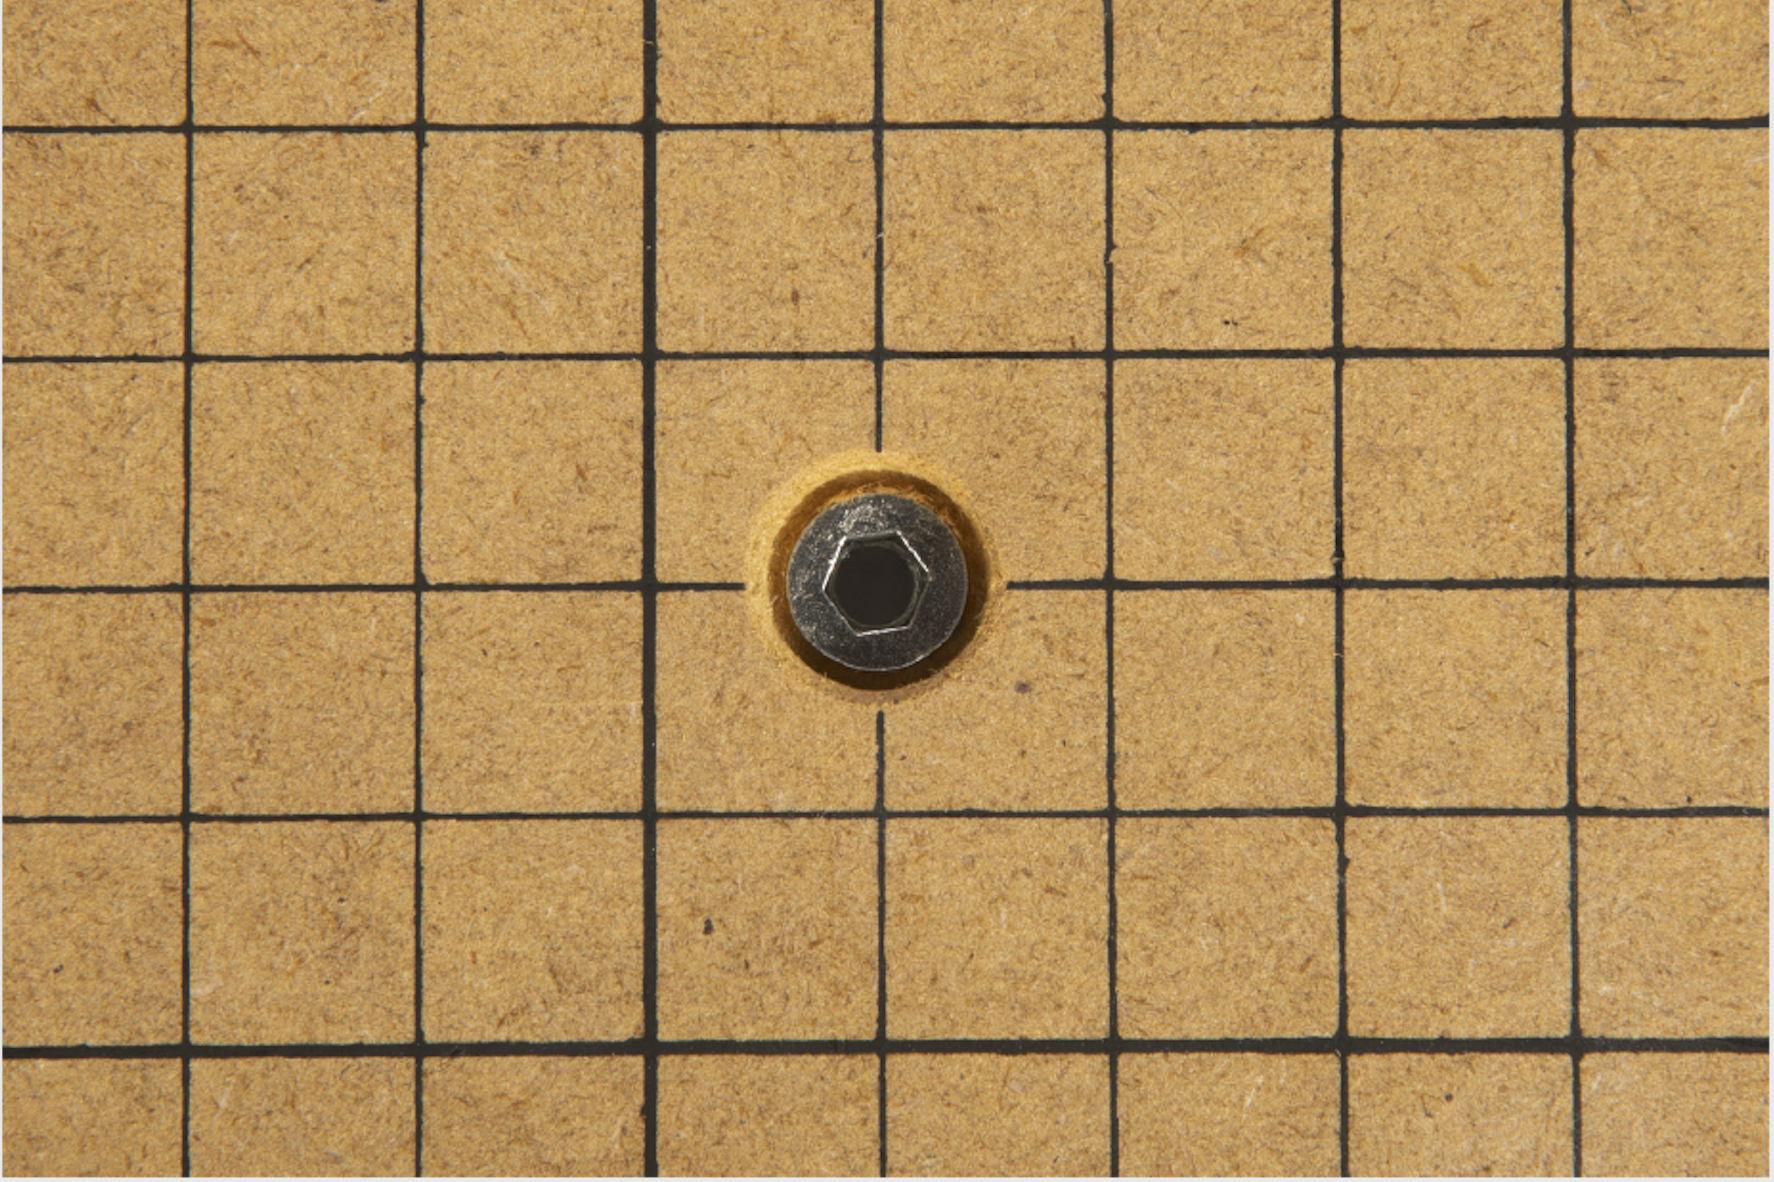
(5) Tweeze the nut back into the hole of the CNC Carving Platform, and press it for a while.
(6) Wait for at least 24 hours to ensure that the mixed glue is cured before reuse.
7.4 Every Three Months
To keep your CNC carver and Luban up to date, update your firmware and software every three months. For how to update, see Firmware and Software.