
4.1 Prepare the Material
Select the Material
To protect your safety as well as the environment, select the materials to be engraved and cut based on the following rules:
-
- Do not use inflammable and explosive materials;
- Do not use highly reflective materials;
- Ensure that the material will not produce hazardous and toxic fumes when being laser engraved or cut, or the produced fumes can be purified by your air purifier.
In addition, to ensure a high-quality engraving and cutting effect, the material needs to meet certain requirements in shape and size.
- Lists of Supported Materials
You can select materials from the supported lists provided by Snapmaker. Snapmaker screens and tests these materials to ensure that they are safe and can be engraved and cut by the 10W Laser Module.
If the material you use is not on the corresponding list, ensure that you know enough information about the material properties and take precautions against potential hazards that occur during laser engraving and cutting.
|
Supported Materials for Engraving |
Basswood, Pinewood, Plywood, Beech, Walnut, Bamboo, MDF, Painted Metal, Copper Clad Laminate, Tinplate, Stainless Steel, Anodized Aluminum, Dark Glass, Slate, Brick, Ceramic, Jade, Marble, Shale, Leather, Fabric, Canvas, Corrugated Paper, Cardboard, Plastic, Dark Acrylic (Blue excluded), etc. |
|
Supported Materials for Cutting |
Basswood, Pinewood, Plywood, Beech, Walnut, Bamboo, MDF, Leather, Fabric, Canvas, Corrugated Paper, Cardboard, Plastic, Dark Acrylic (Blue excluded), etc. |
- Shape
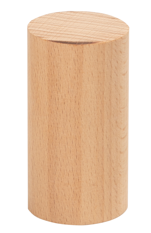
The 10W Laser Module engraves and cuts materials with a fixed focal length. To ensure a consistent effect, we recommend you use a cylindrical material.
- Size
The material size should not exceed the work area of the Rotary Module. The maximum material size the Rotary Module can clamp varies with the compatible machine models of the Rotary Module.
|
Machine Models |
Maximum Material Diameter |
Maximum Material Length |
|
Rotary Module (A350/A350T/F350) |
136 mm |
170 mm |
|
Rotary Module (A250/A250T/F250) |
136 mm |
70 mm |
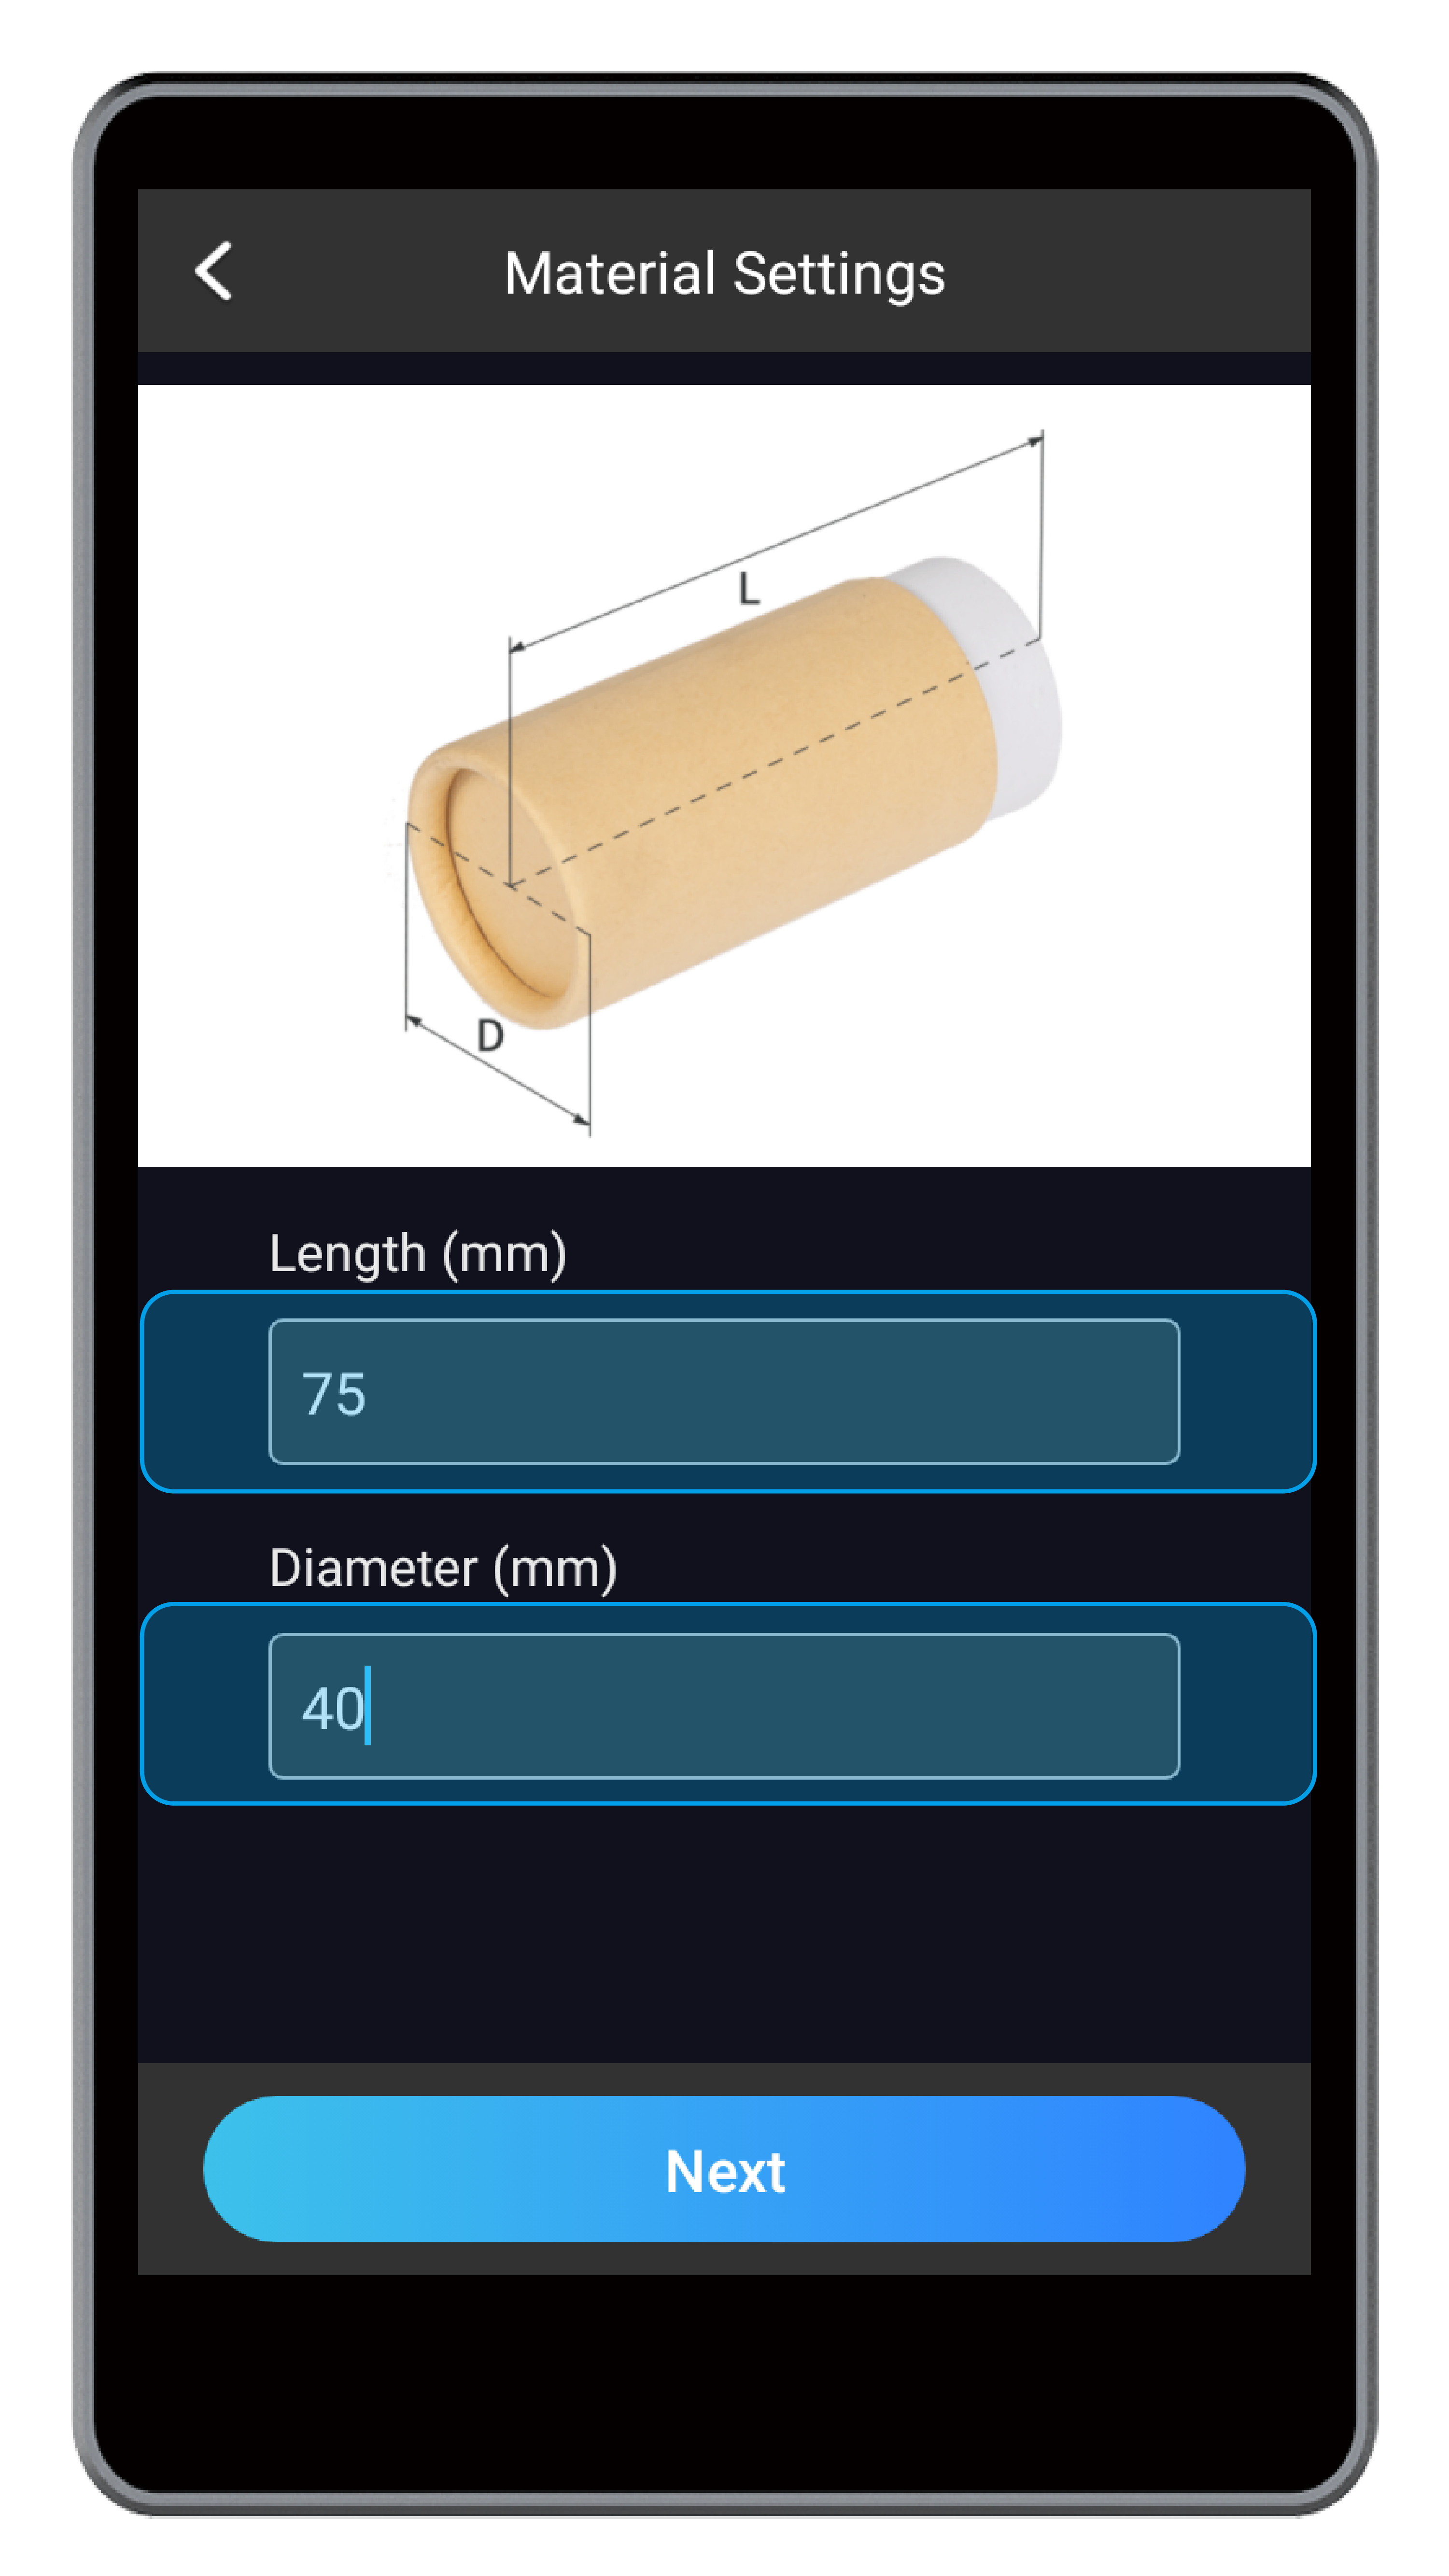
Measure the Material Size
After you select a proper material, you need to measure its diameter and length, which are necessities in the subsequent operations, including Prepare the G-code File and Start Engraving and Cutting.
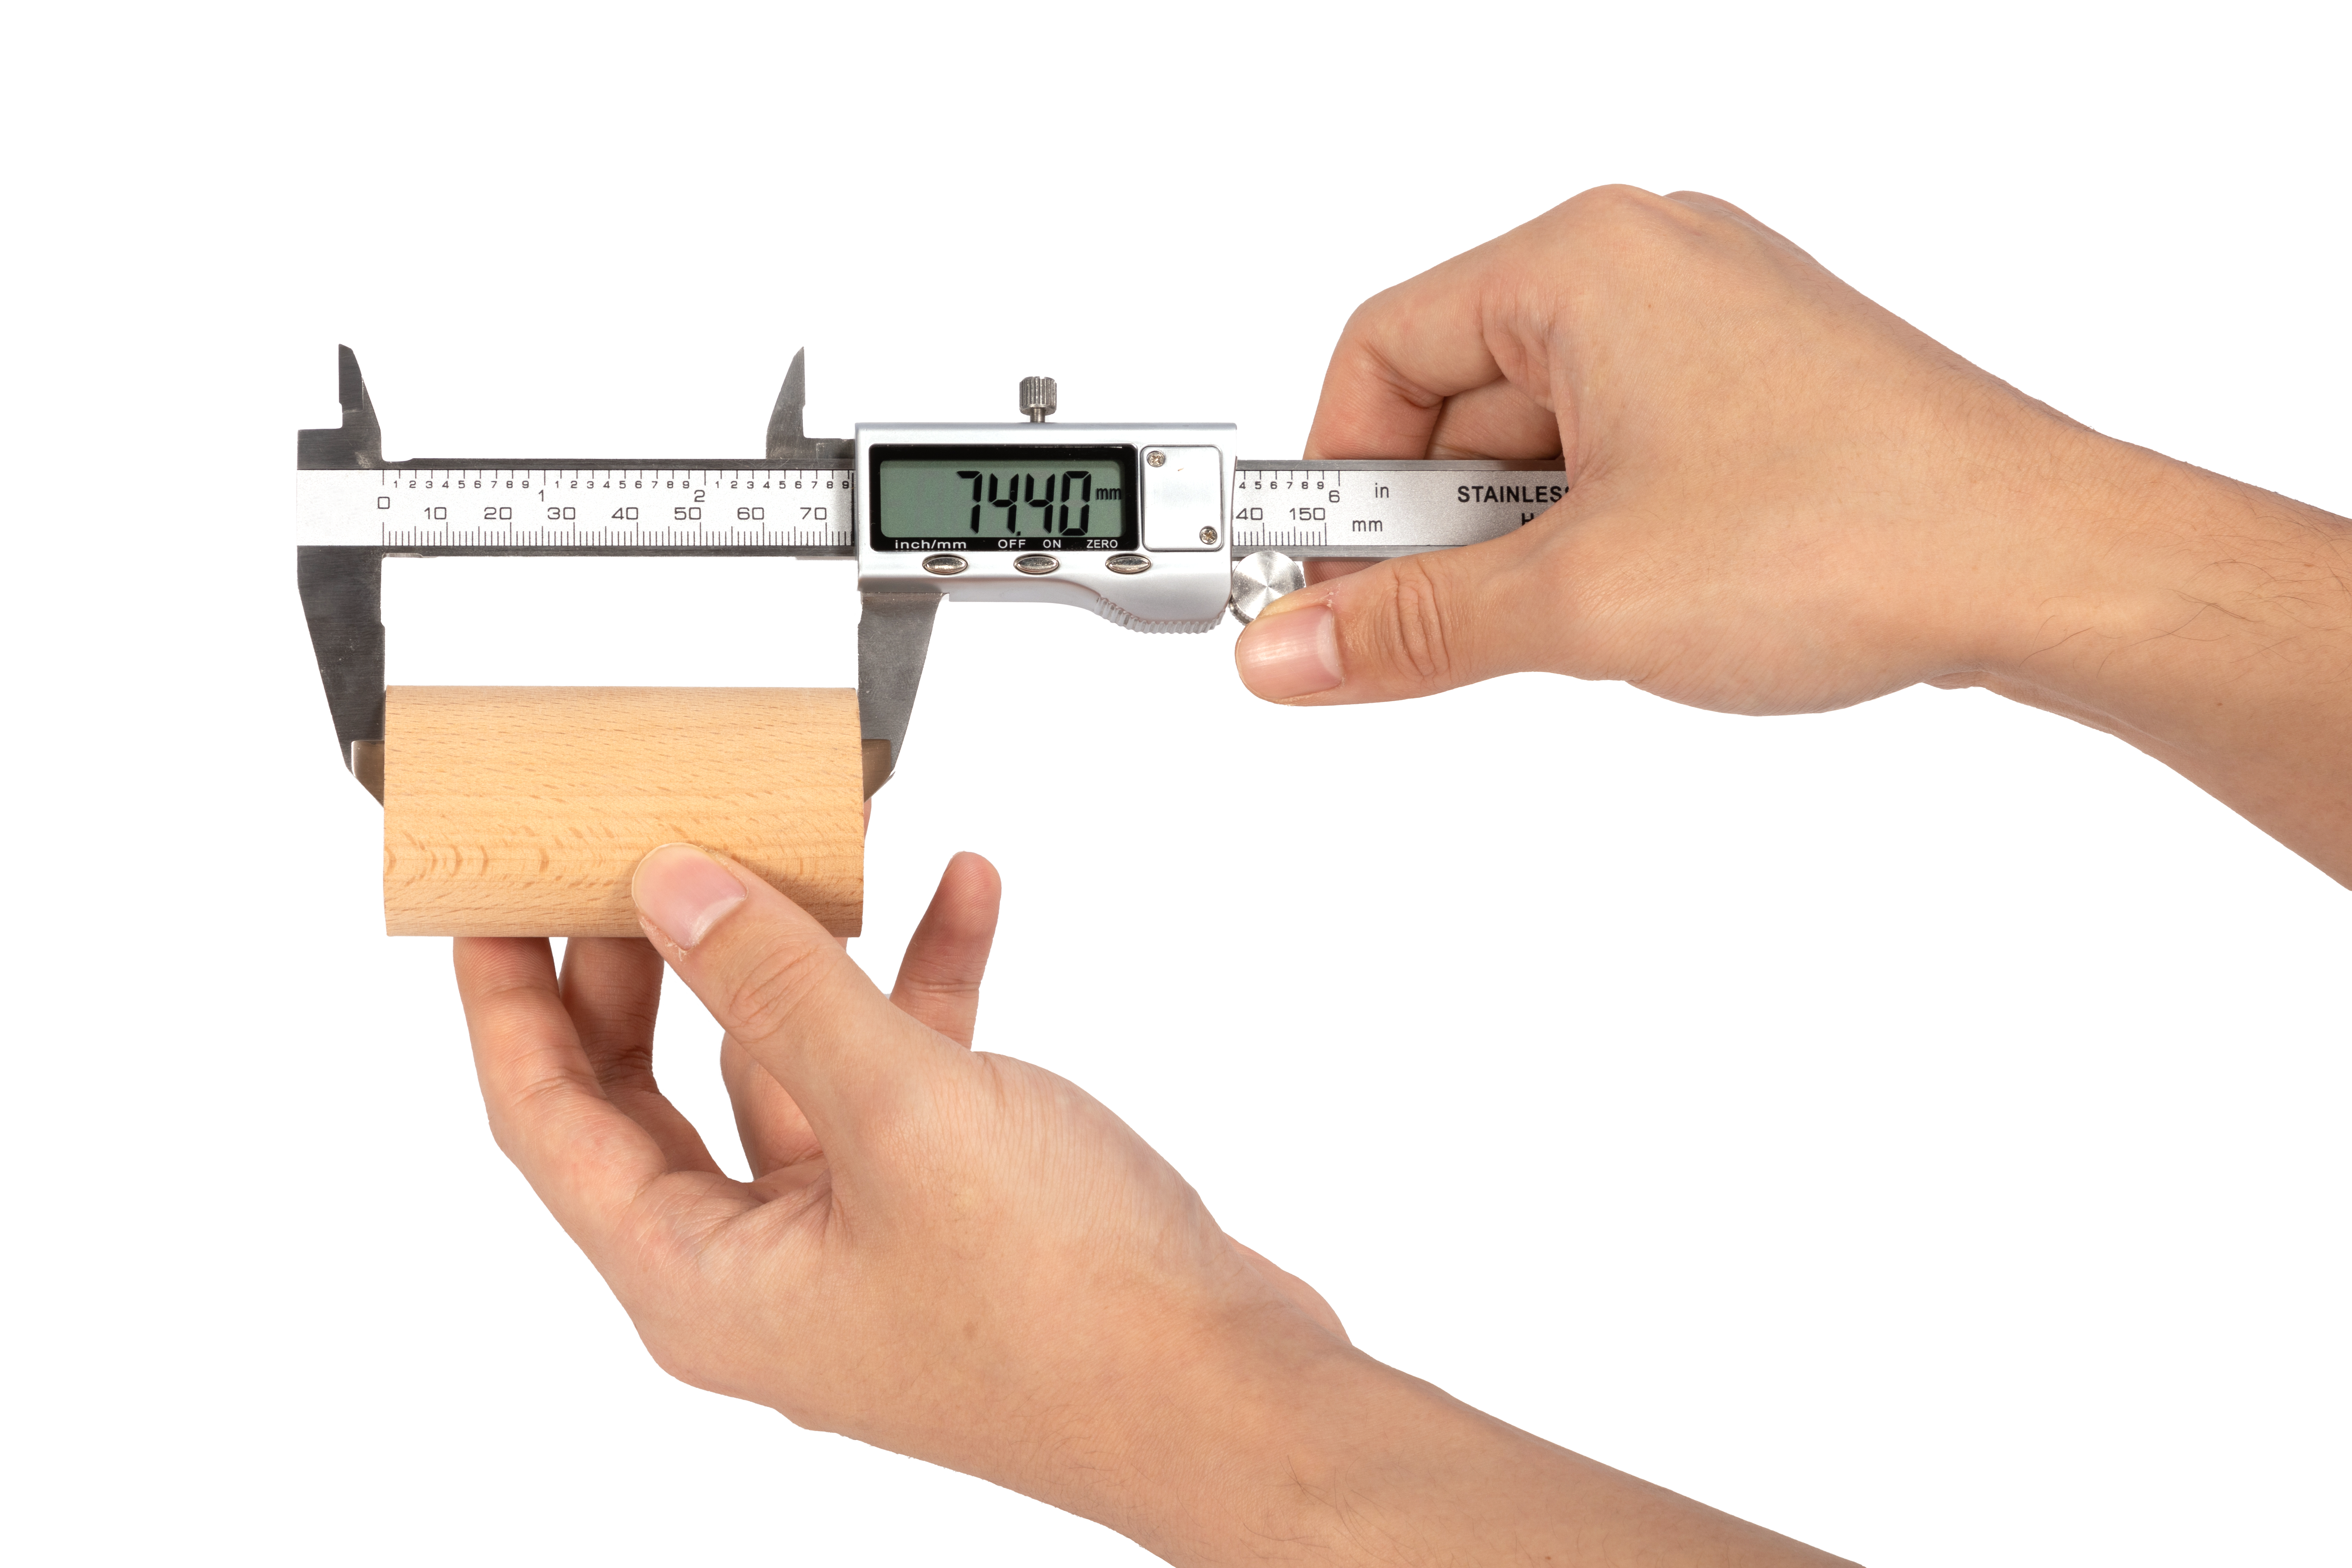
We recommend you use a vernier caliper to measure the material size.
When measuring the diameter, use the main jaws of the vernier caliper to clamp one side of the material. Measure the straight line segment that passes through the center of the bottom circle.

When measuring the material length, use the main jaws of the vernier caliper to clamp the left and the right sides of the material. Ensure that there is no gap between the jaws and the material surface.
4.2 Prepare the G-code File
How It Works: Canvas
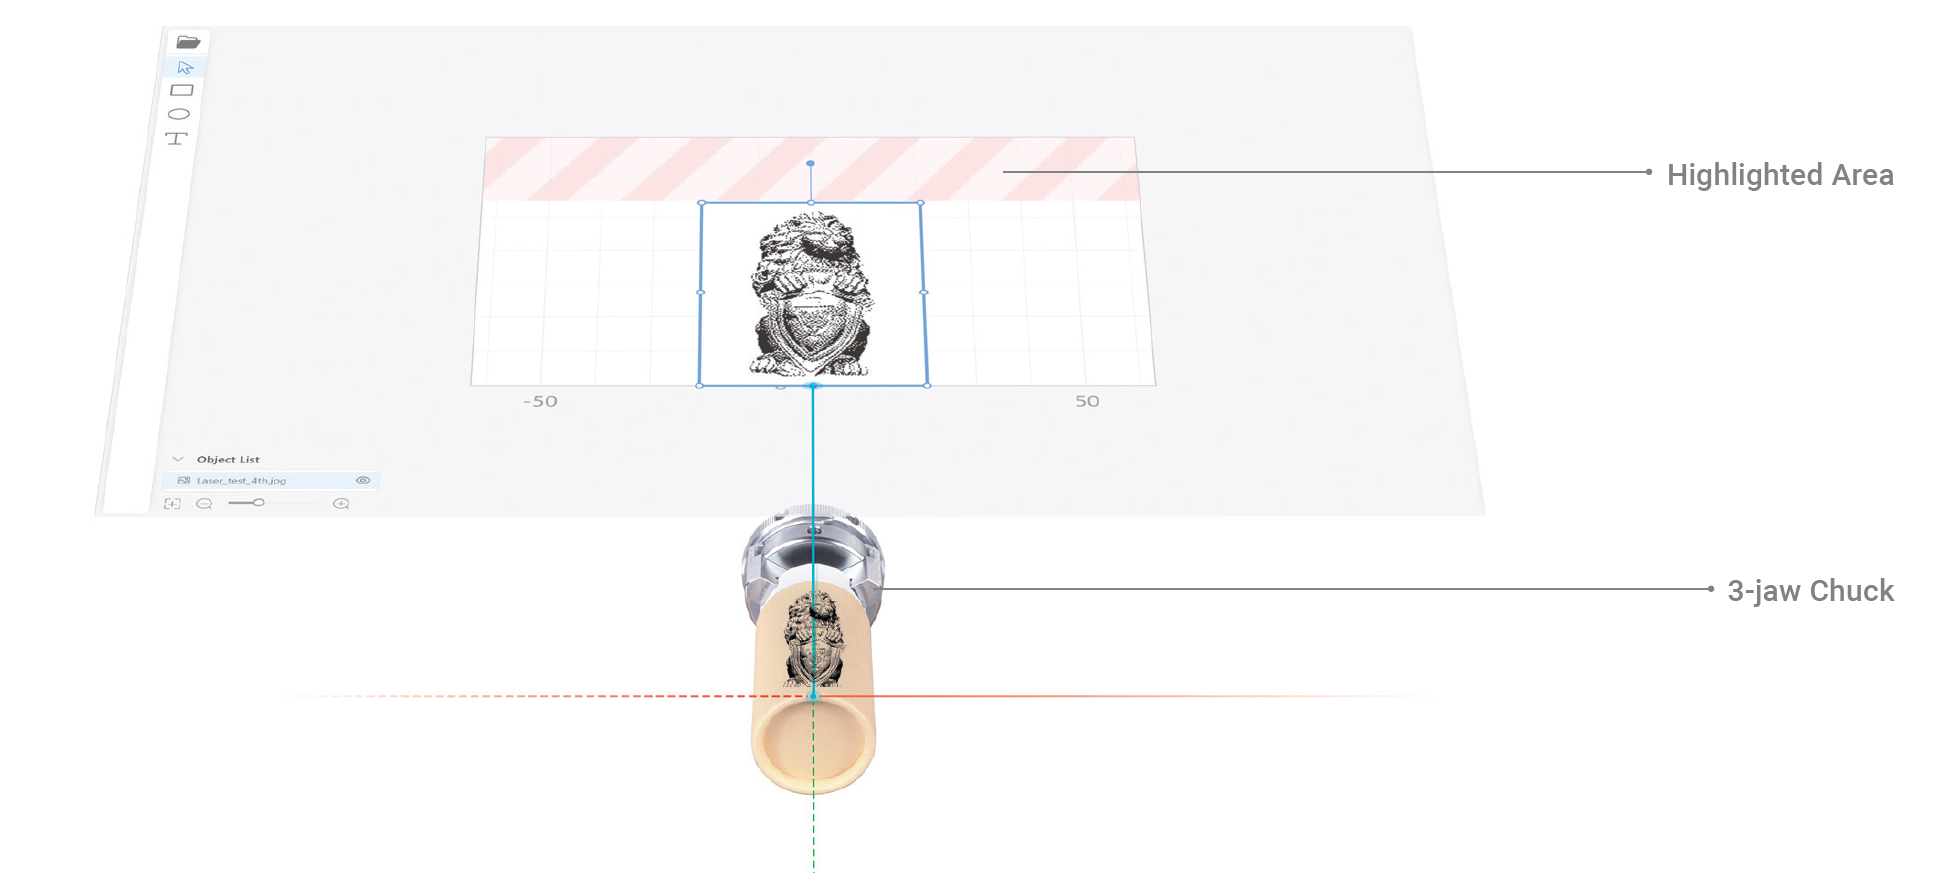
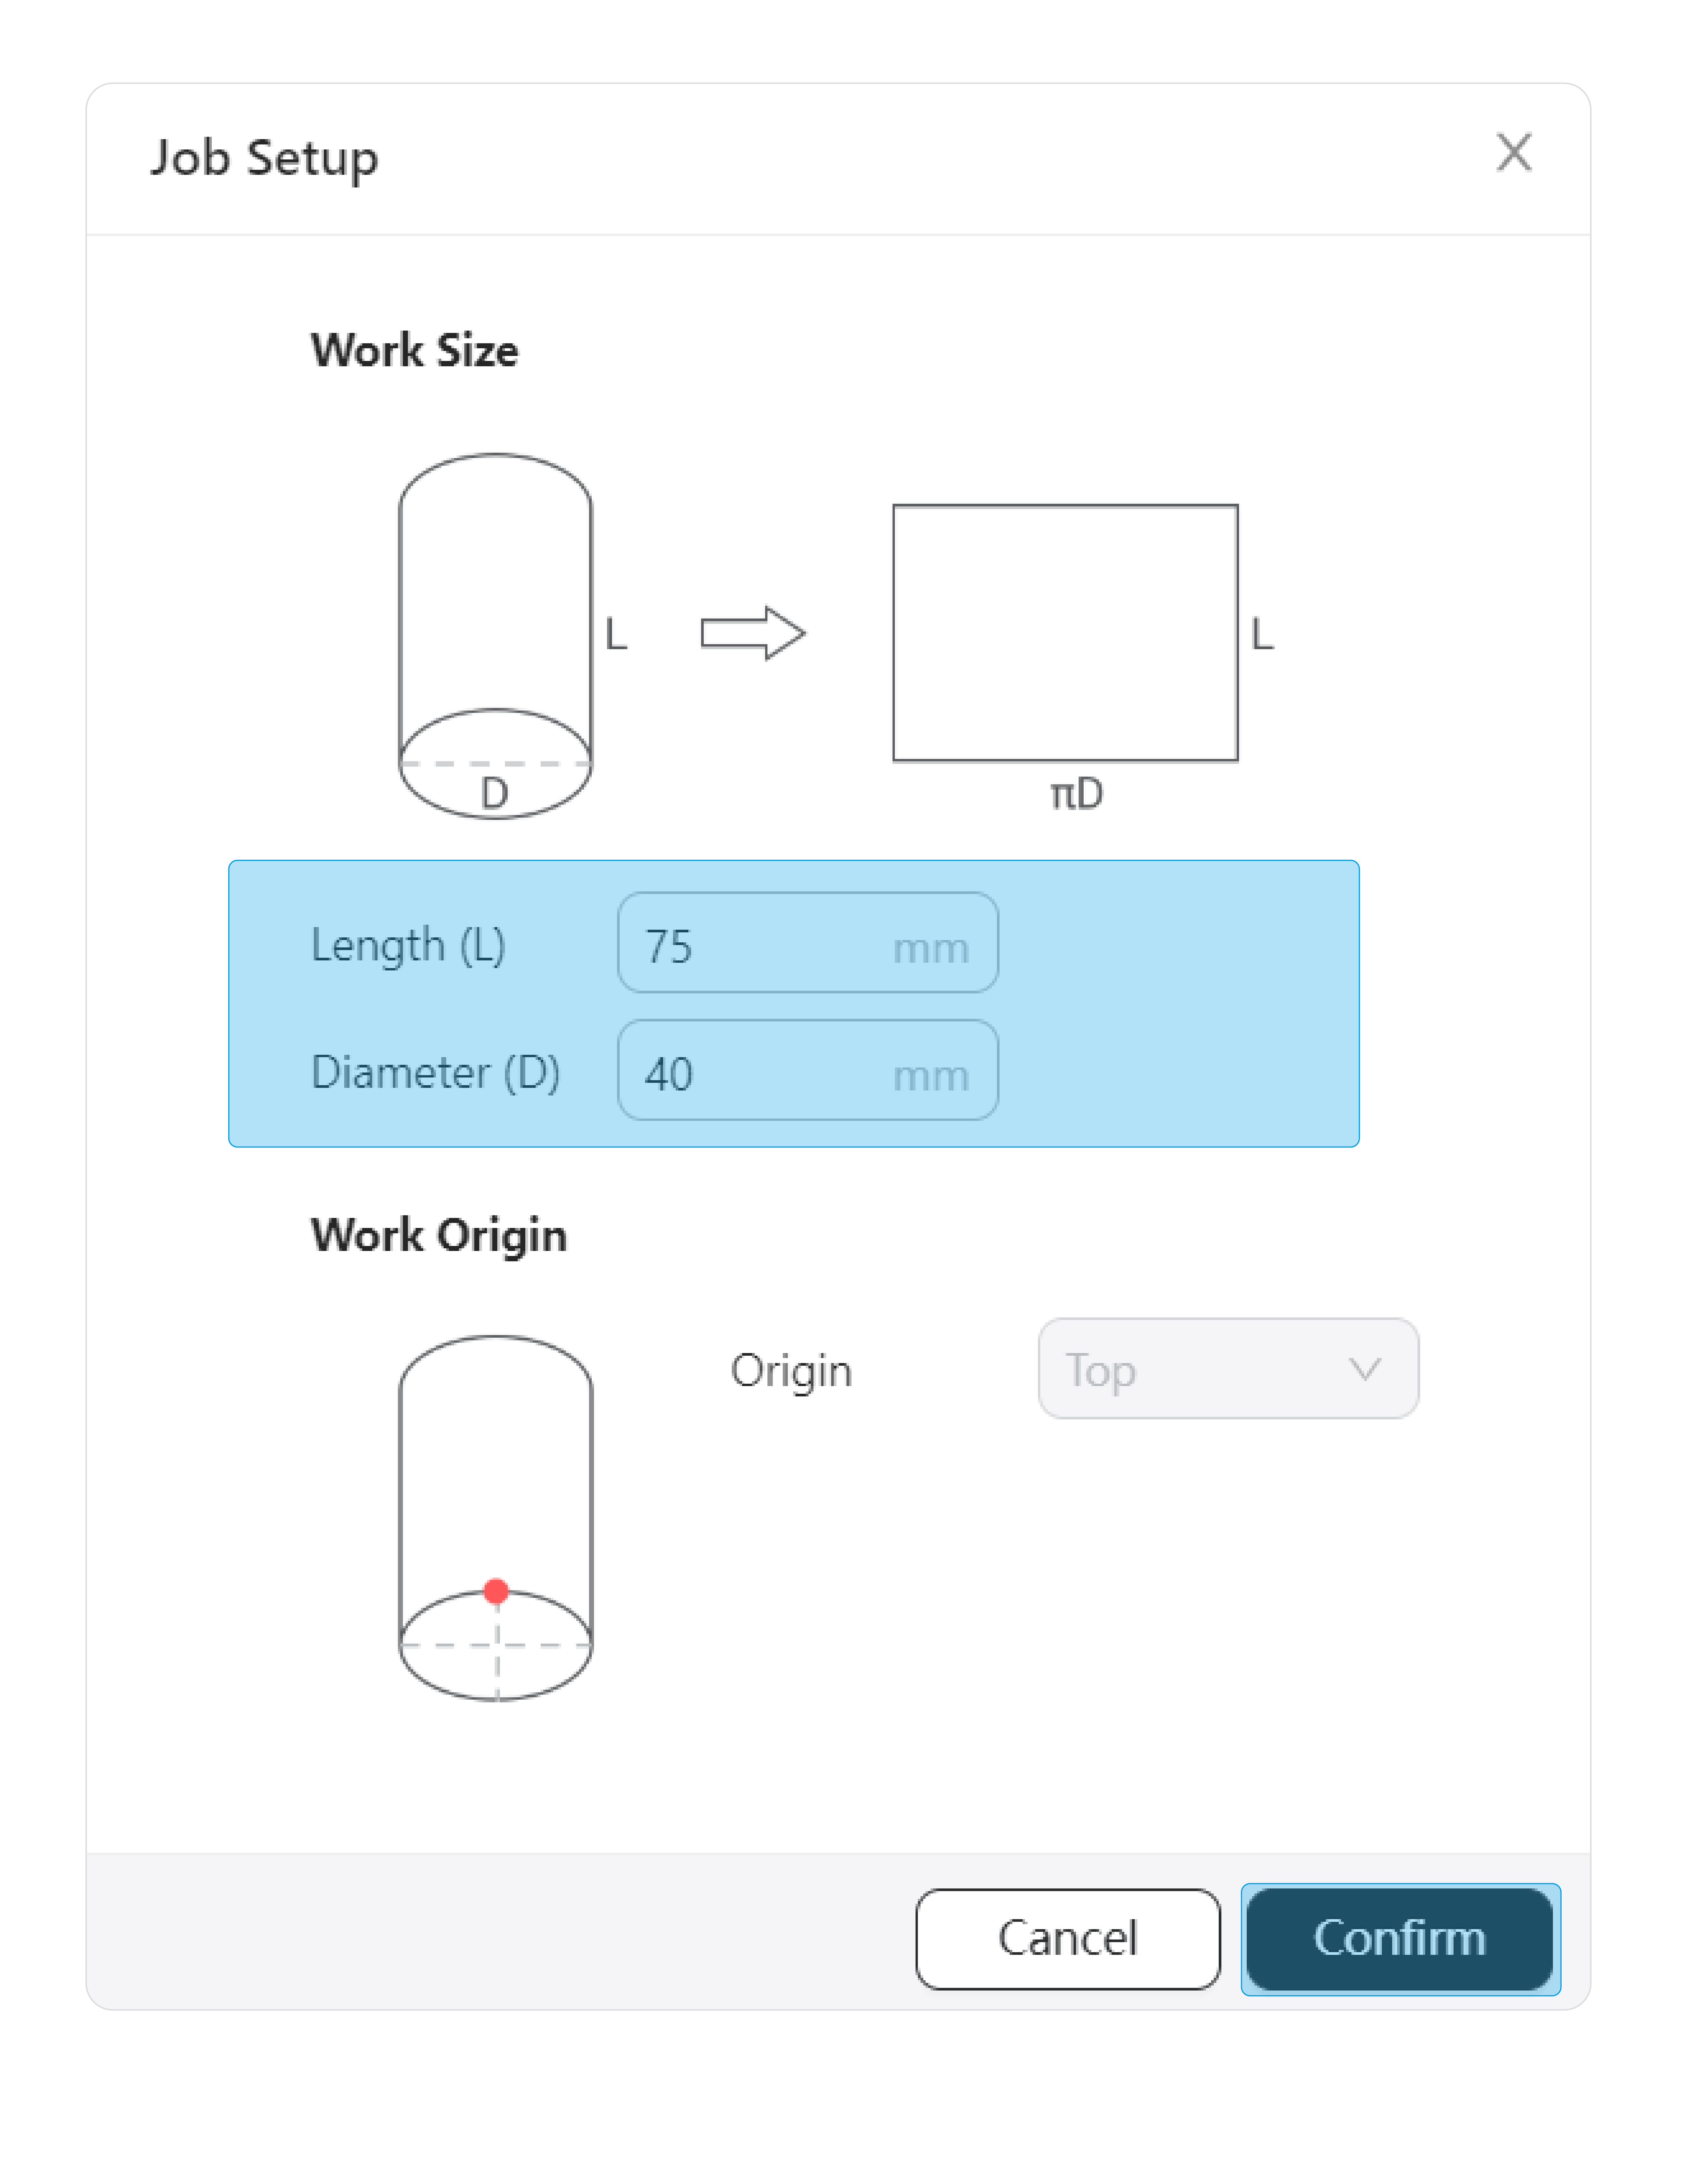
The canvas in the Luban equals the lateral area of your material. After you input the diameter and length of your material, Luban will adjust the size of the canvas. You should put your object within the canvas. The highlighted area is where the material is clamped by the 3-jaw Chuck.
Generate the G-code File
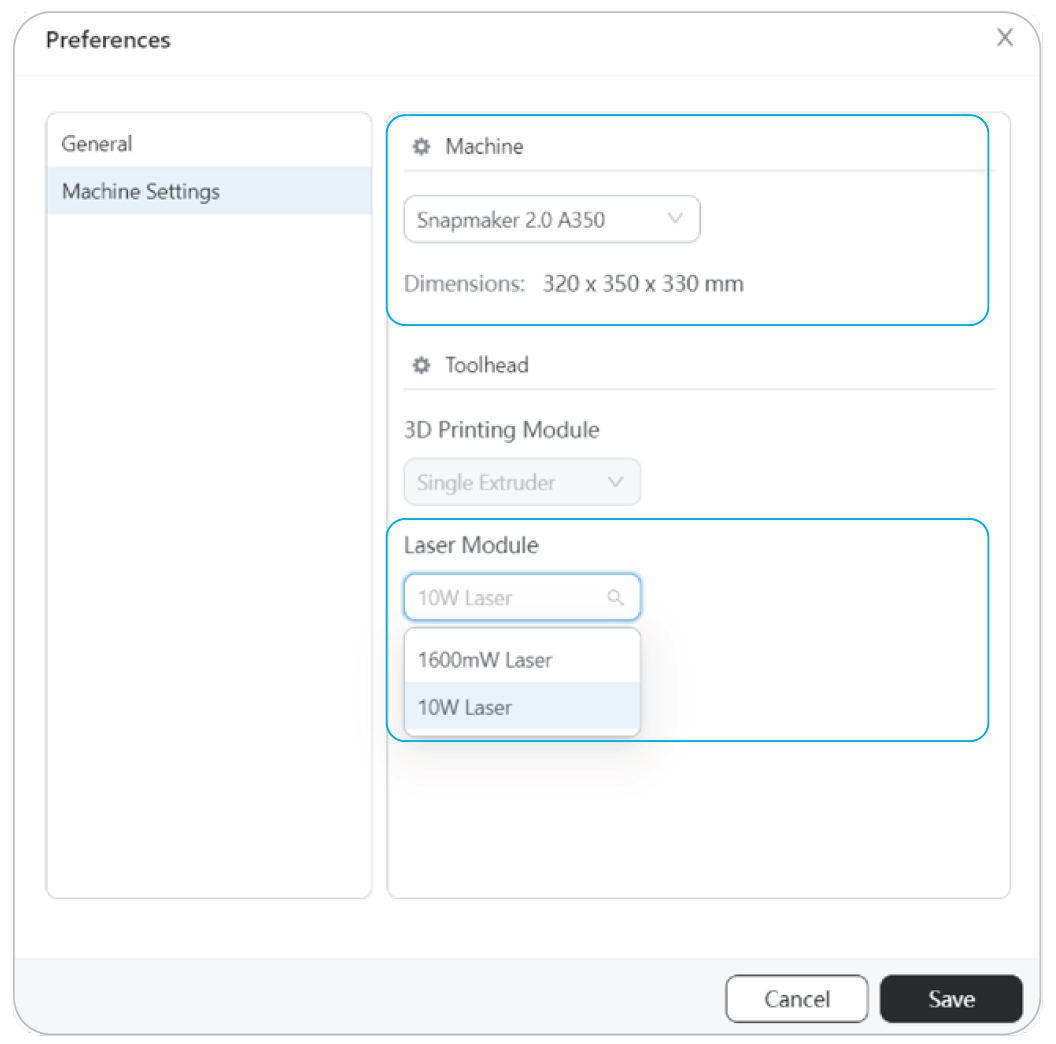
(1) On your computer, open Luban. On the menu bar, select Settings > Machine Settings to open the Preferences pop-up window. Select the machine model and the type of the Laser Module, and click Save.
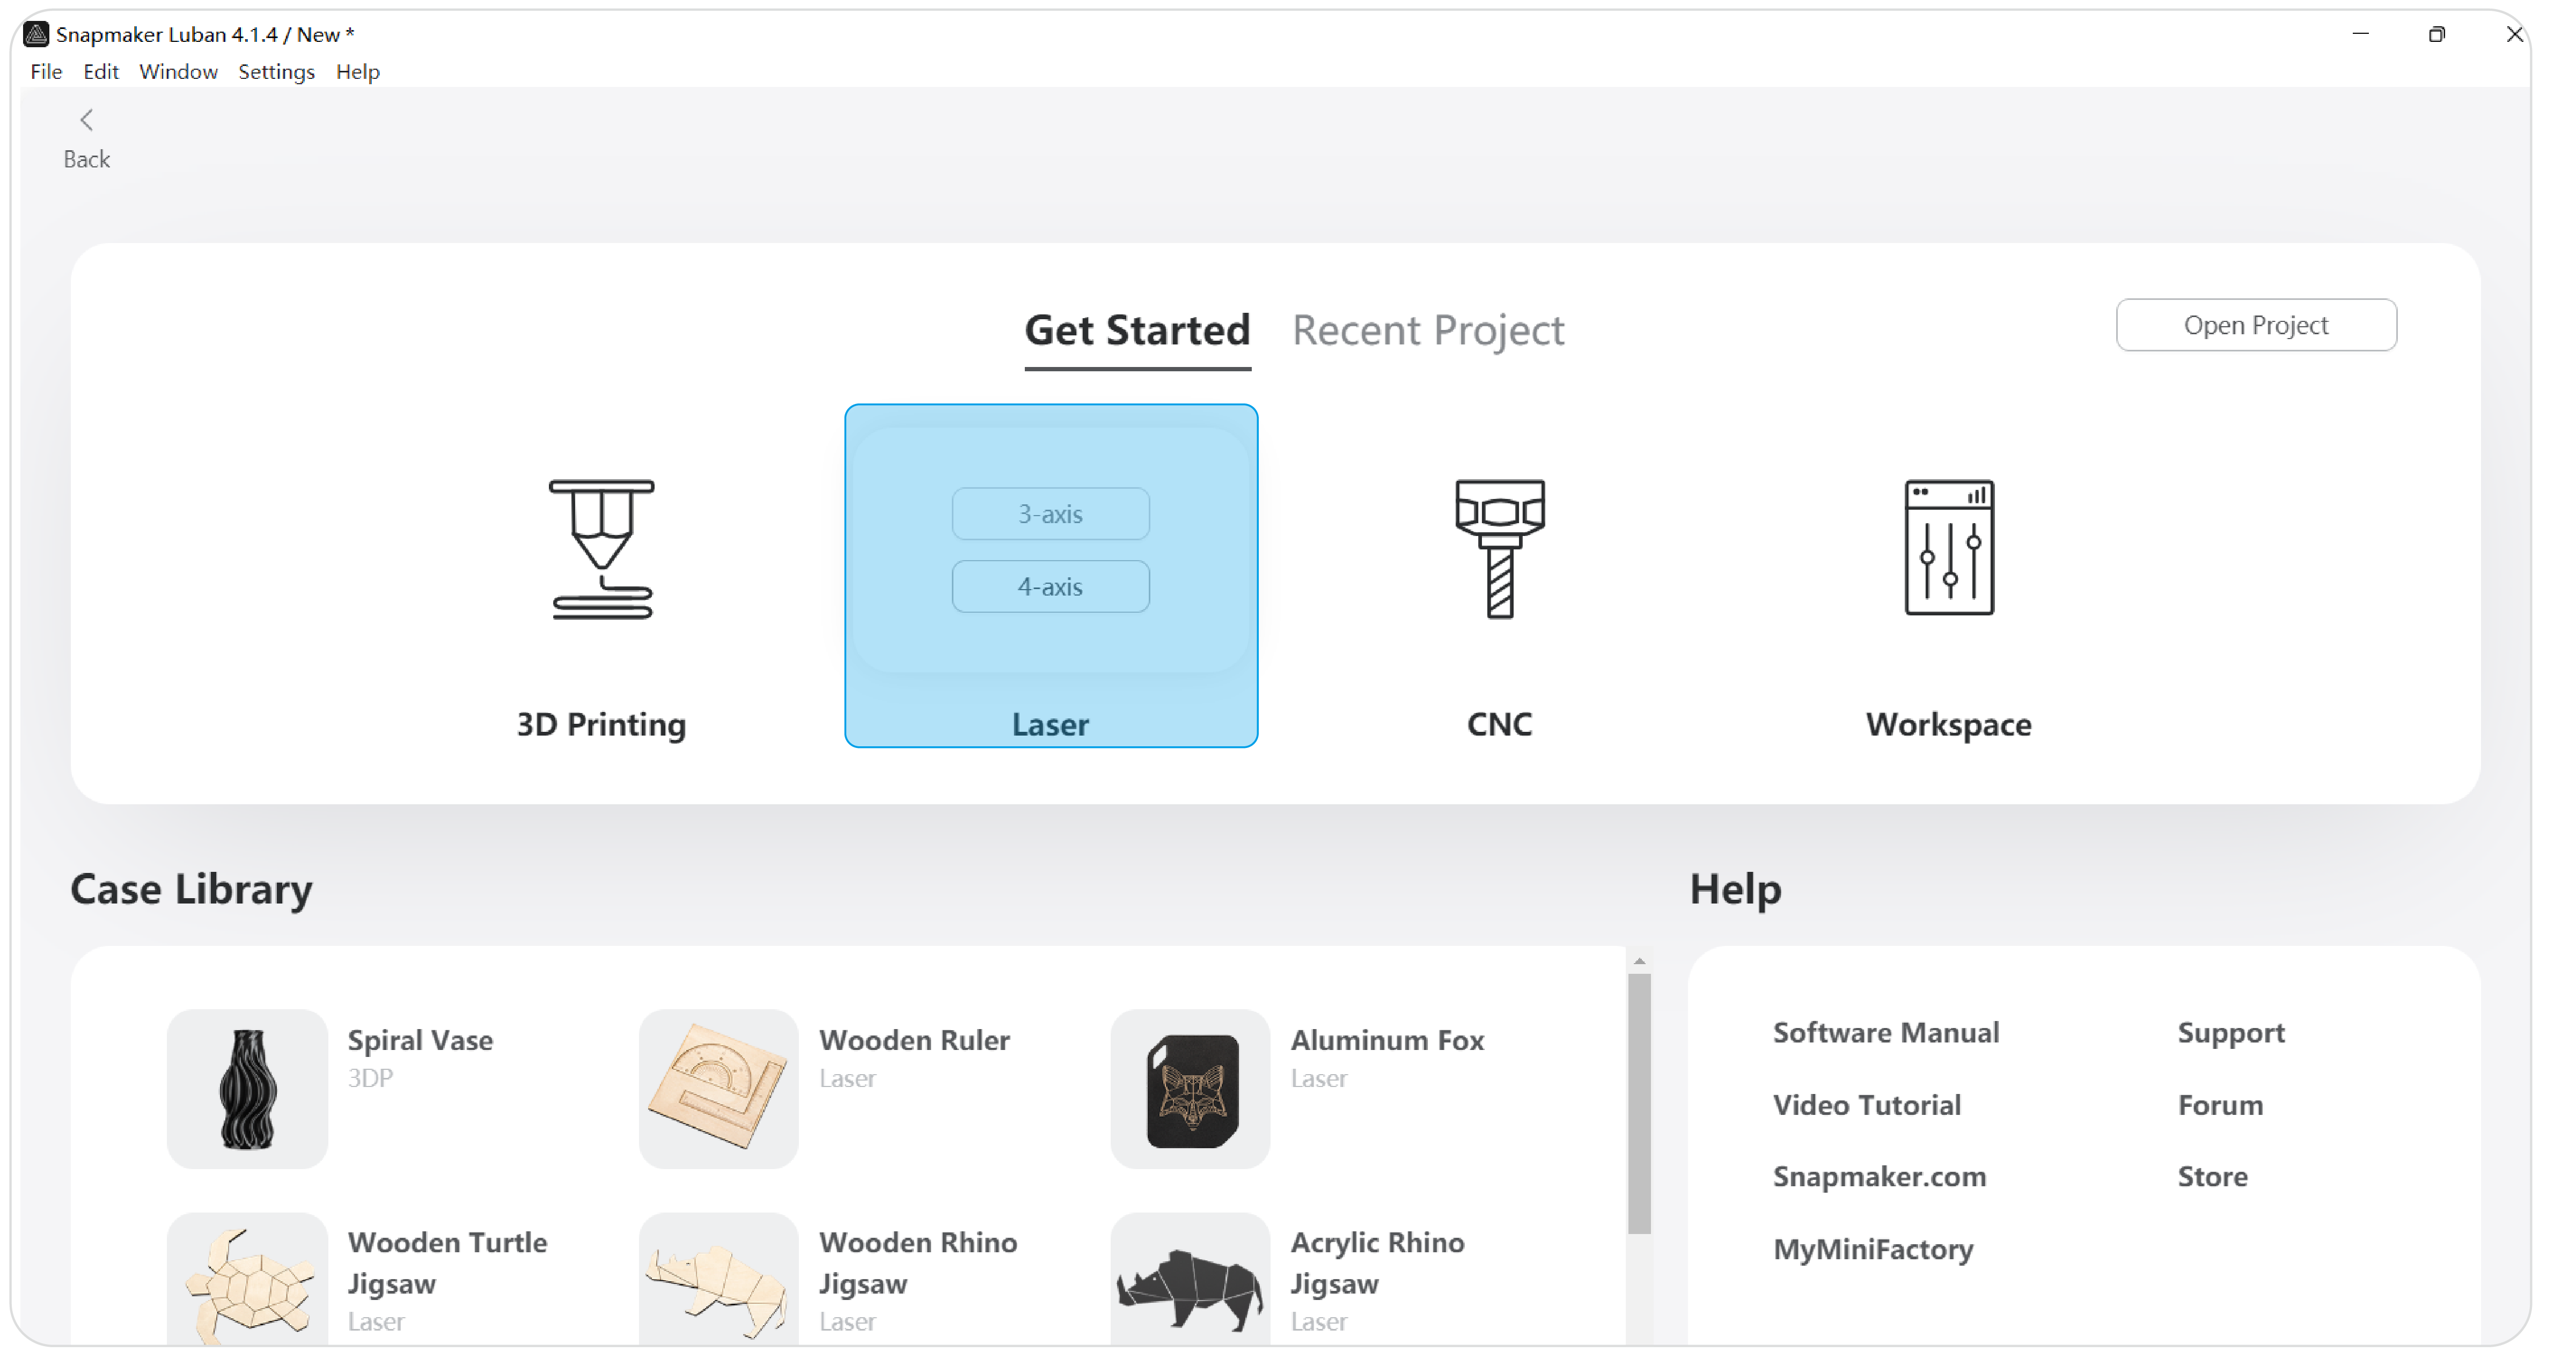
(2) On the Home page of Luban, select Laser > 4-axis to enter the Laser G-code Generator ![]() .
.
(3) On the Job Setup pop-up window, input the length and diameter of your material and click Confirm.
(4) On the left toolbar, click  to import an object file from your computer and add it to the canvas.
![]() Currently, the Laser G-code Generator of Luban can process the following file formats: .svg, .png, .jpeg, .jpg, .bmp, and .dxf.
Currently, the Laser G-code Generator of Luban can process the following file formats: .svg, .png, .jpeg, .jpg, .bmp, and .dxf.
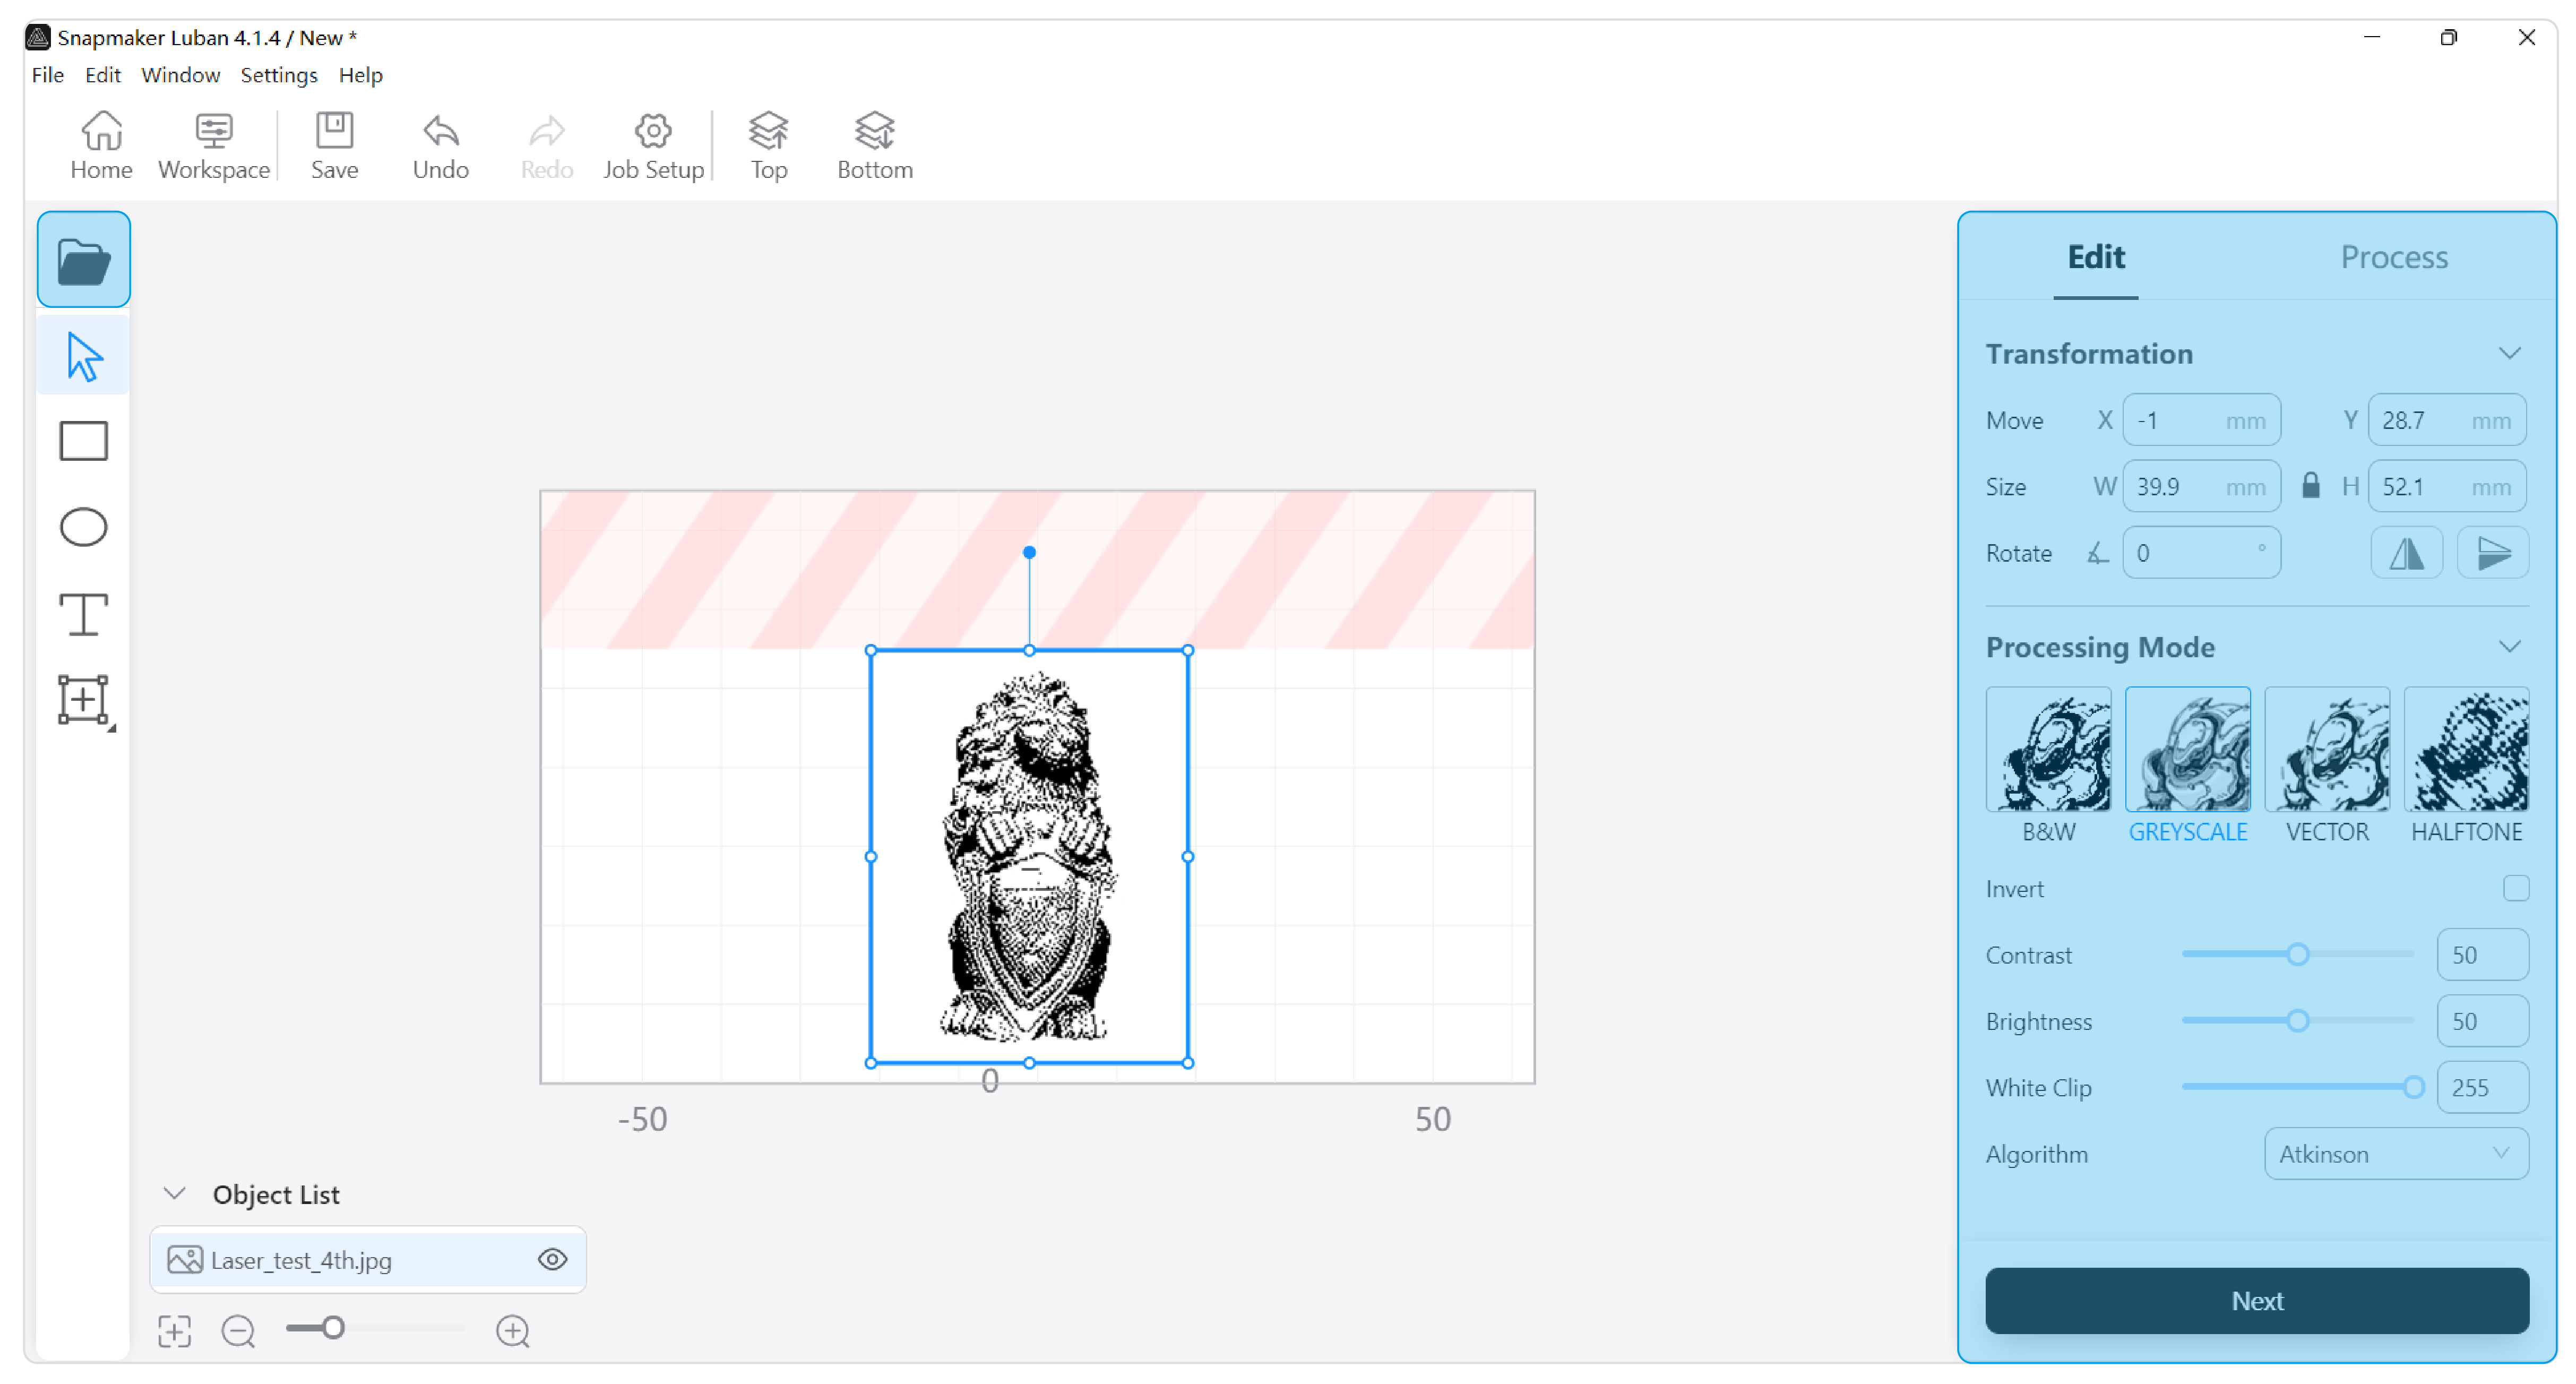
(5) On the object list, click to select the object. On the Edit panel to the right of the canvas, you can set the position, size, rotation angle, and processing mode for the object. After you finish editing, click Next to enter the Process panel.
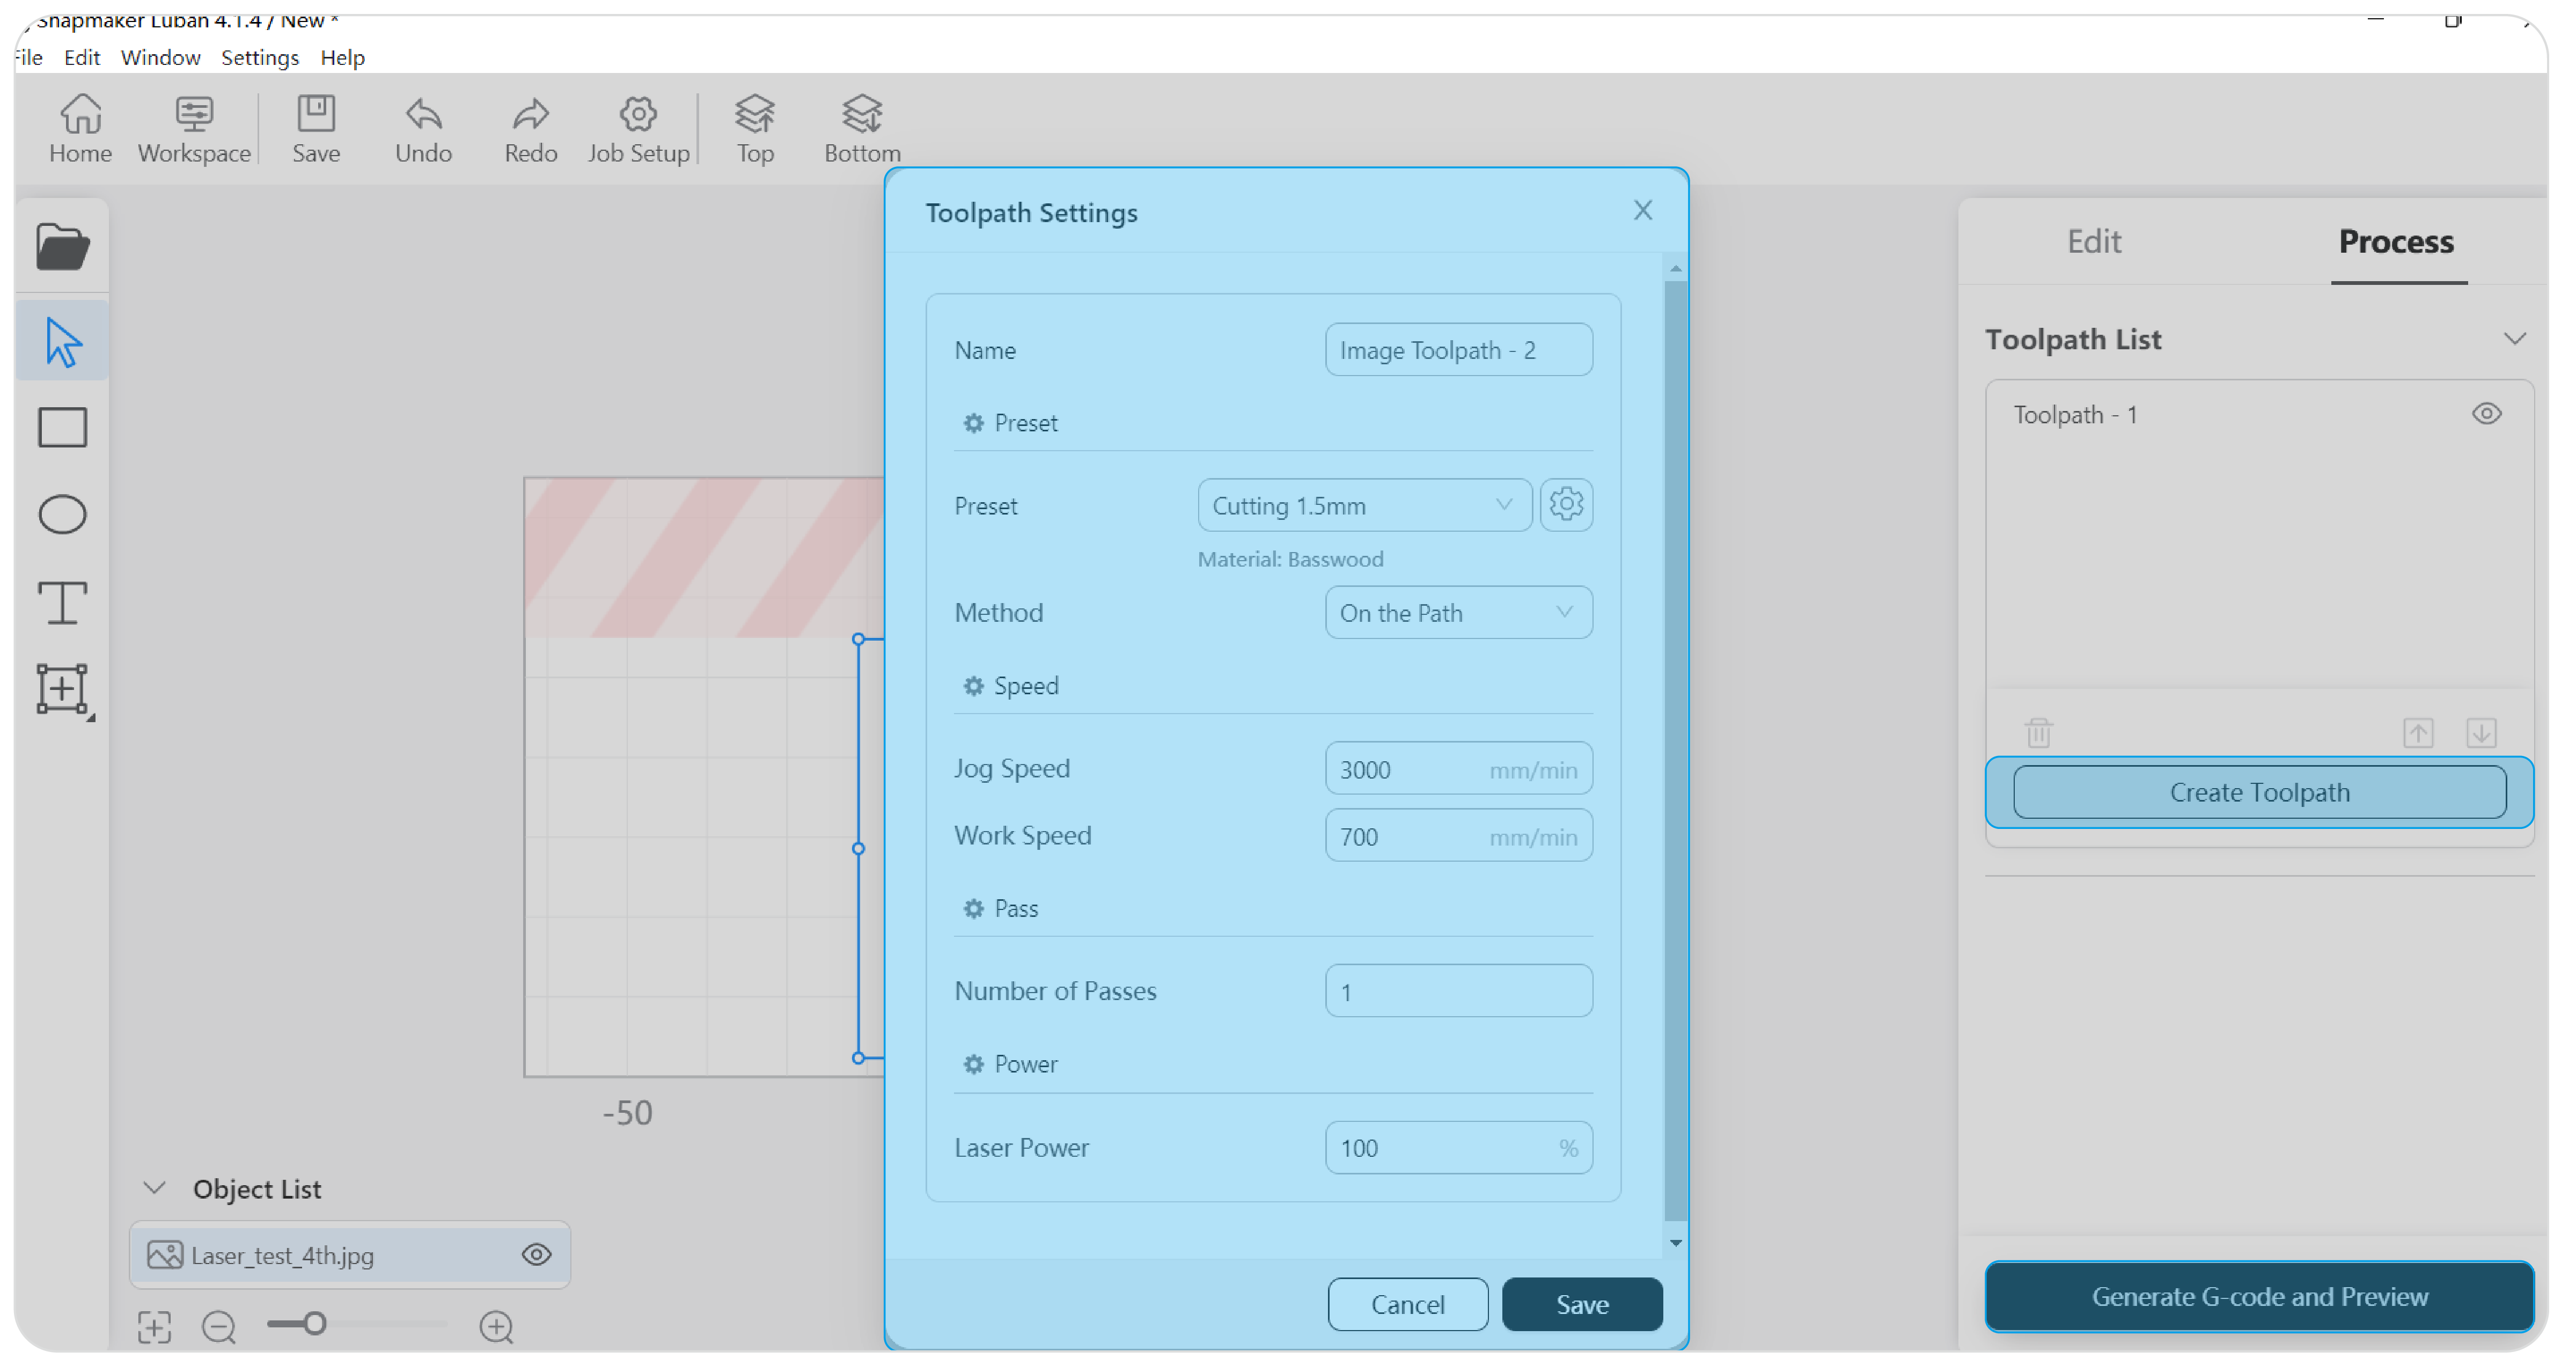
(6) On the object list, click to select the object. On the Process panel to the right of the canvas, click Create Toolpath.
- You can select the material you use and its processing method in the Preset Based on the selected Preset option, Luban will generate a set of recommended parameters.
- You can also configure work parameters on yourself.
After you finish toolpath settings, click Save > Generate G-code and Preview.
(7) Click Export. Select Load G-code to Workspace or Export G-code to File.
- If you select Load G-code to Workspace, and the machine is connected with Luban, you can send the G-code file to the machine from Luban (only when using Wi-Fi connection) or start laser engraving and cutting on Luban.
- If you select Export G-code to File, you can save the G-code file to your local computer.
4.3 Start Engraving and Cutting
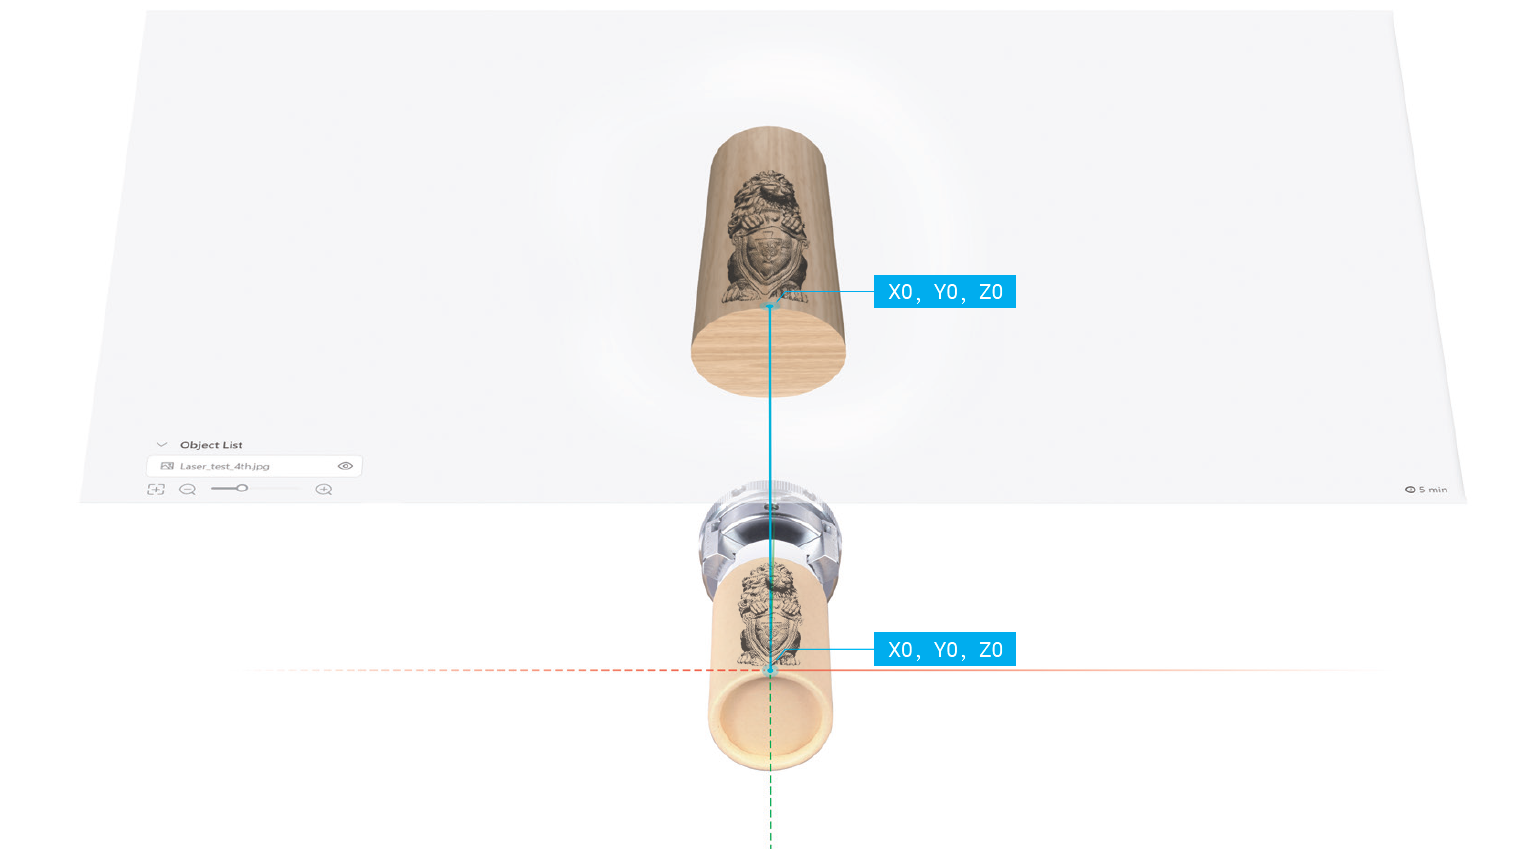
How It Works: Work Origin
Setting the work origin helps the machine find out how to engrave or cut the material. The work origin (X0, Y0, Z0) on the material corresponds to the work origin (X0, Y0, Z0) on Luban.
Start Engraving and Cutting on the Touchscreen
(1) Transfer the G-code file to the machine (see 3.7 Transfer the G-code File).
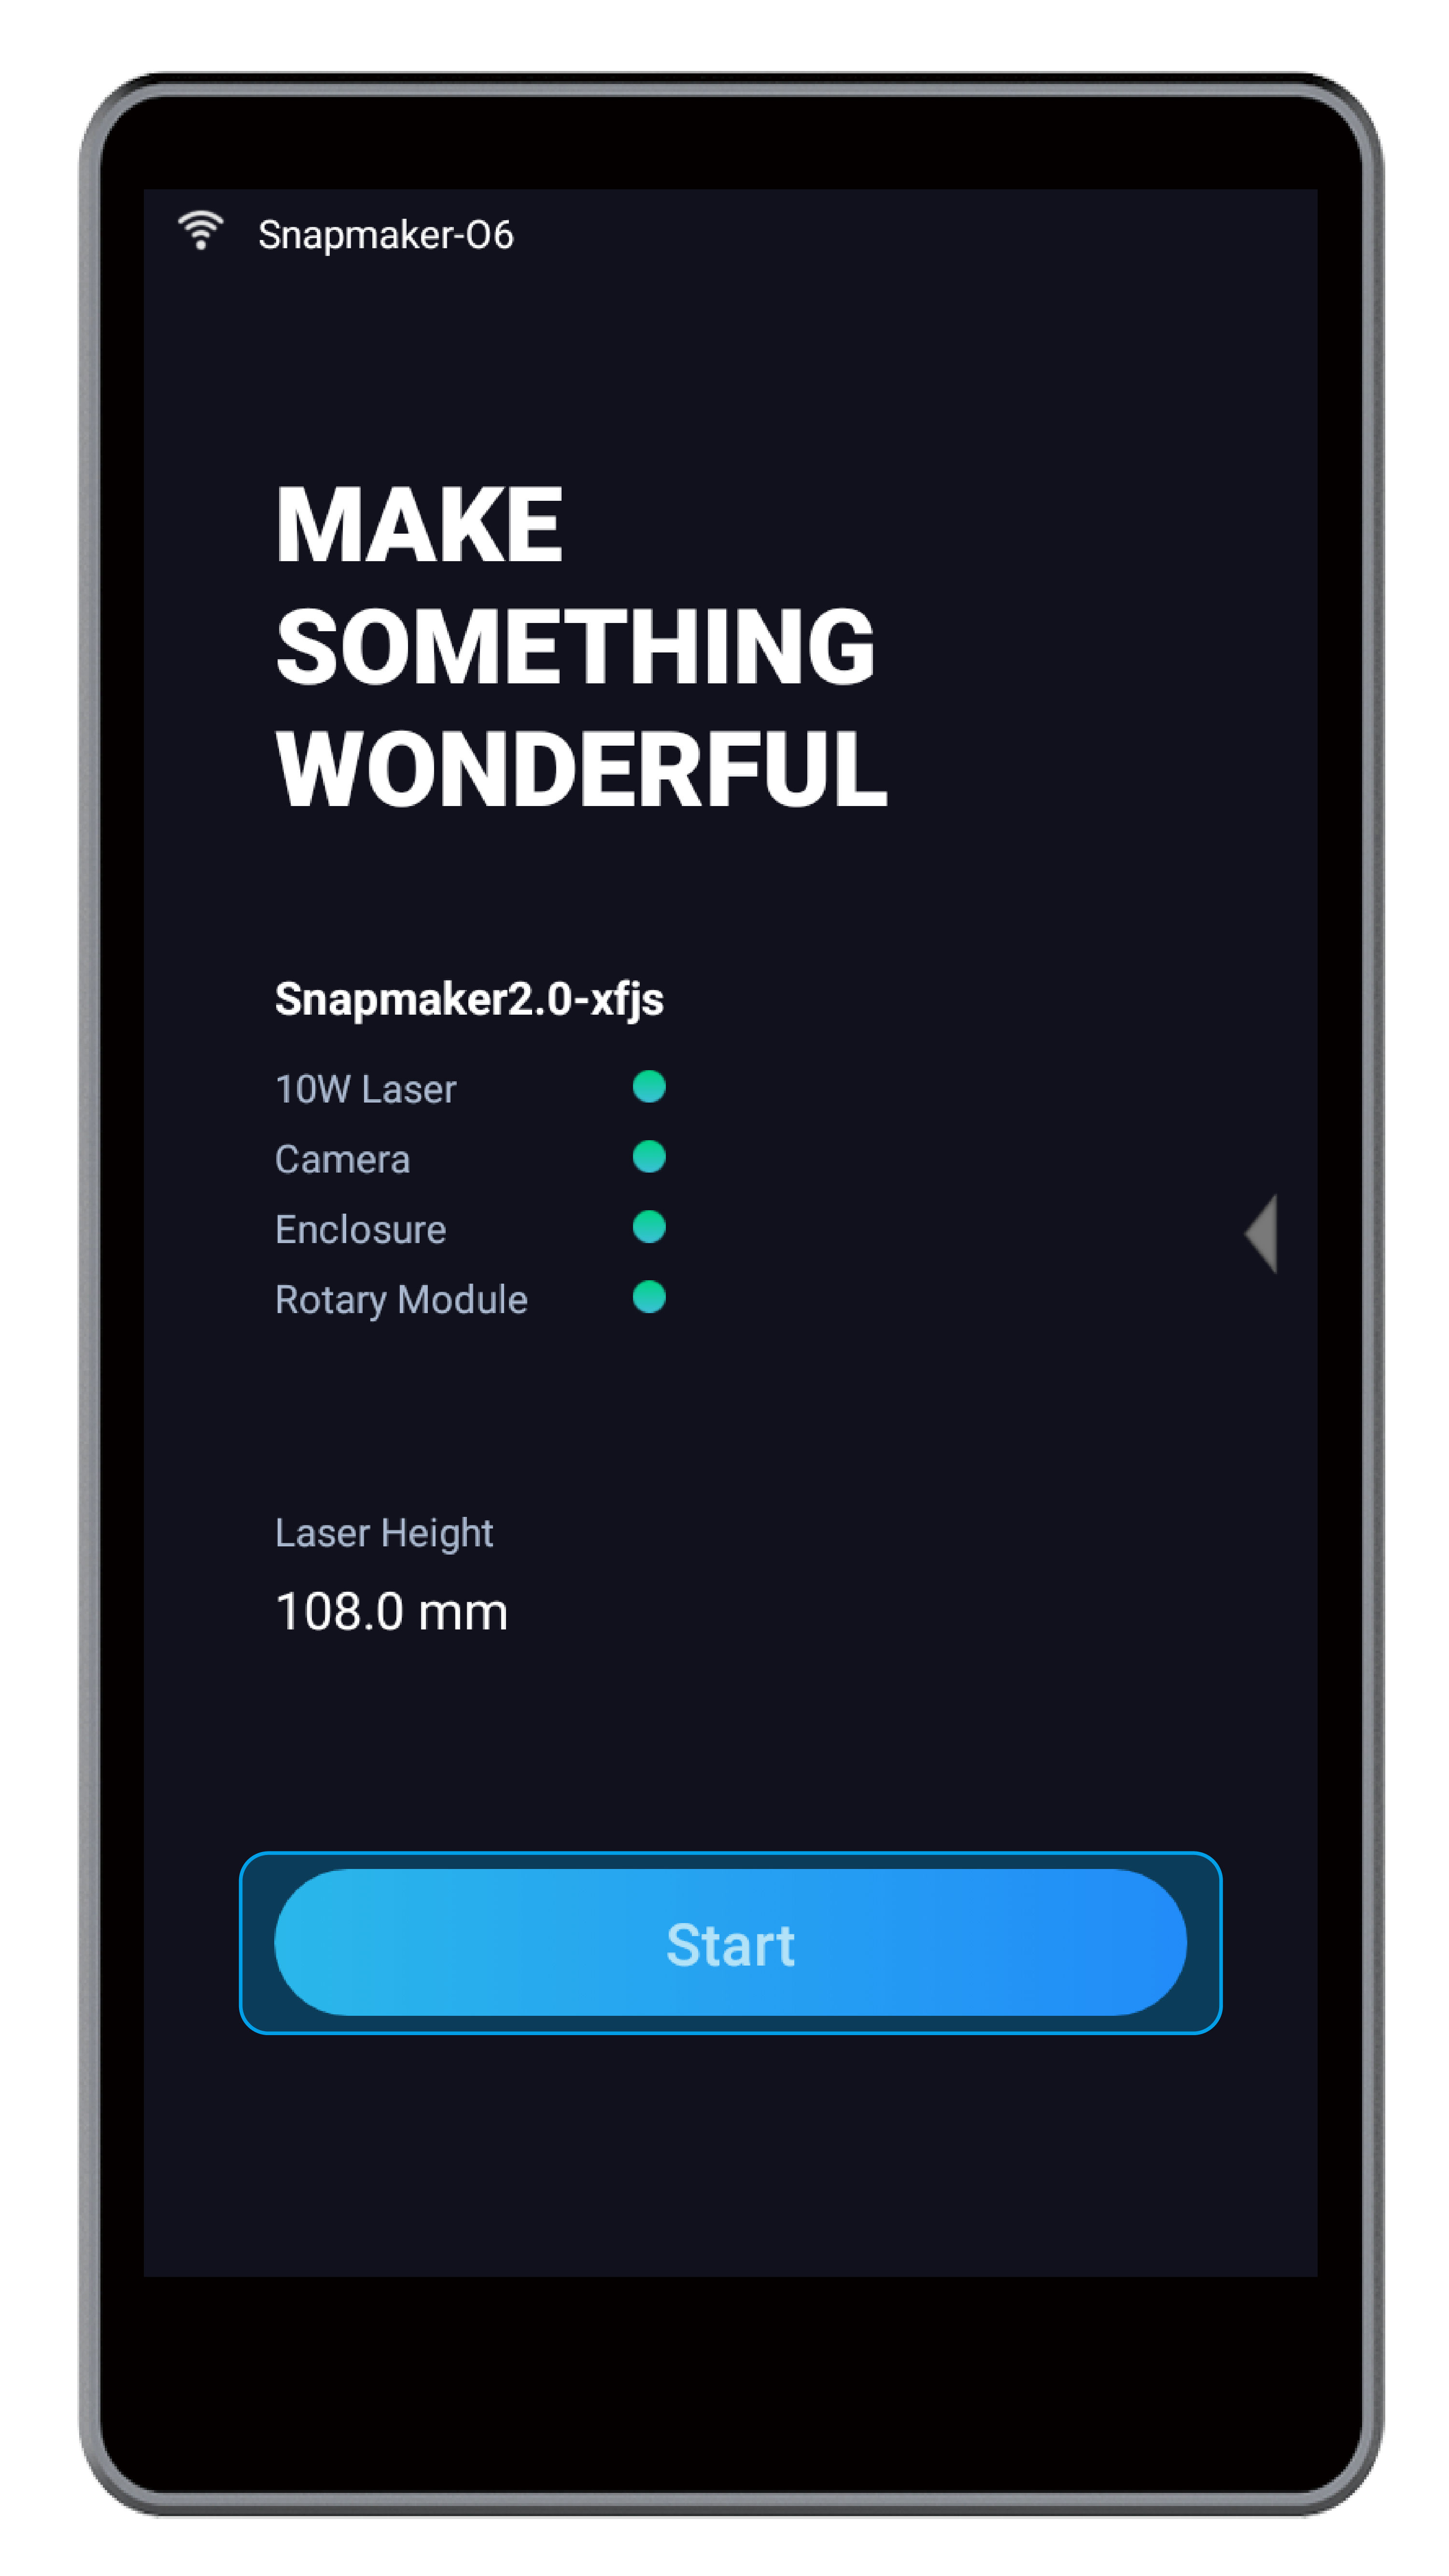
(2) On the Home Screen of the Touchscreen, tap Start.
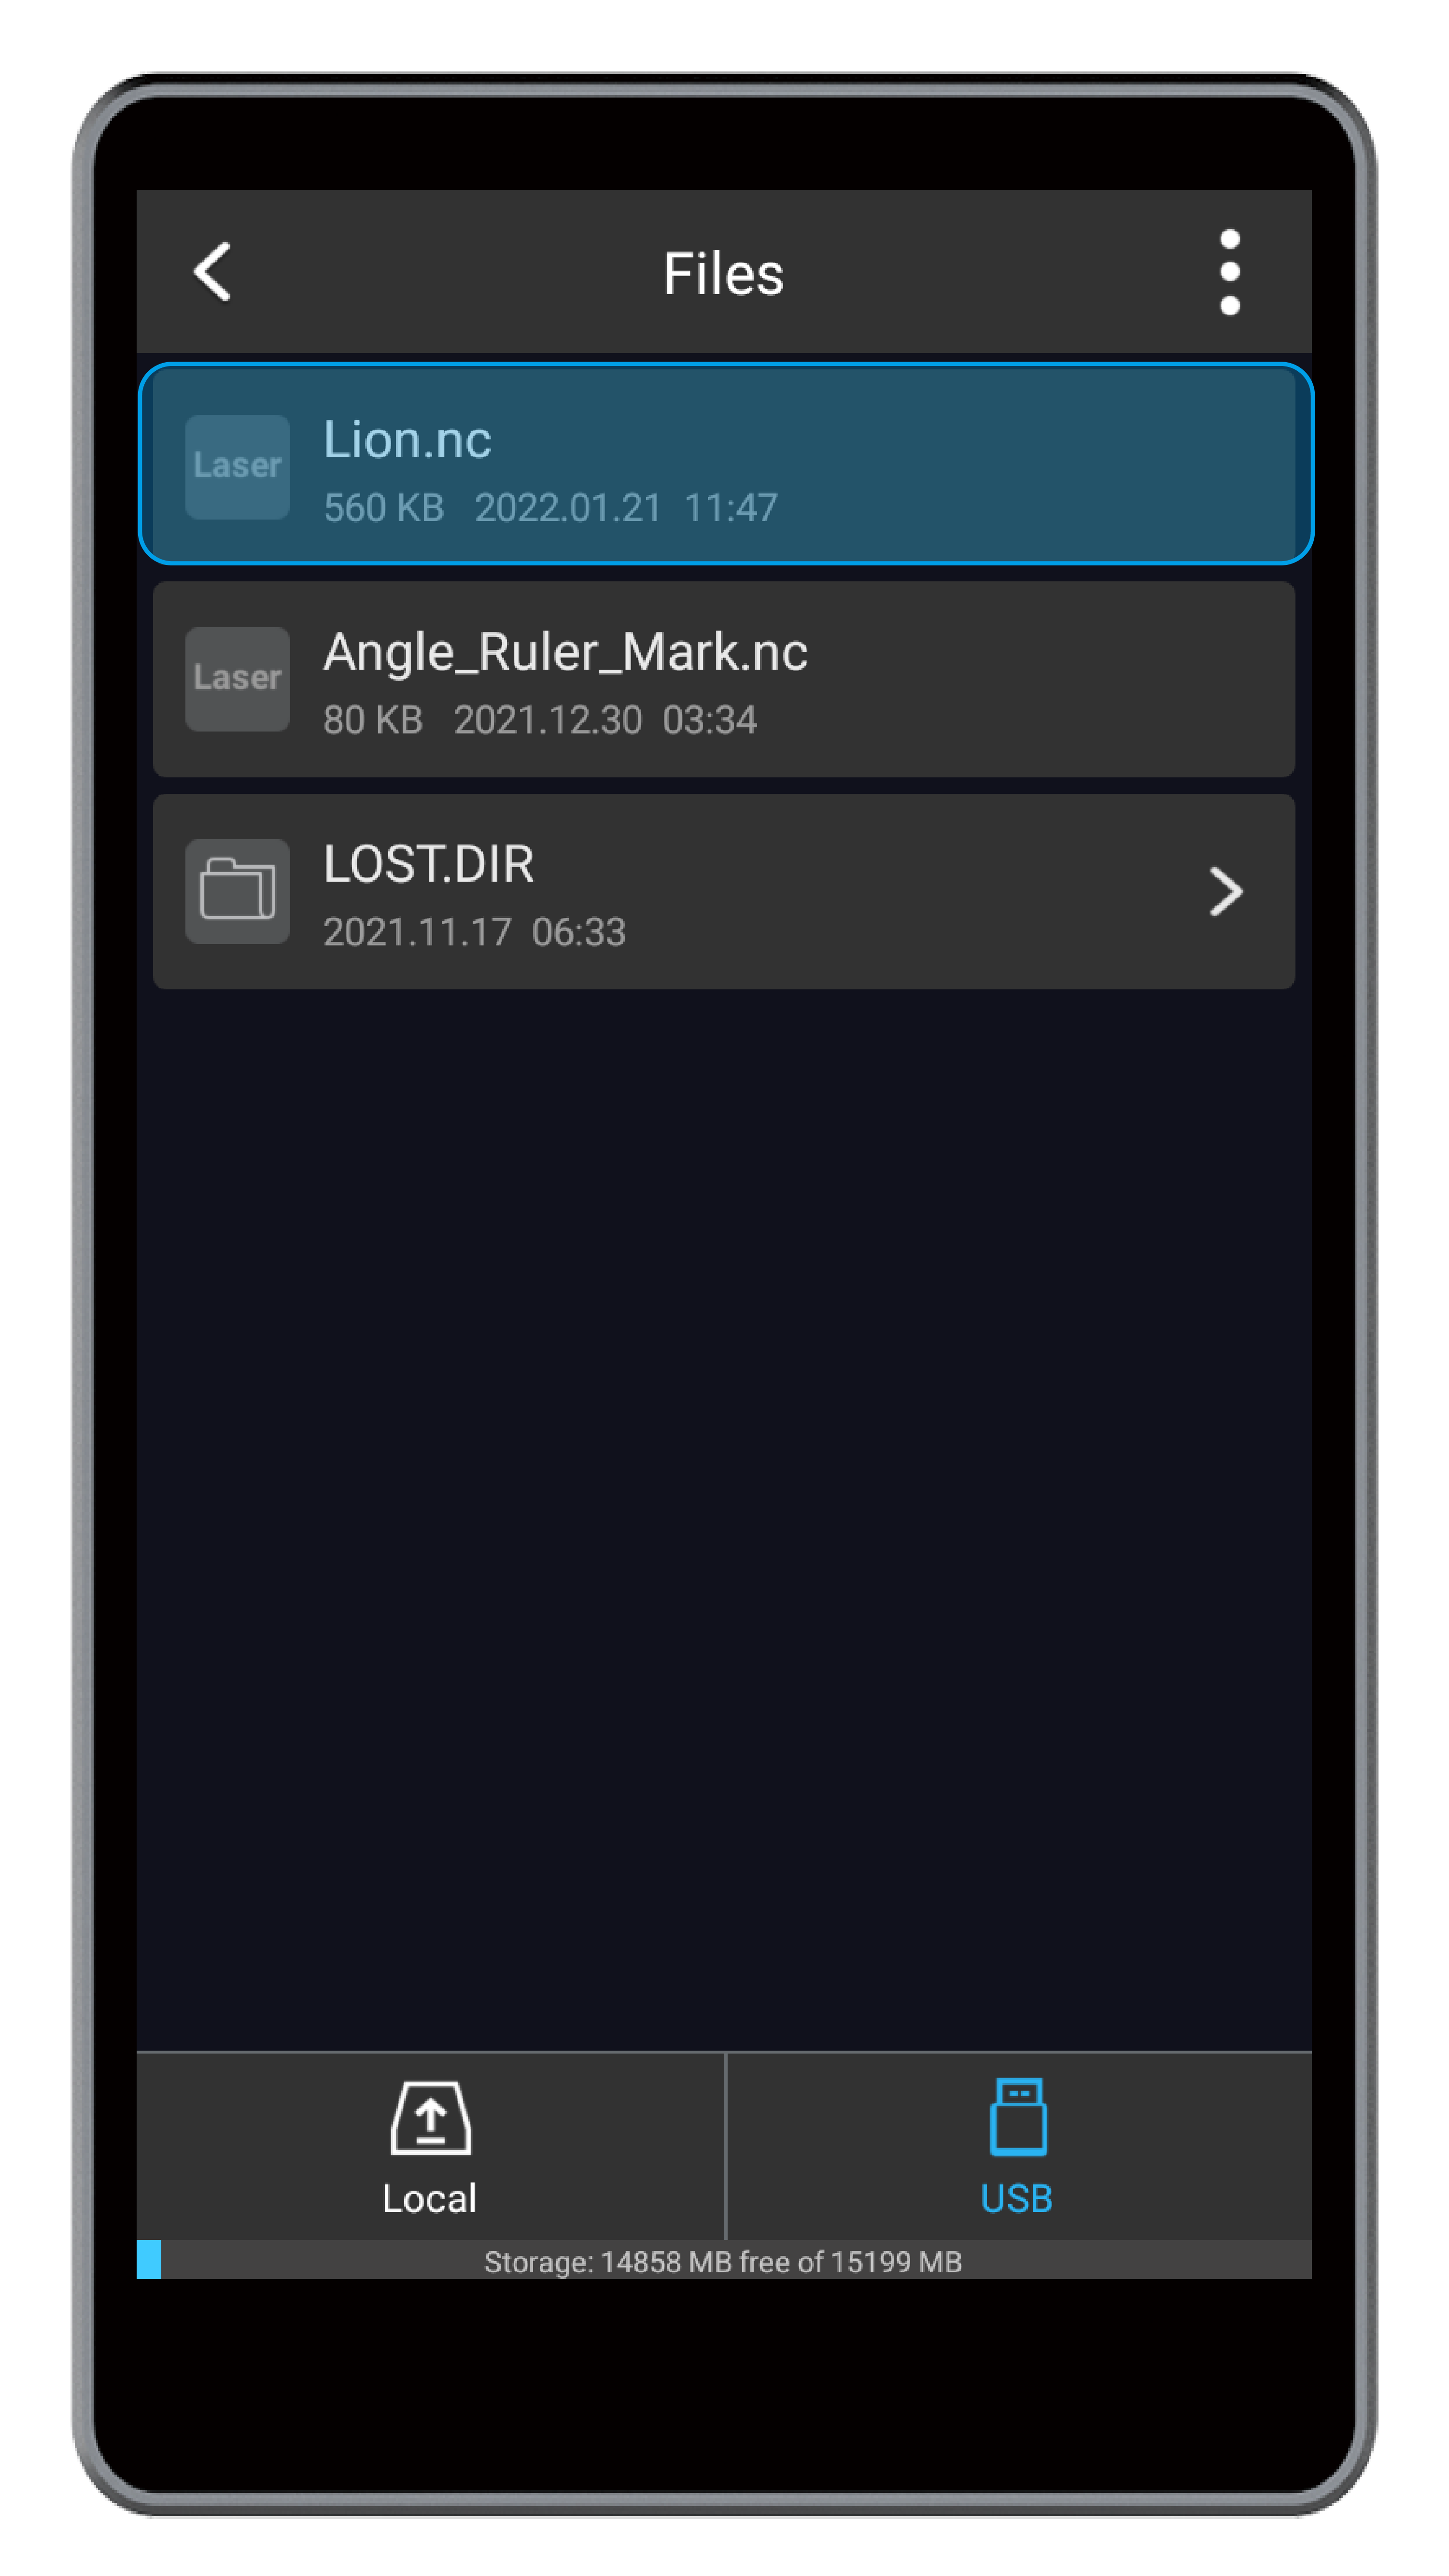
(3) Choose the G-code file you prepare from Local or USB.
(4) Preview the engraving and cutting object and check Laser Power, Work Speed, and Estimated Time. Then, click Ready.
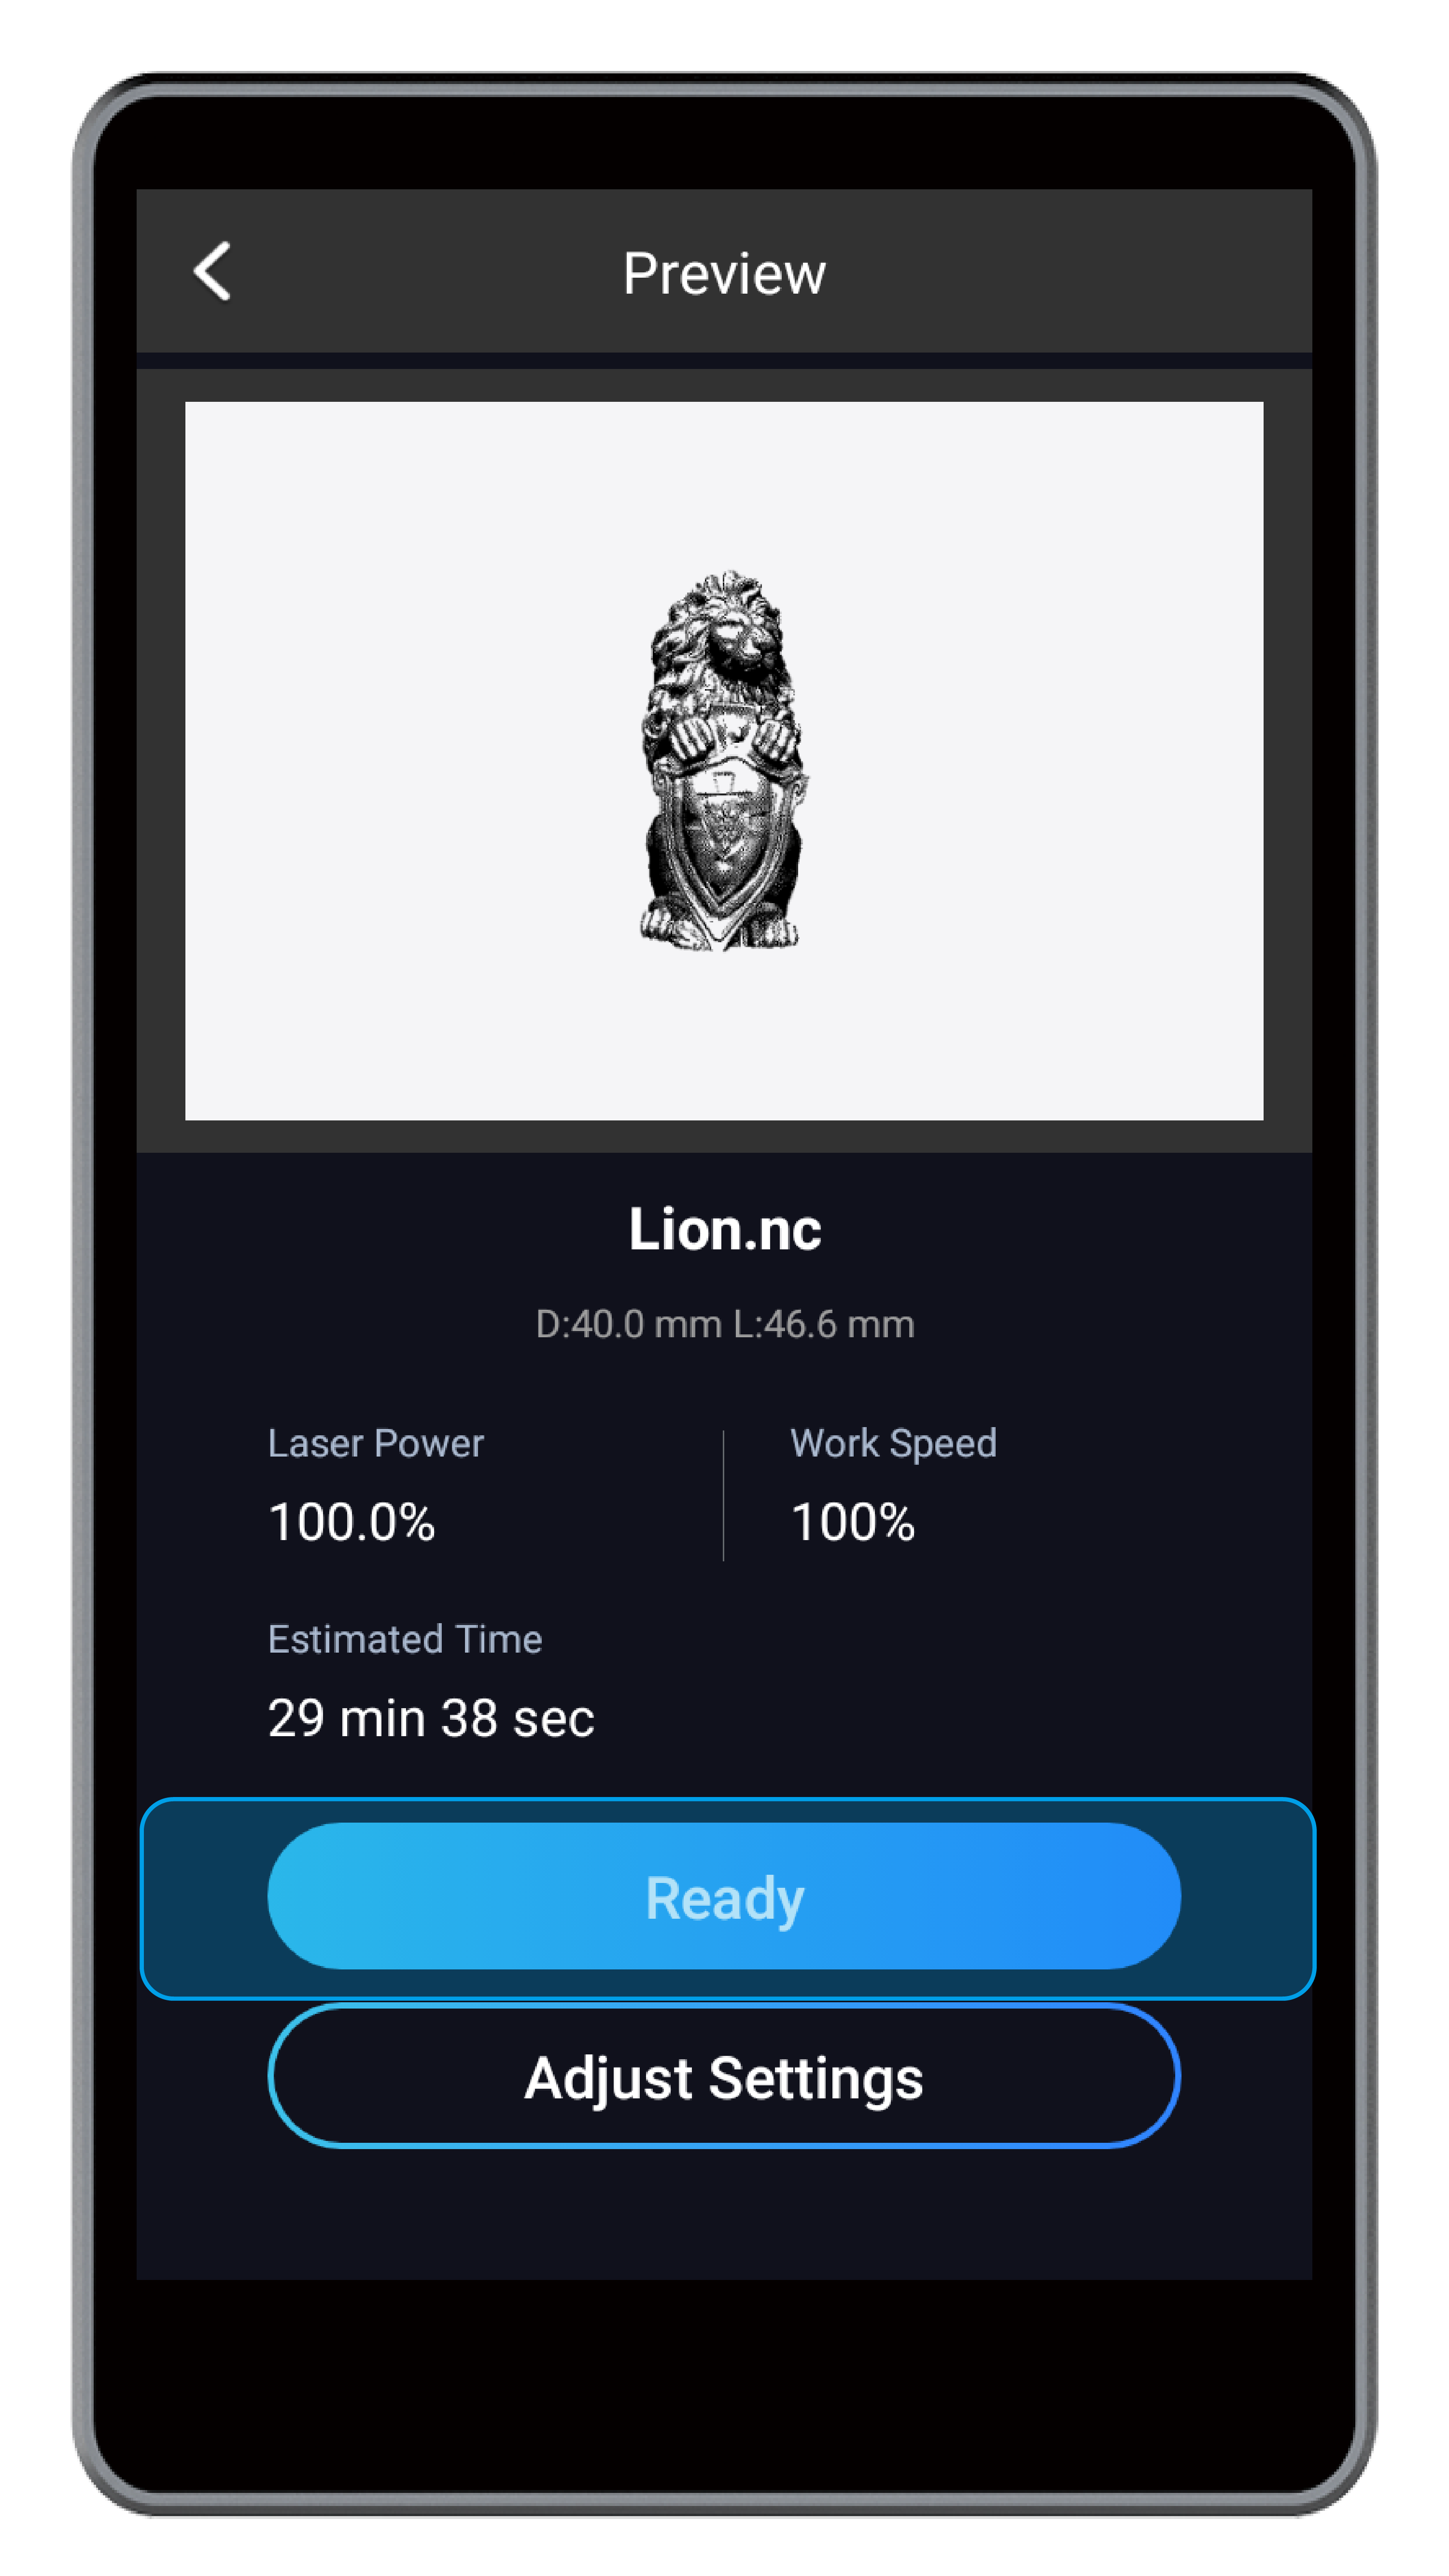
![]() You can tap Adjust Settings to modify Laser Power and Work Speed.
You can tap Adjust Settings to modify Laser Power and Work Speed.
![]() If the toolhead has not been to its home position after you turn on the machine, you need to tap Going Home, and the machine will move the toolhead in X, Y, and Z orientations to the pre-defined position, whose coordinates serve as reference points.
If the toolhead has not been to its home position after you turn on the machine, you need to tap Going Home, and the machine will move the toolhead in X, Y, and Z orientations to the pre-defined position, whose coordinates serve as reference points.
(5) In the Material Setting screen, input the diameter and length of the material and tap Next.
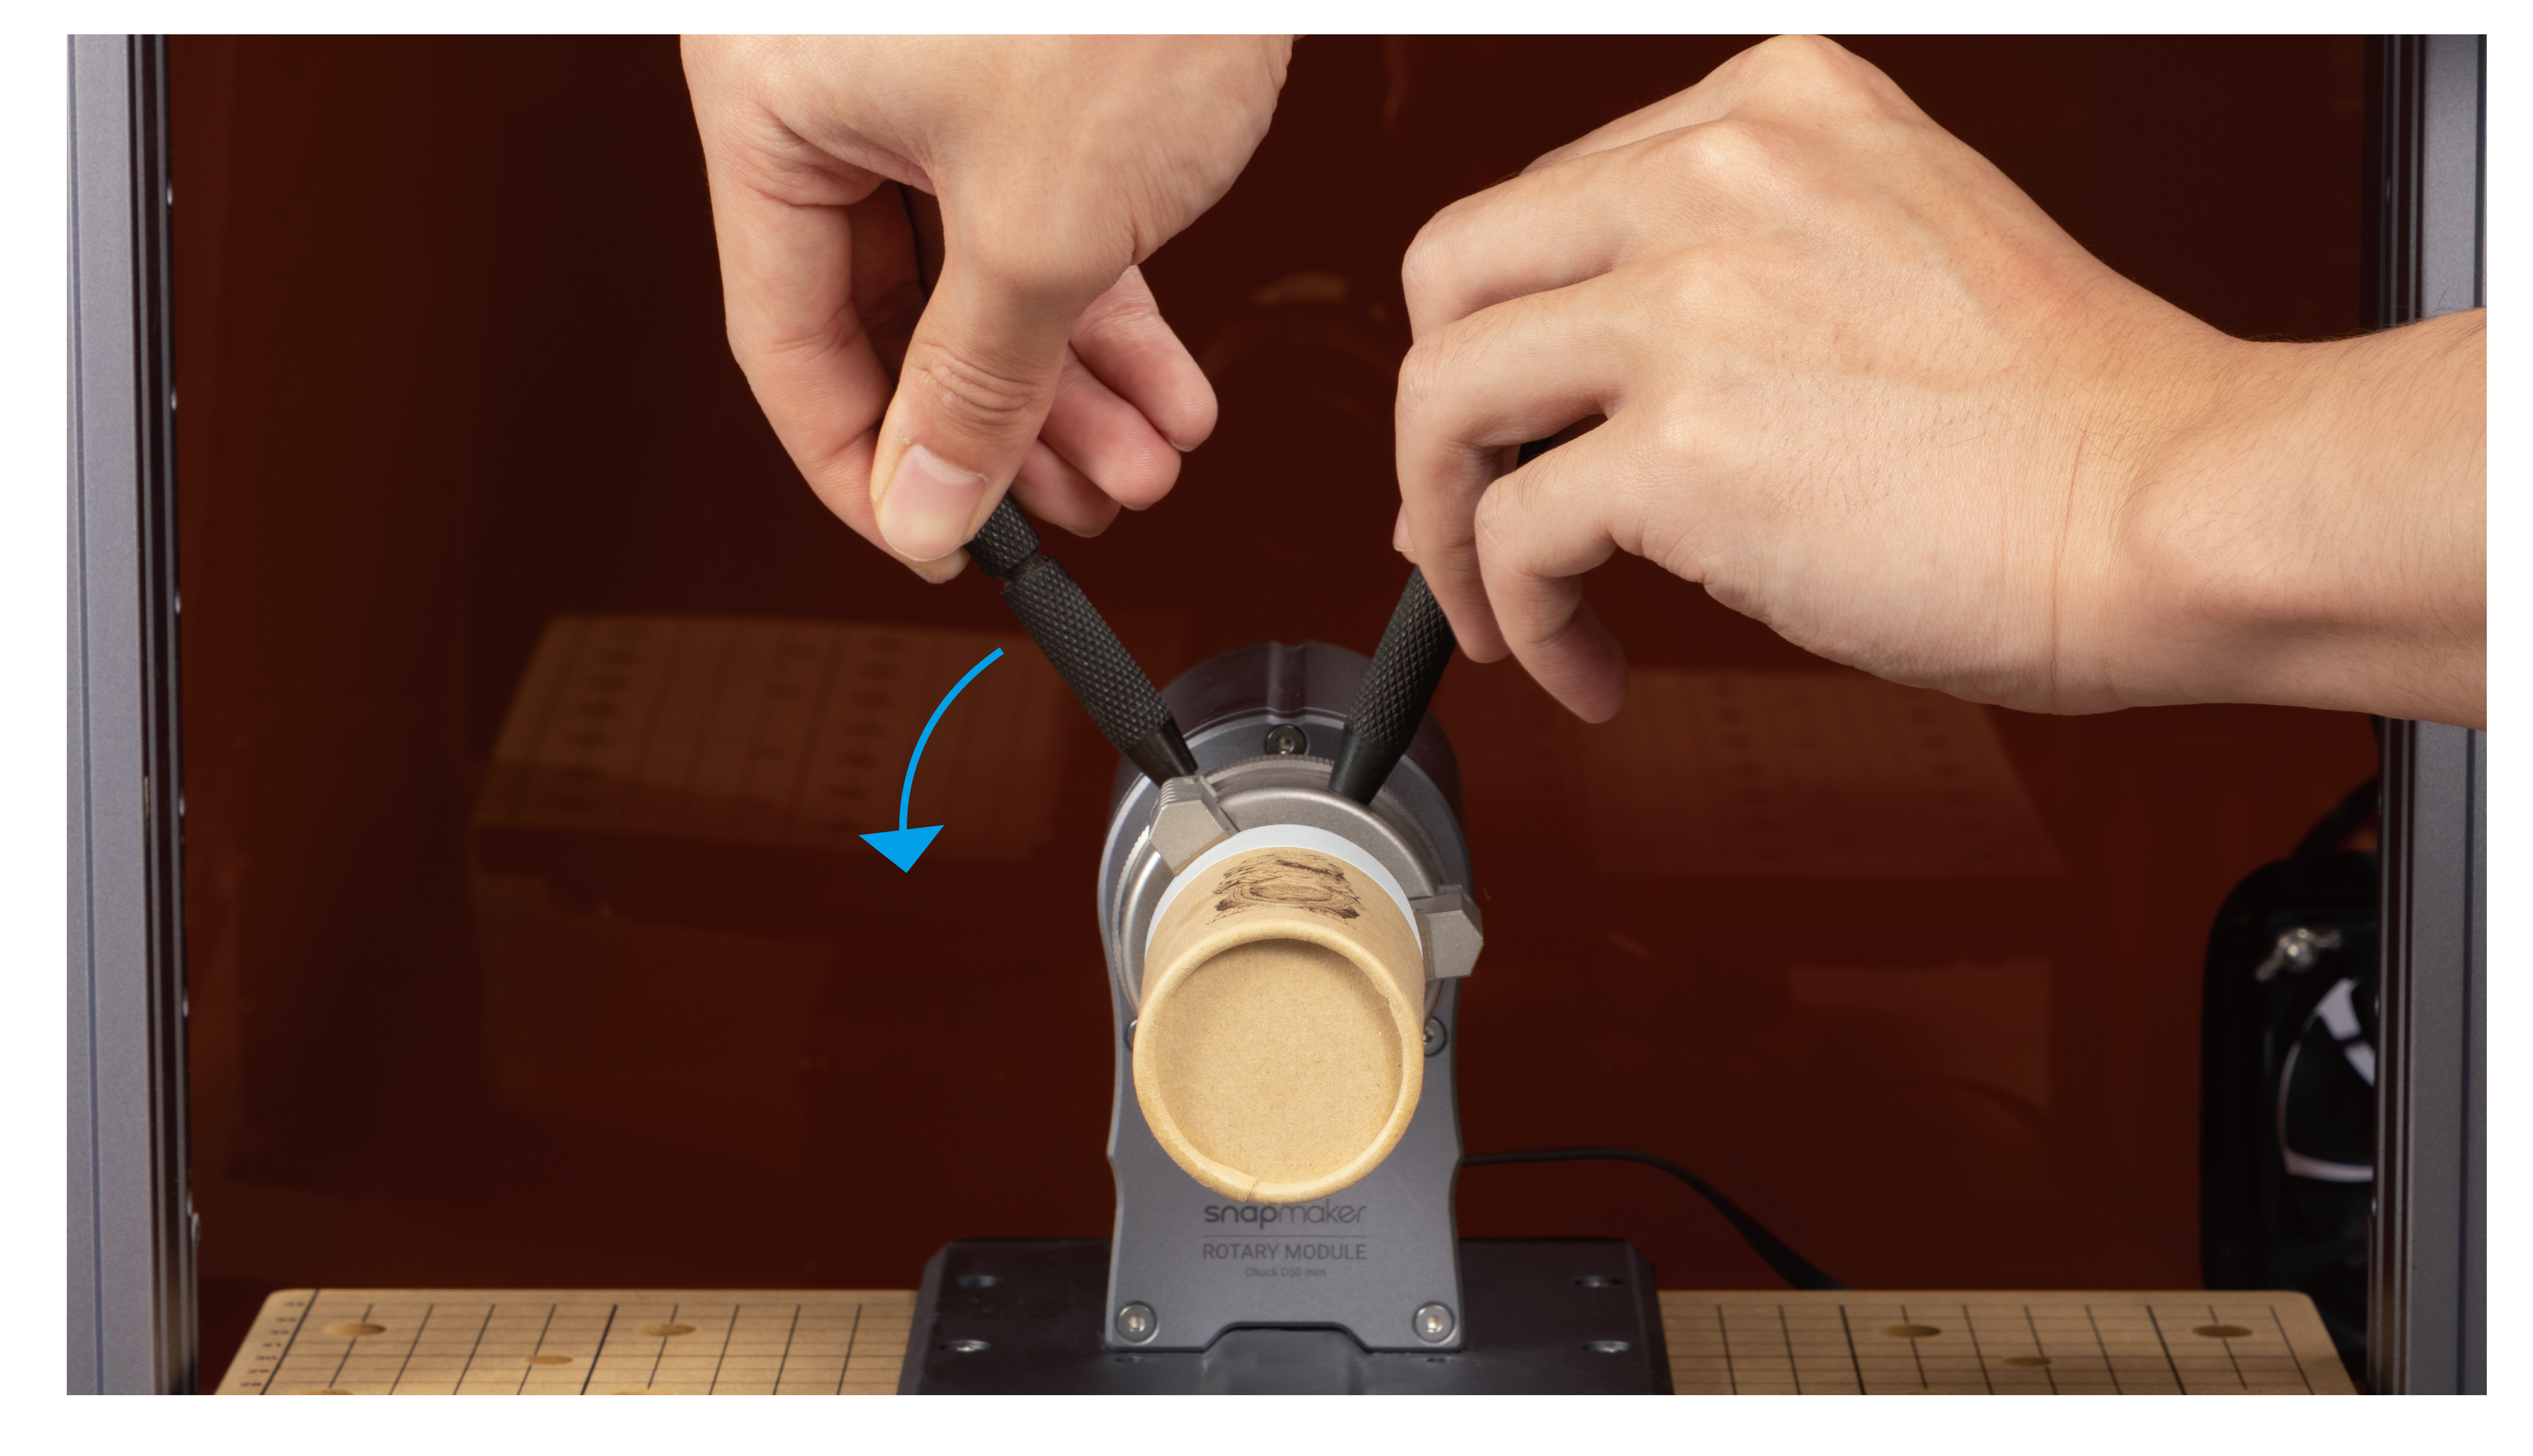
(6) Loosen the 3-jaw Chuck by turning two chuck wrenches. Insert one end of the material onto the 3-stepped jaws, and tighten the Chuck. After fixing the material, tap Next.
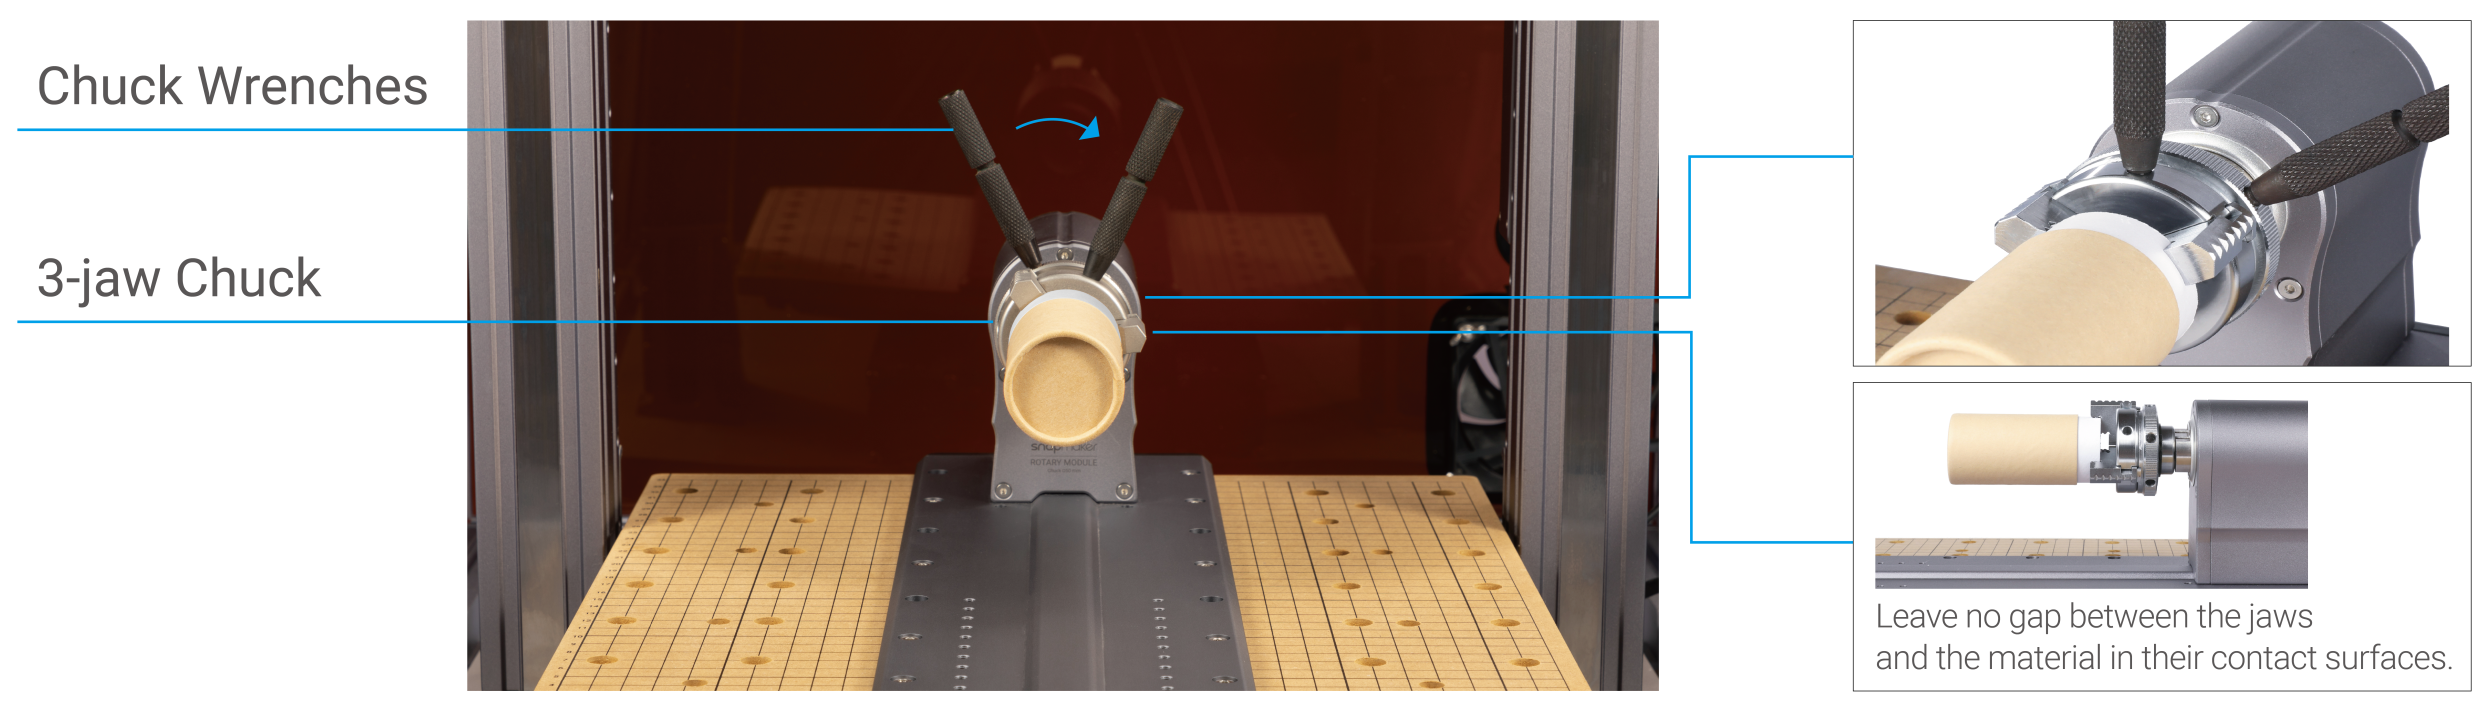
![]() Caution the sharp jaws. Use two chuck wrenches to loosen or tighten the jaws.
Caution the sharp jaws. Use two chuck wrenches to loosen or tighten the jaws.
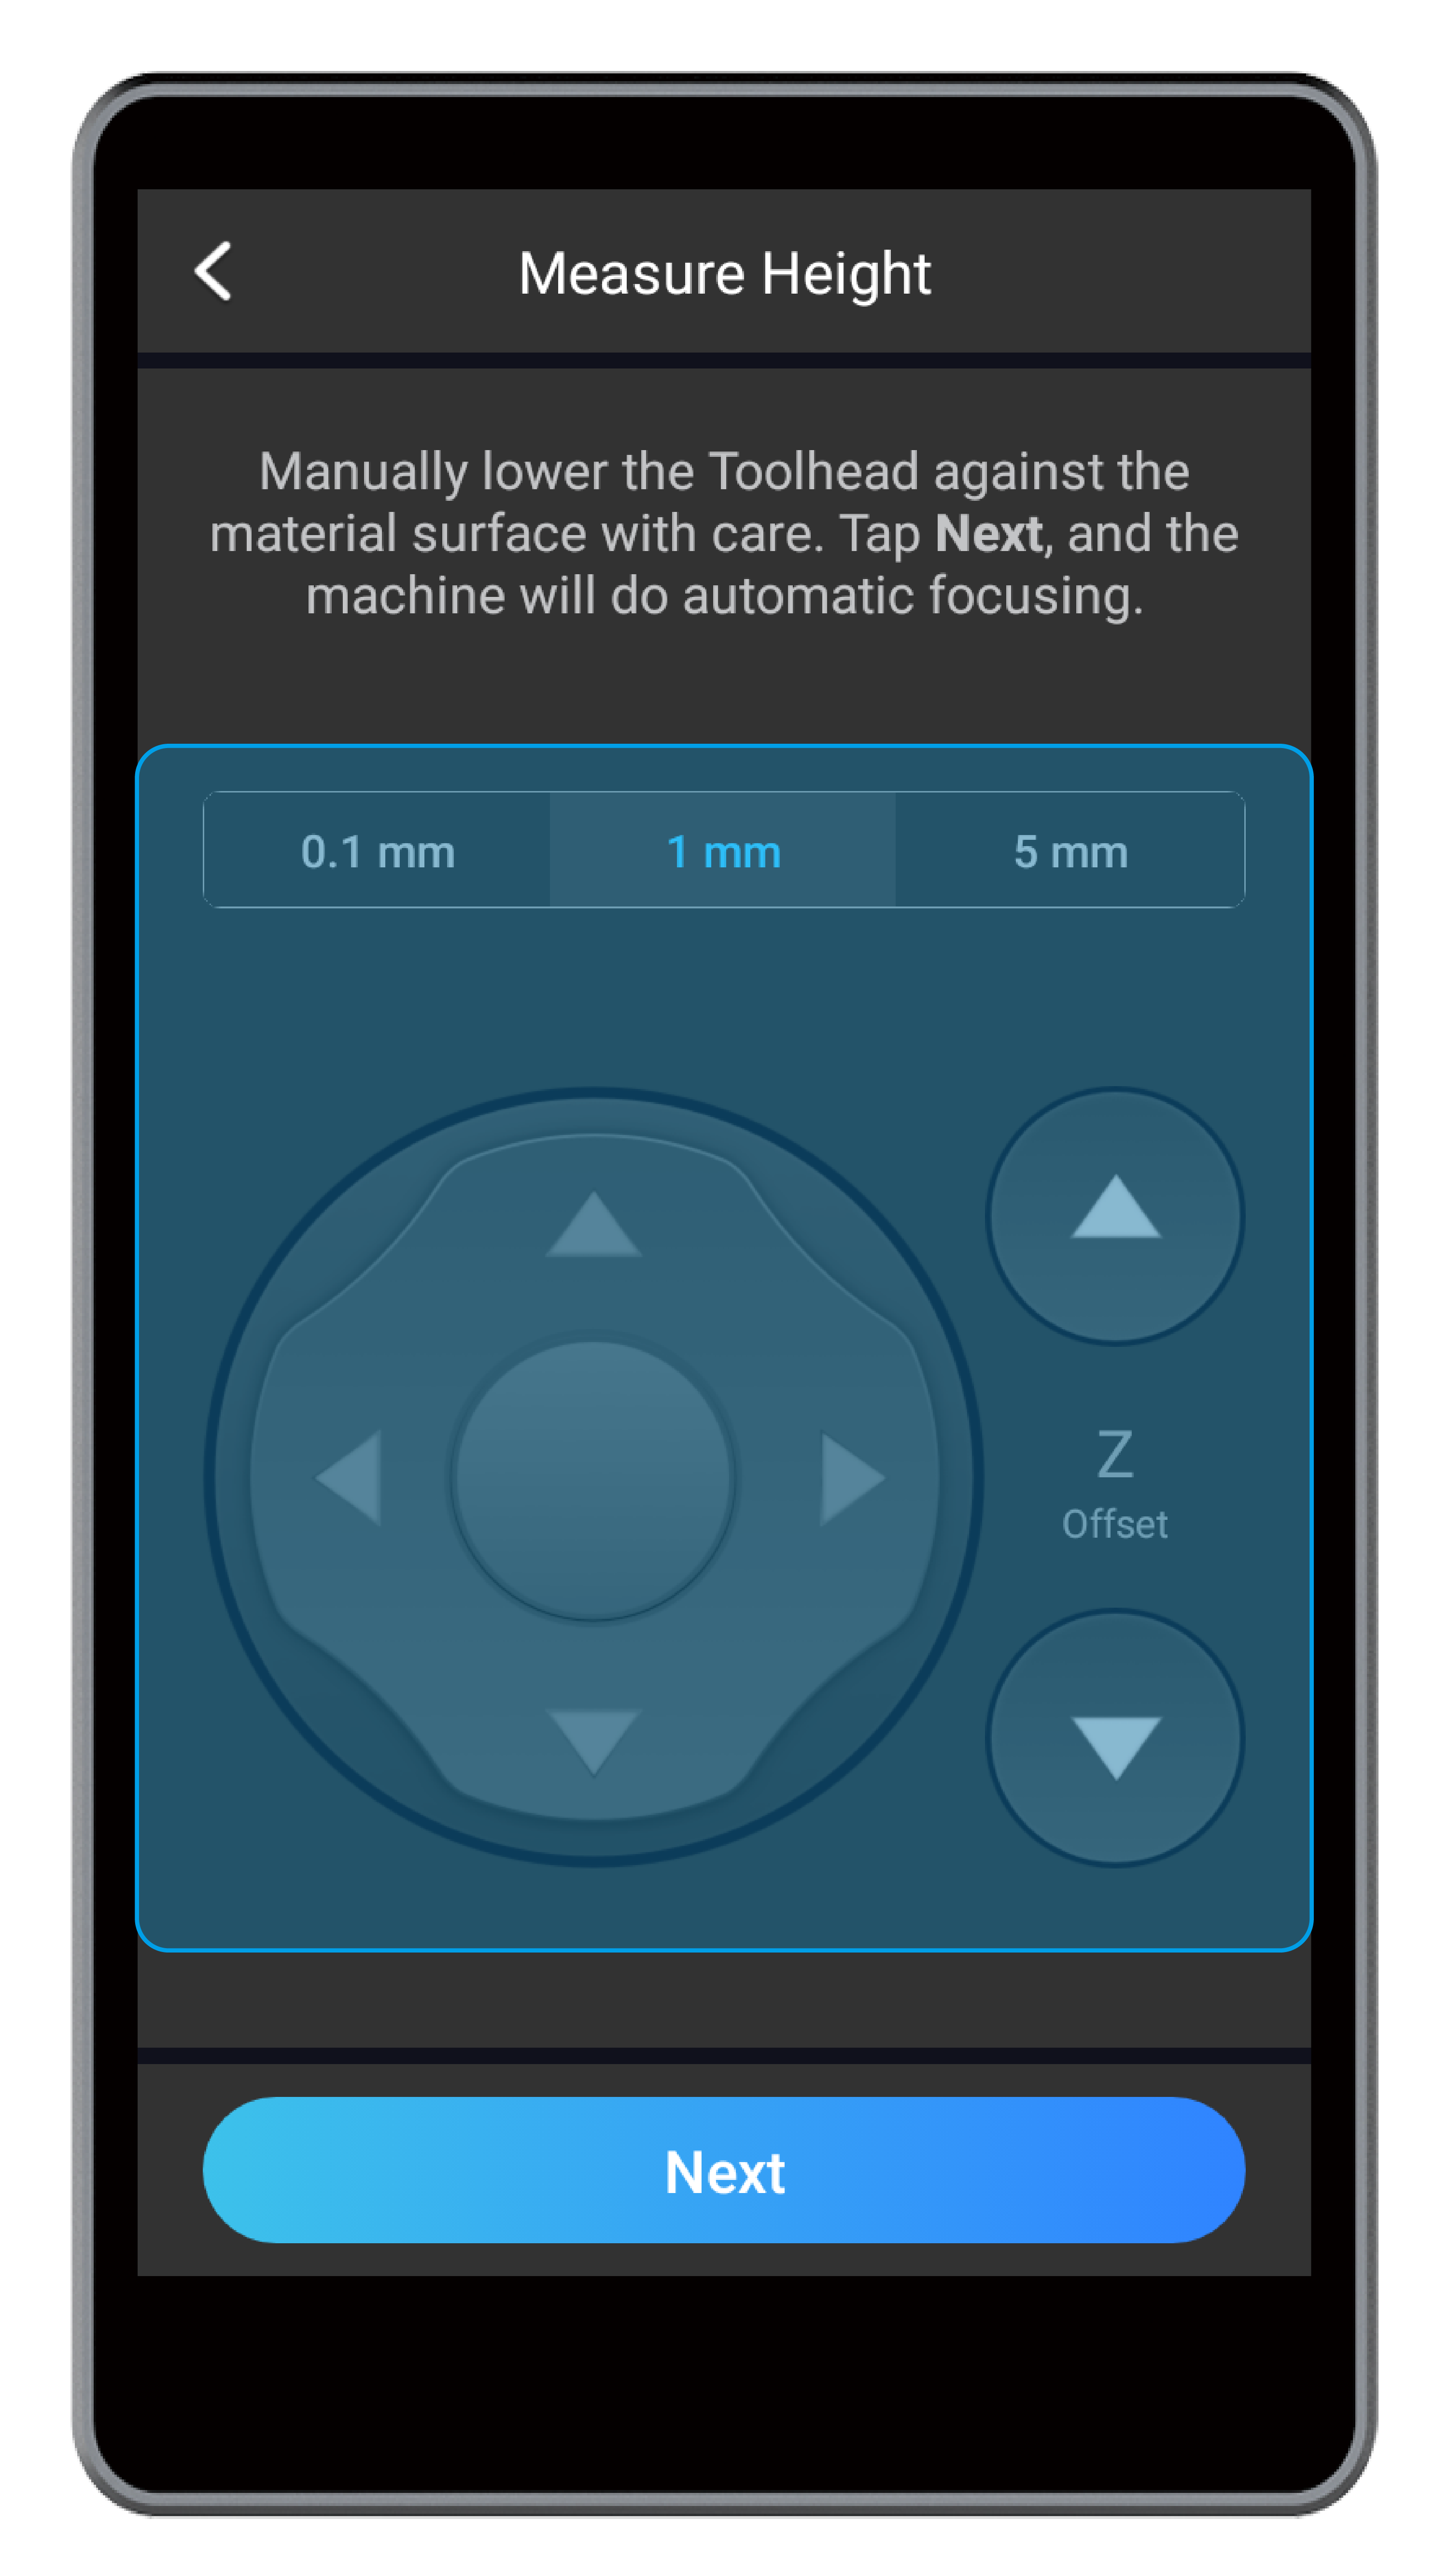
(7) On the Measure Height screen, tap Next, and the toolhead will move to a position above the material. Tap X-/X+/Y-/Y+/Z-/Z+ to move the toolhead until the air concentrator hood slightly touches the top surface of the material. Tap Next, and the machine will do automatic focusing.
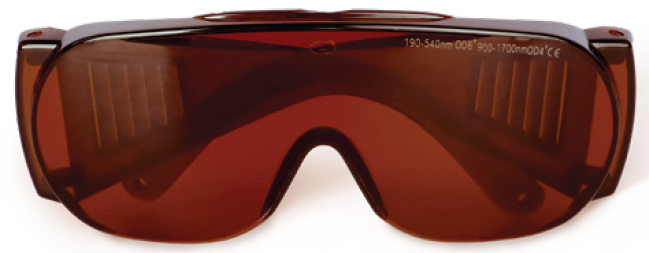
(8) Ensure that all the operators and bystanders have correctly put on the laser safety goggles. Then, tap Next.
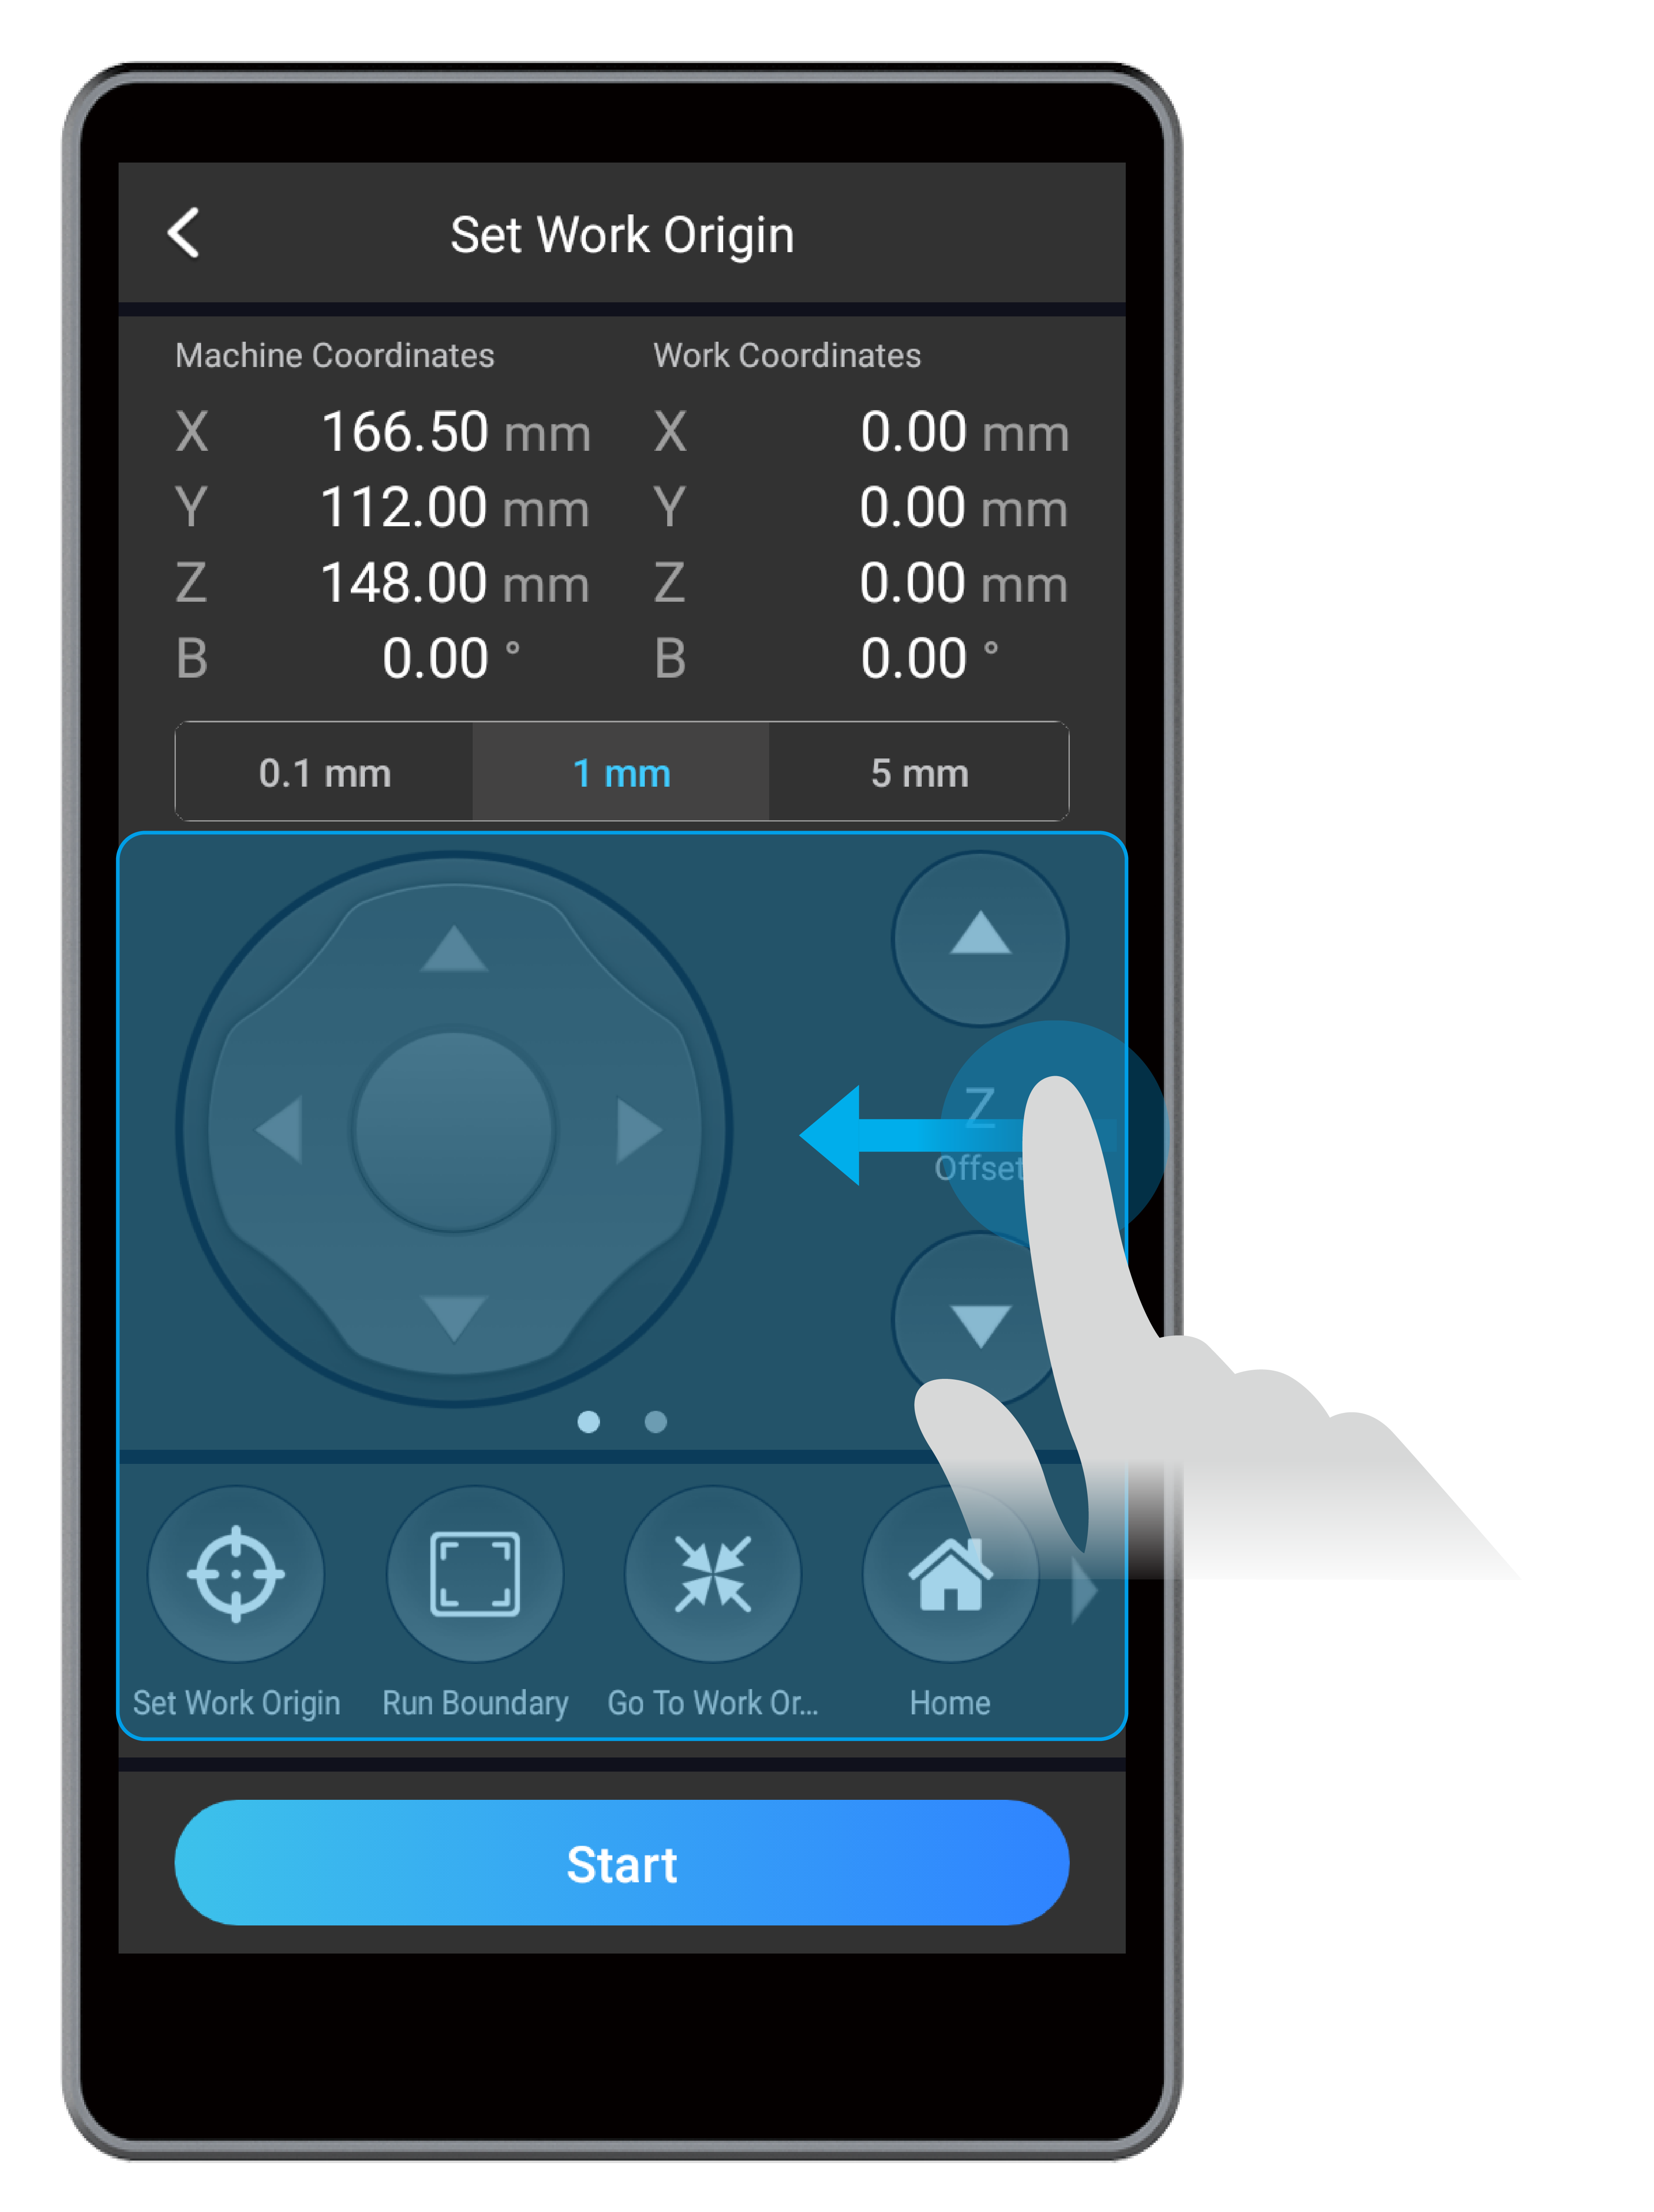
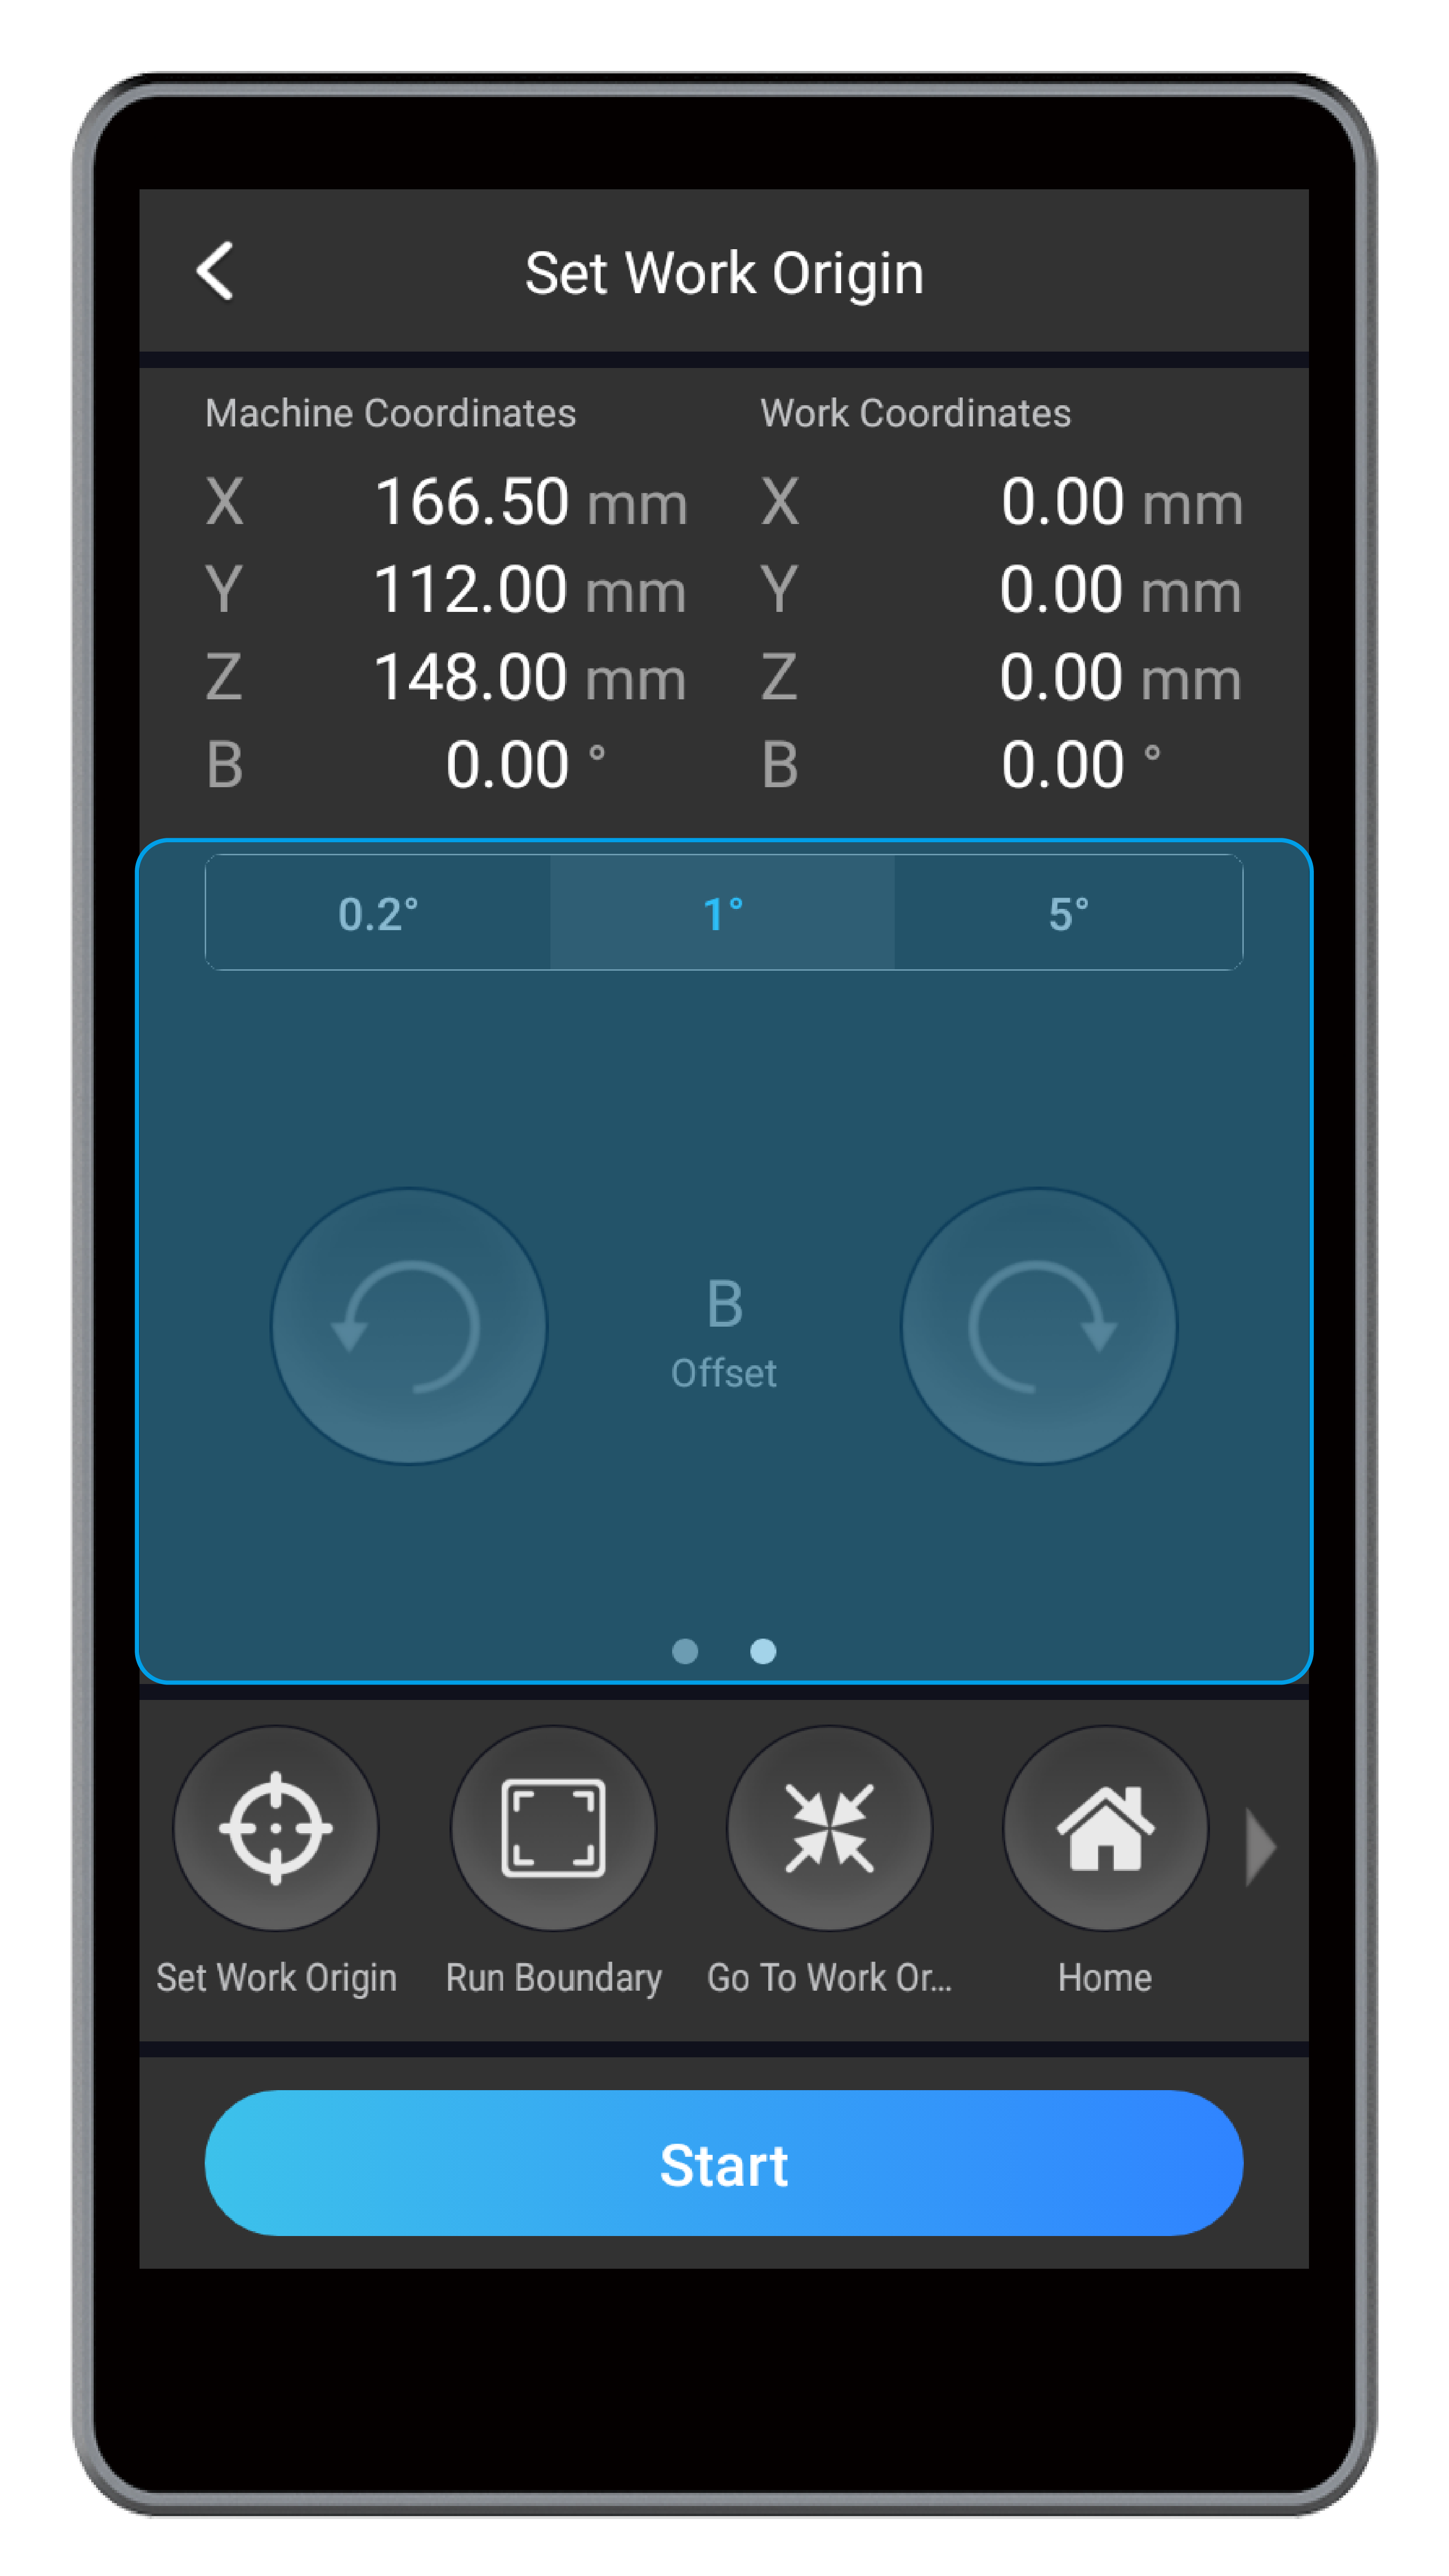
(9) Tap X-/X+/Y-/Y+ to move the toolhead, and swipe left on the Control panel to tap B Offset to rotate the material. When the laser dot moves to where the work origin will be, tap Set Work Origin > Run Boundary to check the work area.
![]() If the air concentrator hood bumps into the machine, turn off the machine immediately or press the Emergency Stop Button
If the air concentrator hood bumps into the machine, turn off the machine immediately or press the Emergency Stop Button ![]() .
.
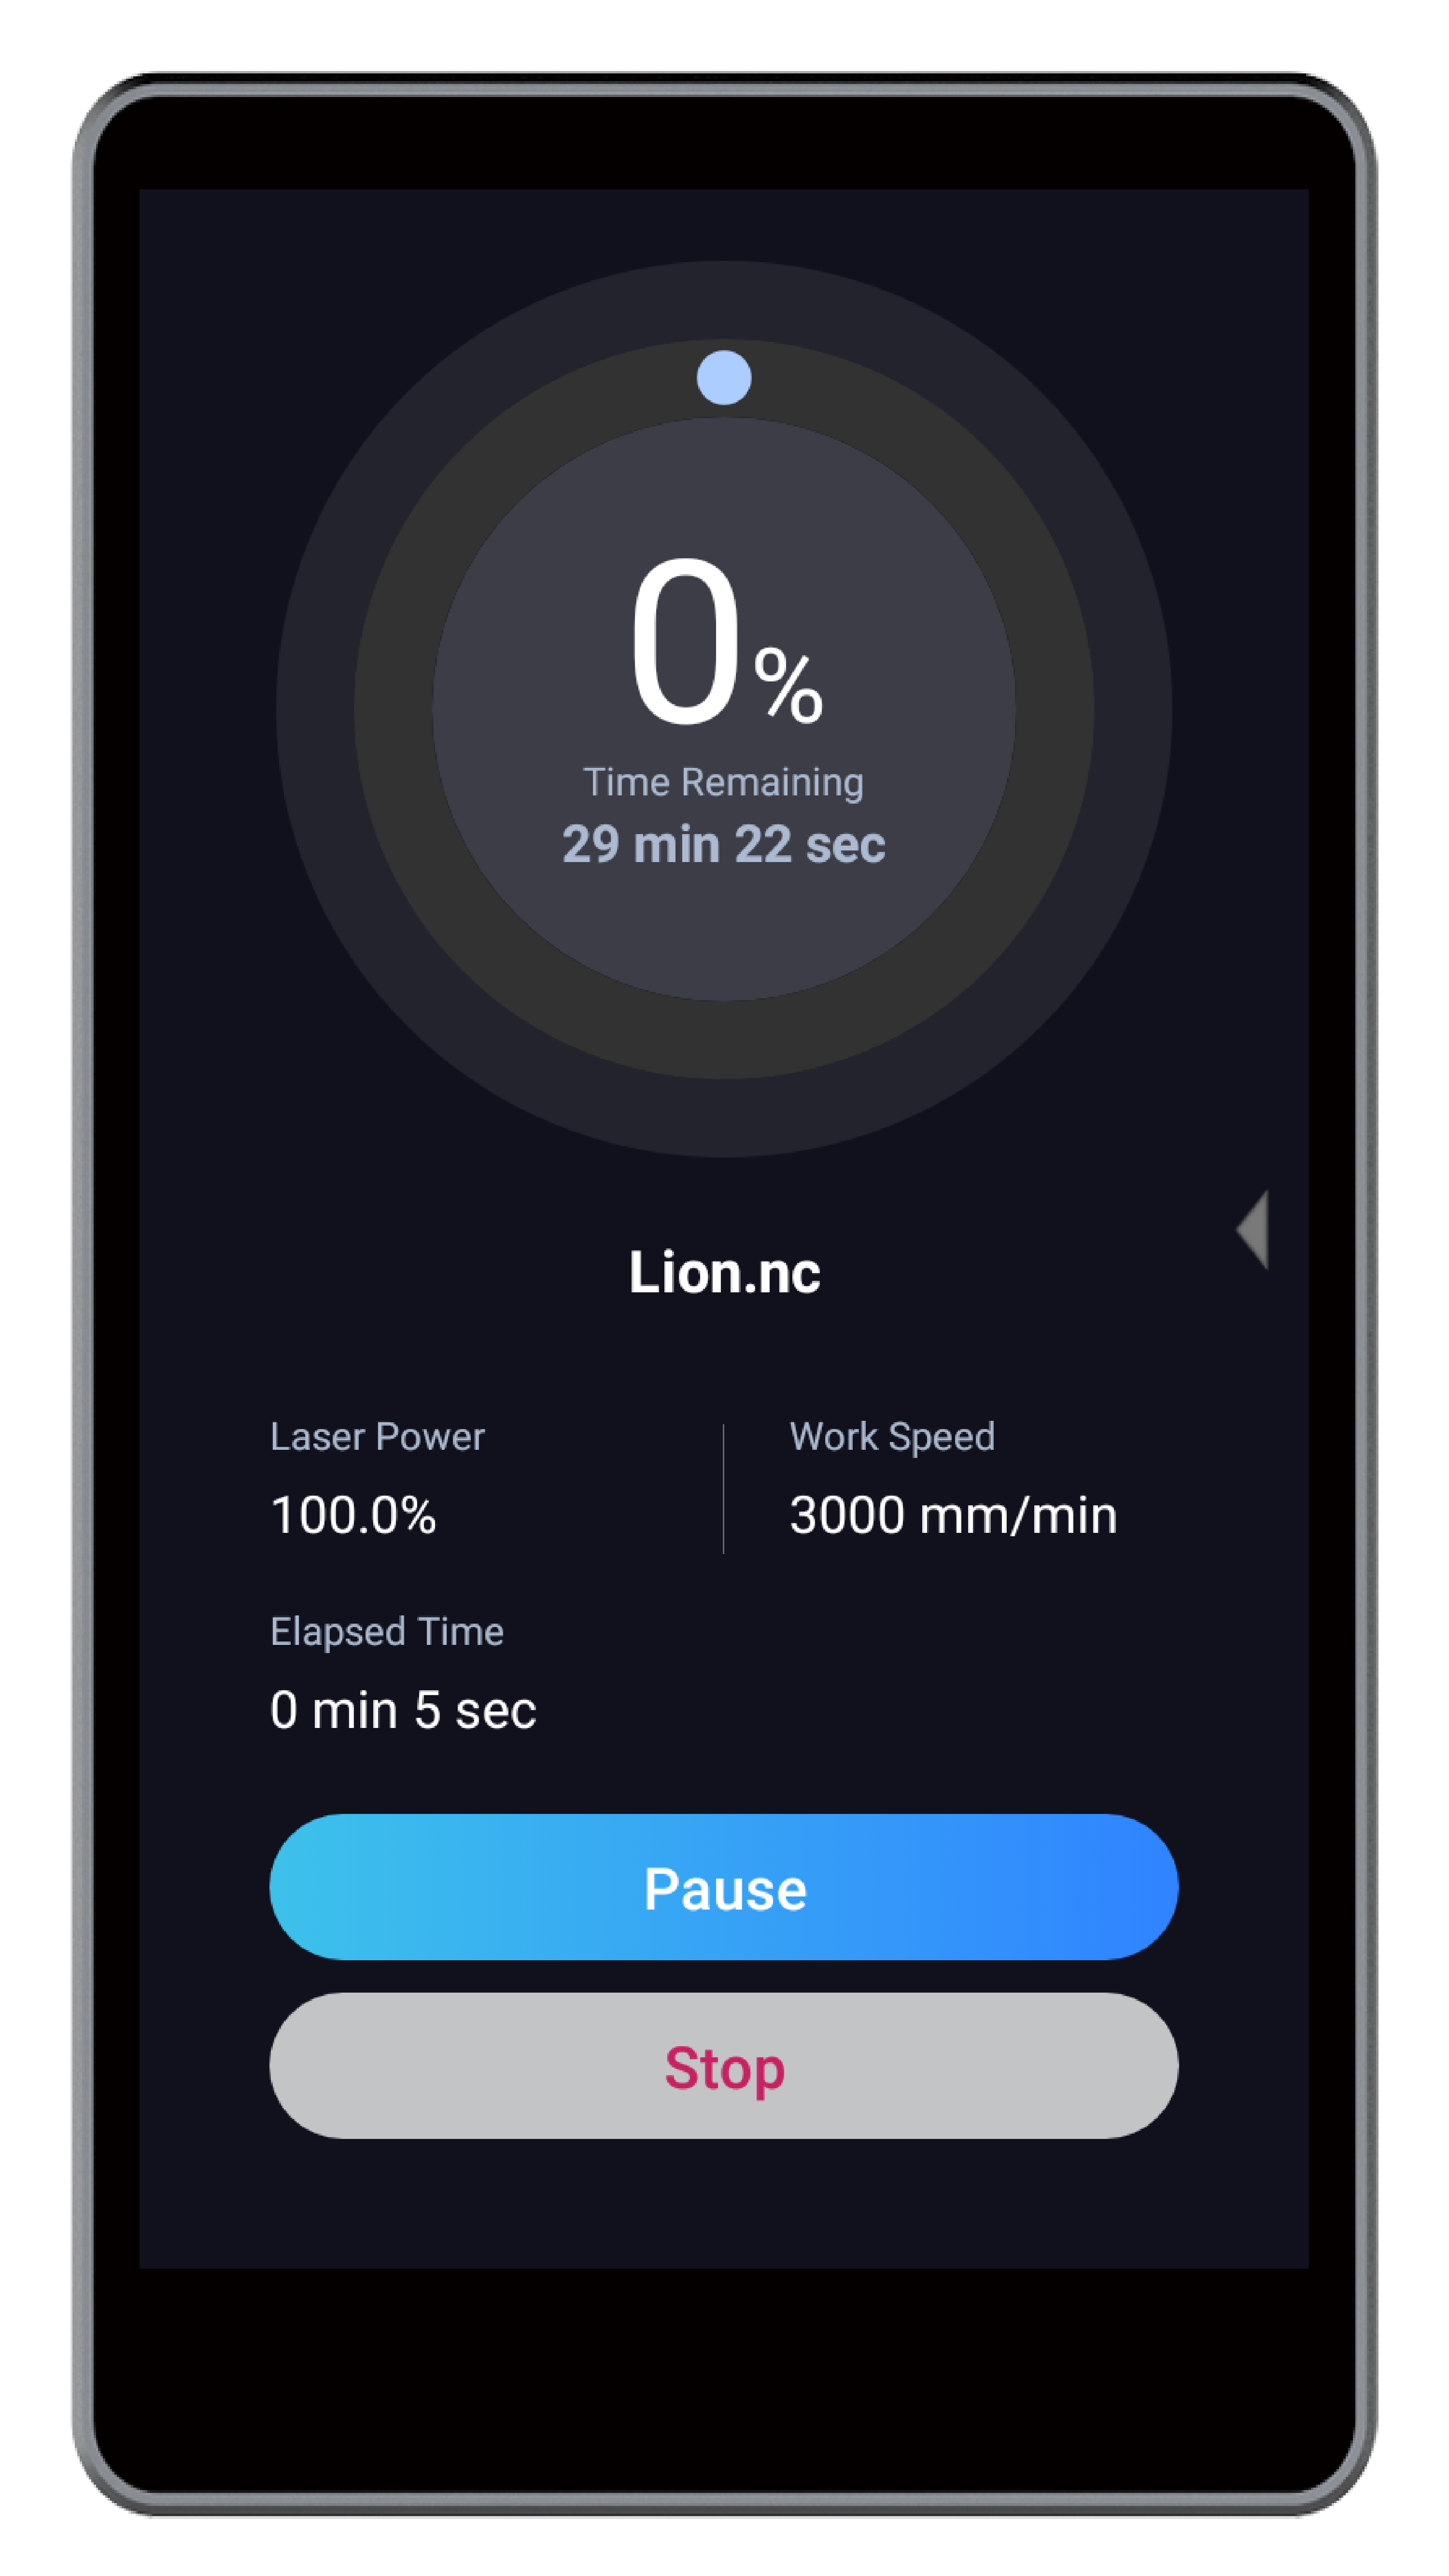
(10) Close the Enclosure and click Start to start laser engraving and cutting.
![]() If you use the 10W Laser Module for continual cutting at 100% laser power for more than eight hours, its service life may be shortened.
If you use the 10W Laser Module for continual cutting at 100% laser power for more than eight hours, its service life may be shortened.
![]() During laser engraving and cutting, you can perform the following operations:
During laser engraving and cutting, you can perform the following operations:
- Swipe left on the Touchscreen to modify Laser Power and Work Speed.
- Tap Pause to pause the ongoing laser job, and tap Resume to continue.
- Tap Stop to stop the ongoing laser job. If you stop a job, the job cannot be resumed.
(11) Remove the finished work by turning two chuck wrenches.
Start Engraving and Cutting on Luban
(1) Load the G-code file to Workspace.
- If you generate the G-code file on Luban, click Load G-code to Workspace to load the generated G-code file to Workspace.
- If you want to use a G-code file stored in your computer, click Import on the G-code Files panel of the Workspace. Select a G-code file (in nc. format) from your computer and click Open.
(2) Connect your machine to Luban (see 3.5 Connect the Machine to Luban).
(3) Loosen the 3-jaw Chuck by turning two chuck wrenches. Insert one end of the material onto the 3-stepped jaws, and tighten the Chuck.
![]() Caution the sharp jaws. Use two chuck wrenches to loosen or tighten the jaws.
Caution the sharp jaws. Use two chuck wrenches to loosen or tighten the jaws.
(4) Ensure that all the operators and bystanders have correctly put on the laser safety goggles. Then, on the left Laser panel of the Workspace, turn on Laser Power.
(5) On the right Control panel of the Workspace, click X-/X+/Y-/Y+/Z-/Z+/B Offsets to move the toolhead and rotate the material. When the laser spot moves to where the work origin will be, and the laser beam focuses on the material surface, click Set Work Origin > Run Boundary to check the work area.
![]() If the air concentrator hood bumps into the machine, turn off the machine immediately or press the Emergency Stop Button
If the air concentrator hood bumps into the machine, turn off the machine immediately or press the Emergency Stop Button ![]() .
.
(6) Close the Enclosure. On the right G-code Files panel, select the prepared G-code file and click Start on Luban > Start.
![]() If you use the 10W Laser Module for continual cutting at 100% laser power for more than eight hours, its service life may be shortened.
If you use the 10W Laser Module for continual cutting at 100% laser power for more than eight hours, its service life may be shortened.
![]() The Manual Mode is unavailable in 4-axis laser engraving and cutting.
The Manual Mode is unavailable in 4-axis laser engraving and cutting.
![]() During laser engraving and cutting, you can perform the following operations:
During laser engraving and cutting, you can perform the following operations:
- On the left Laser panel, modify Laser Power and Work Speed: input new values and click the Refresh button .
- On the right Job Status panel, click Pause to pause the ongoing laser job, and click Run to continue.
- On the right Job Status panel, click Stop to stop the ongoing laser job. If you stop a job, the job cannot be resumed.
(7) Remove the finished work by turning two chuck wrenches.