
6.1 Select the Origin Assistant
Swipe left on the Touchscreen, and tap Toolbox. Select Origin Assistant to guide you through setting the work origin.
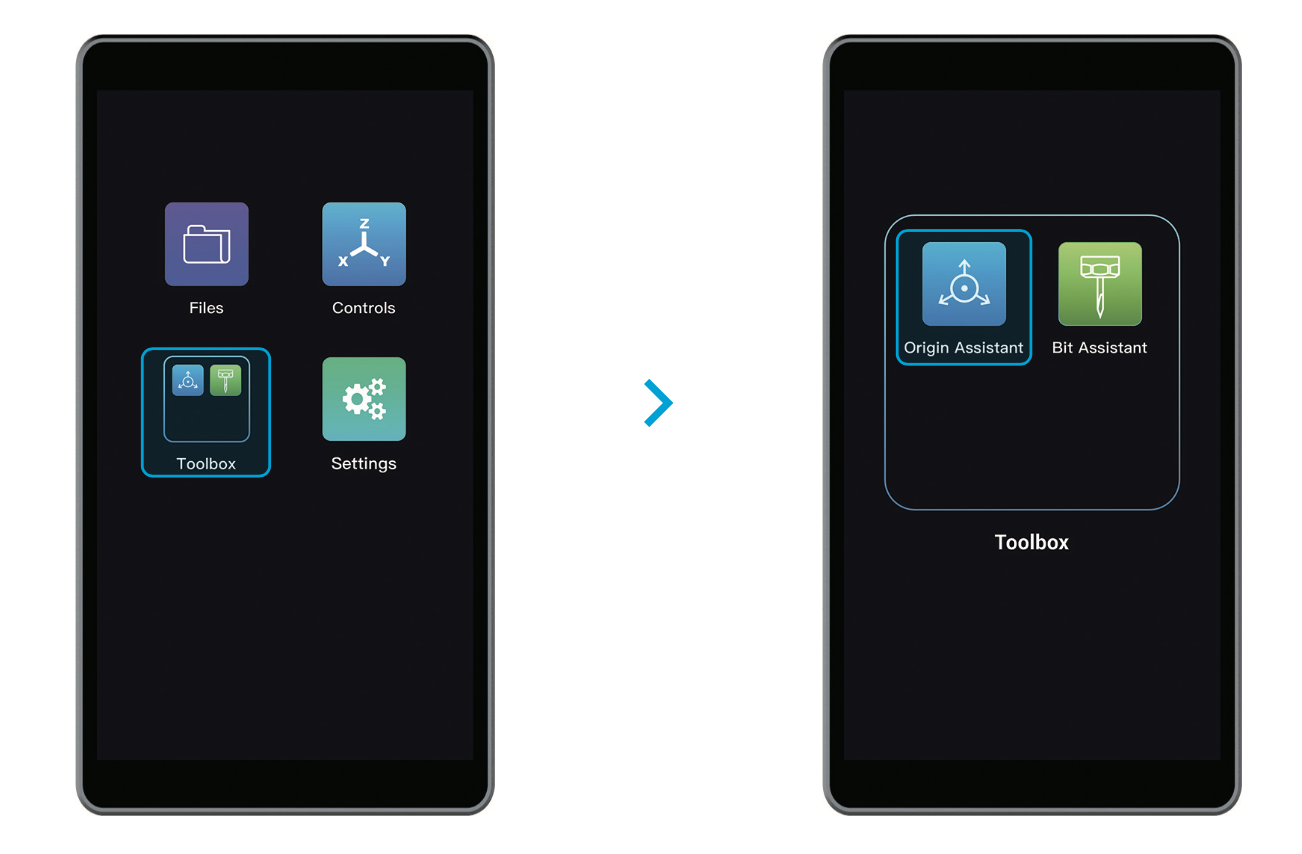
![]() If you are familiar with the Origin Assistant procedures, tap Files to set the work origin and run boundary.
If you are familiar with the Origin Assistant procedures, tap Files to set the work origin and run boundary.
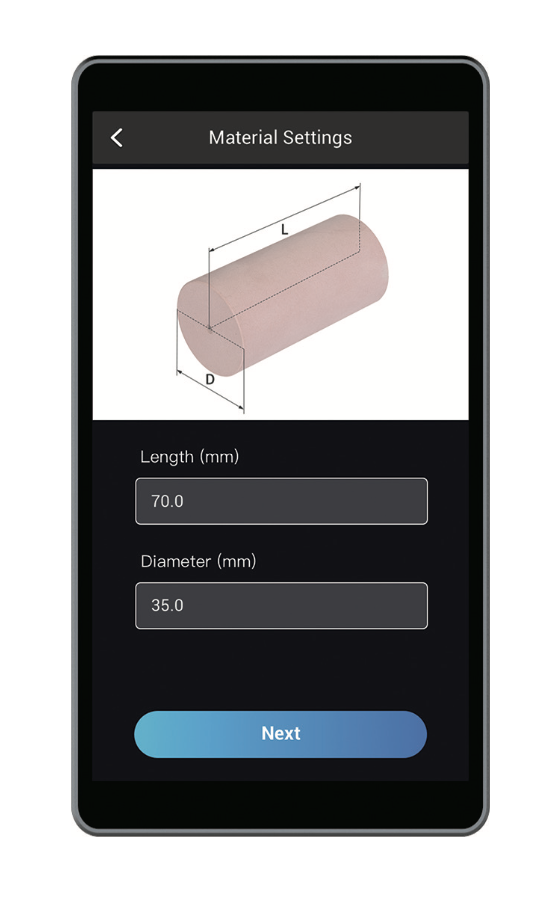
6.2 Material Settings
Input the length and diameter of your material.
6.3 Fix the Material
Loosen the 3-jaw Chuck counter-clockwise by turning two chuck wrenches. Insert one end of the material onto the 3-stepped jaws, and tighten the Chuck clockwise.
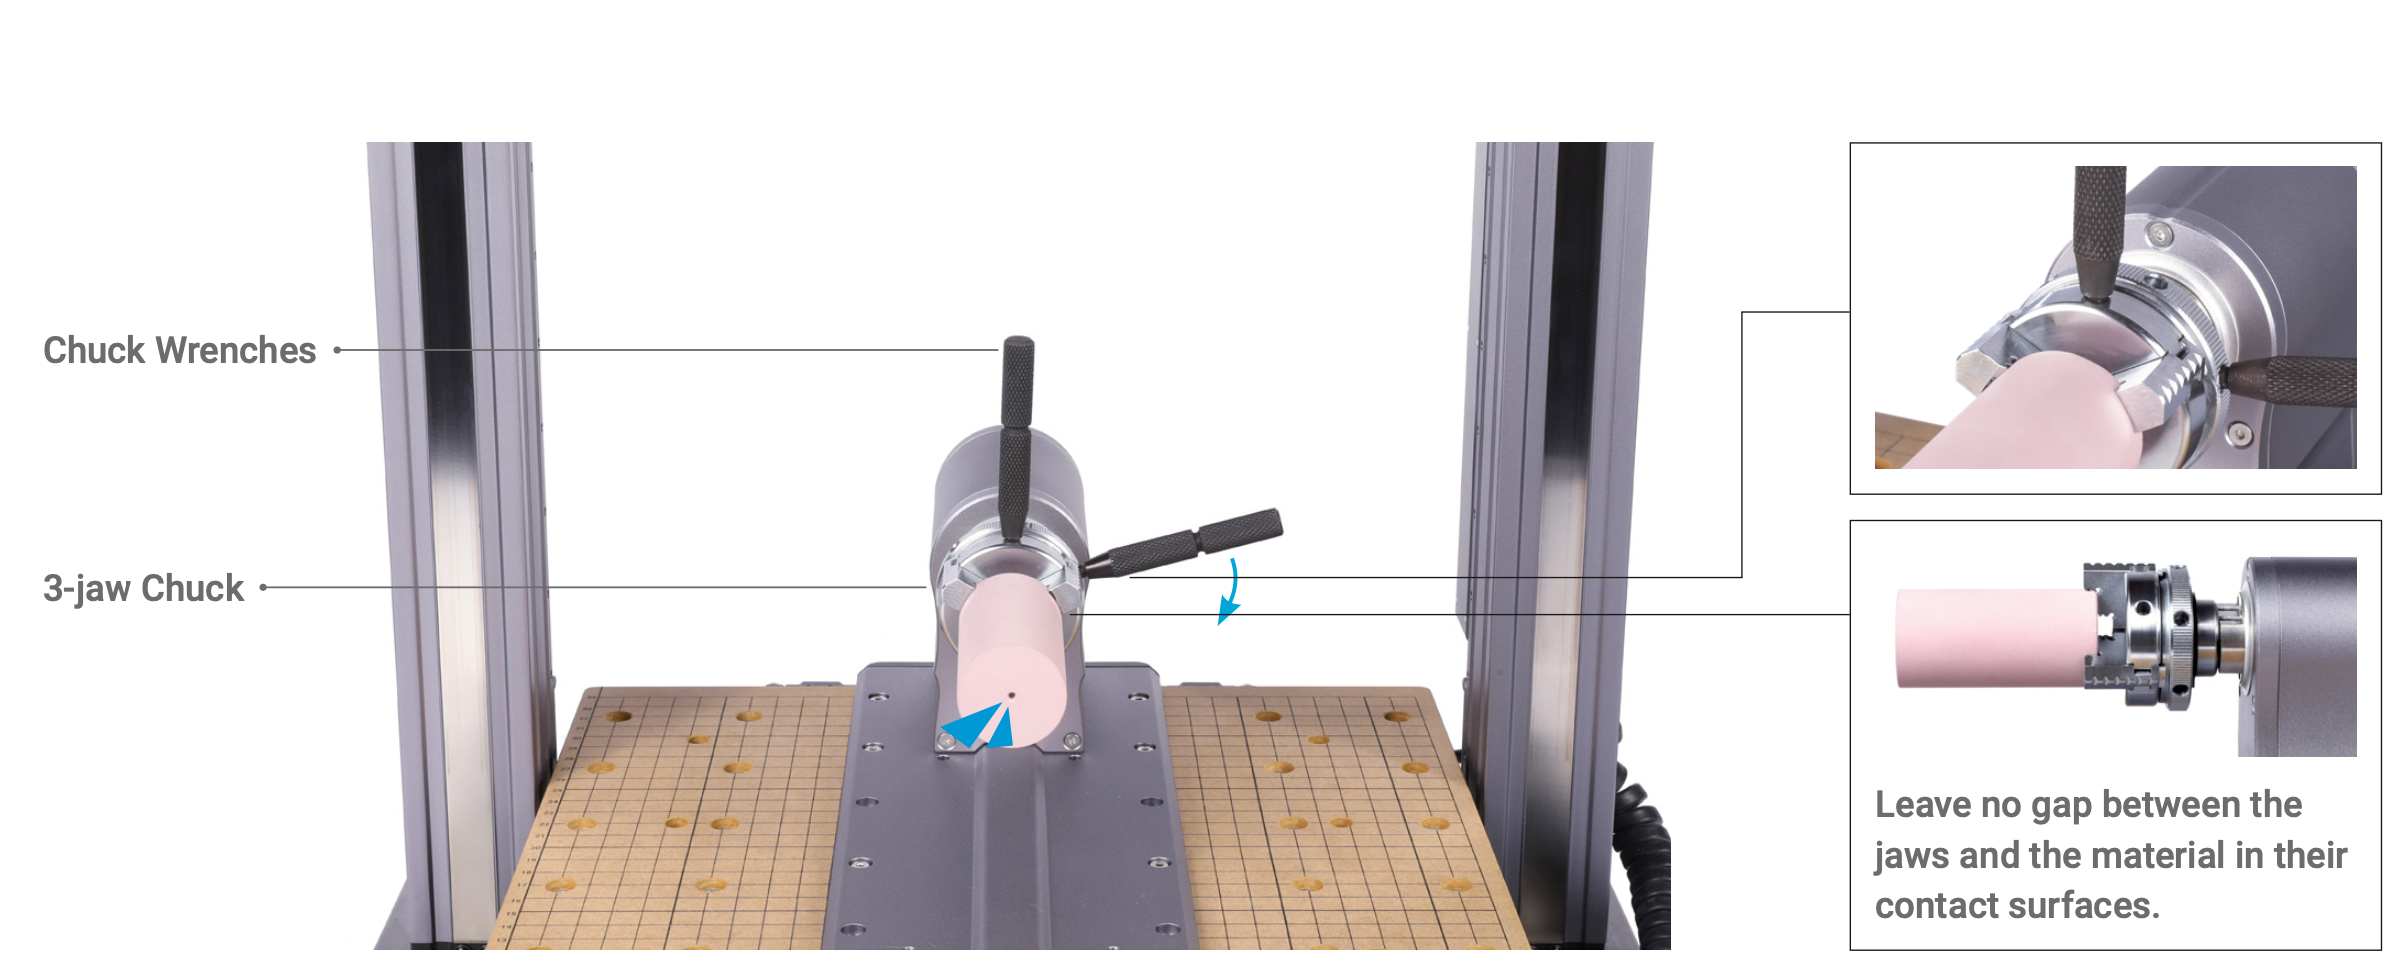
![]() Caution the sharp jaws. Always use two chuck wrenches to adjust the jaws.
Caution the sharp jaws. Always use two chuck wrenches to adjust the jaws.
![]() Do not tighten the Tailstock until 7.3 Attach the Tailstock. Otherwise, the CNC bit is likely to bump into the machine.
Do not tighten the Tailstock until 7.3 Attach the Tailstock. Otherwise, the CNC bit is likely to bump into the machine.
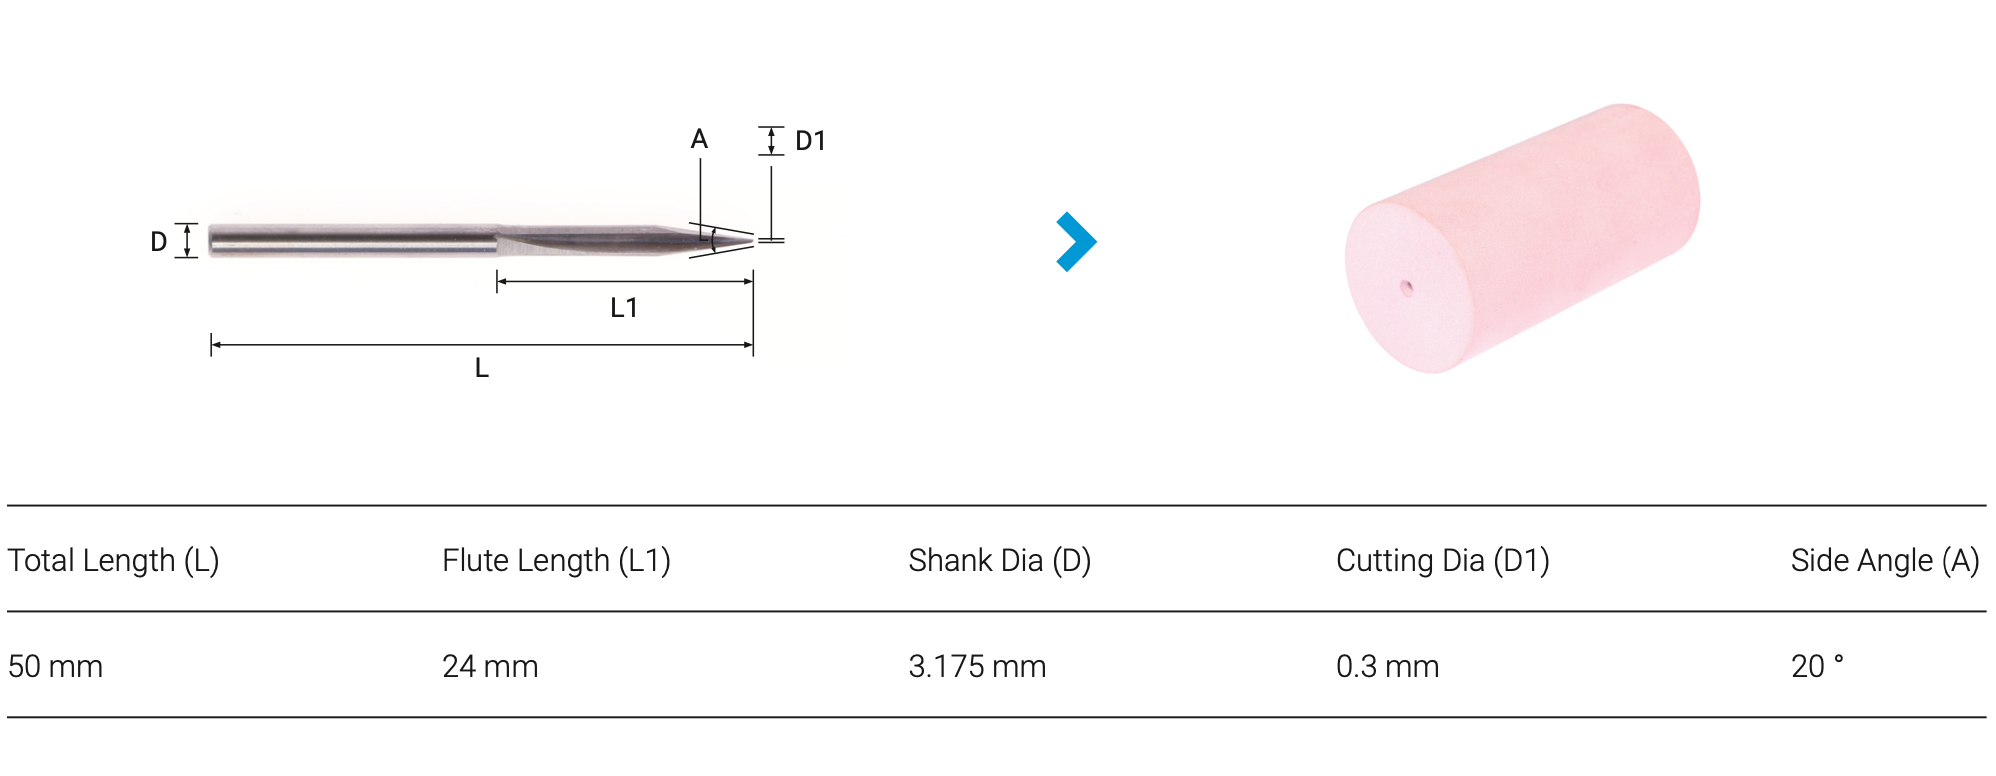
6.4 Attach the CNC Bit
How It Works: Straight Groove V-bit
The Straight Groove V-bit features a long and sharp carving edge, penetrating deep into materials and rendering high-precision creations. The extended flutes on both sides create a larger area of engagement, providing a superior carving than single flute bits. It can also clear sawdust, eliminating clogging and reducing wear and tear.
How to Attach the Bit
Select Straight Groove V-bit on the Touchscreen. Tilt the ER11 collet into the ER11 nut until the collet snaps into place. Insert the CNC bit into the ER11 collet until the shank bottoms against the collet.
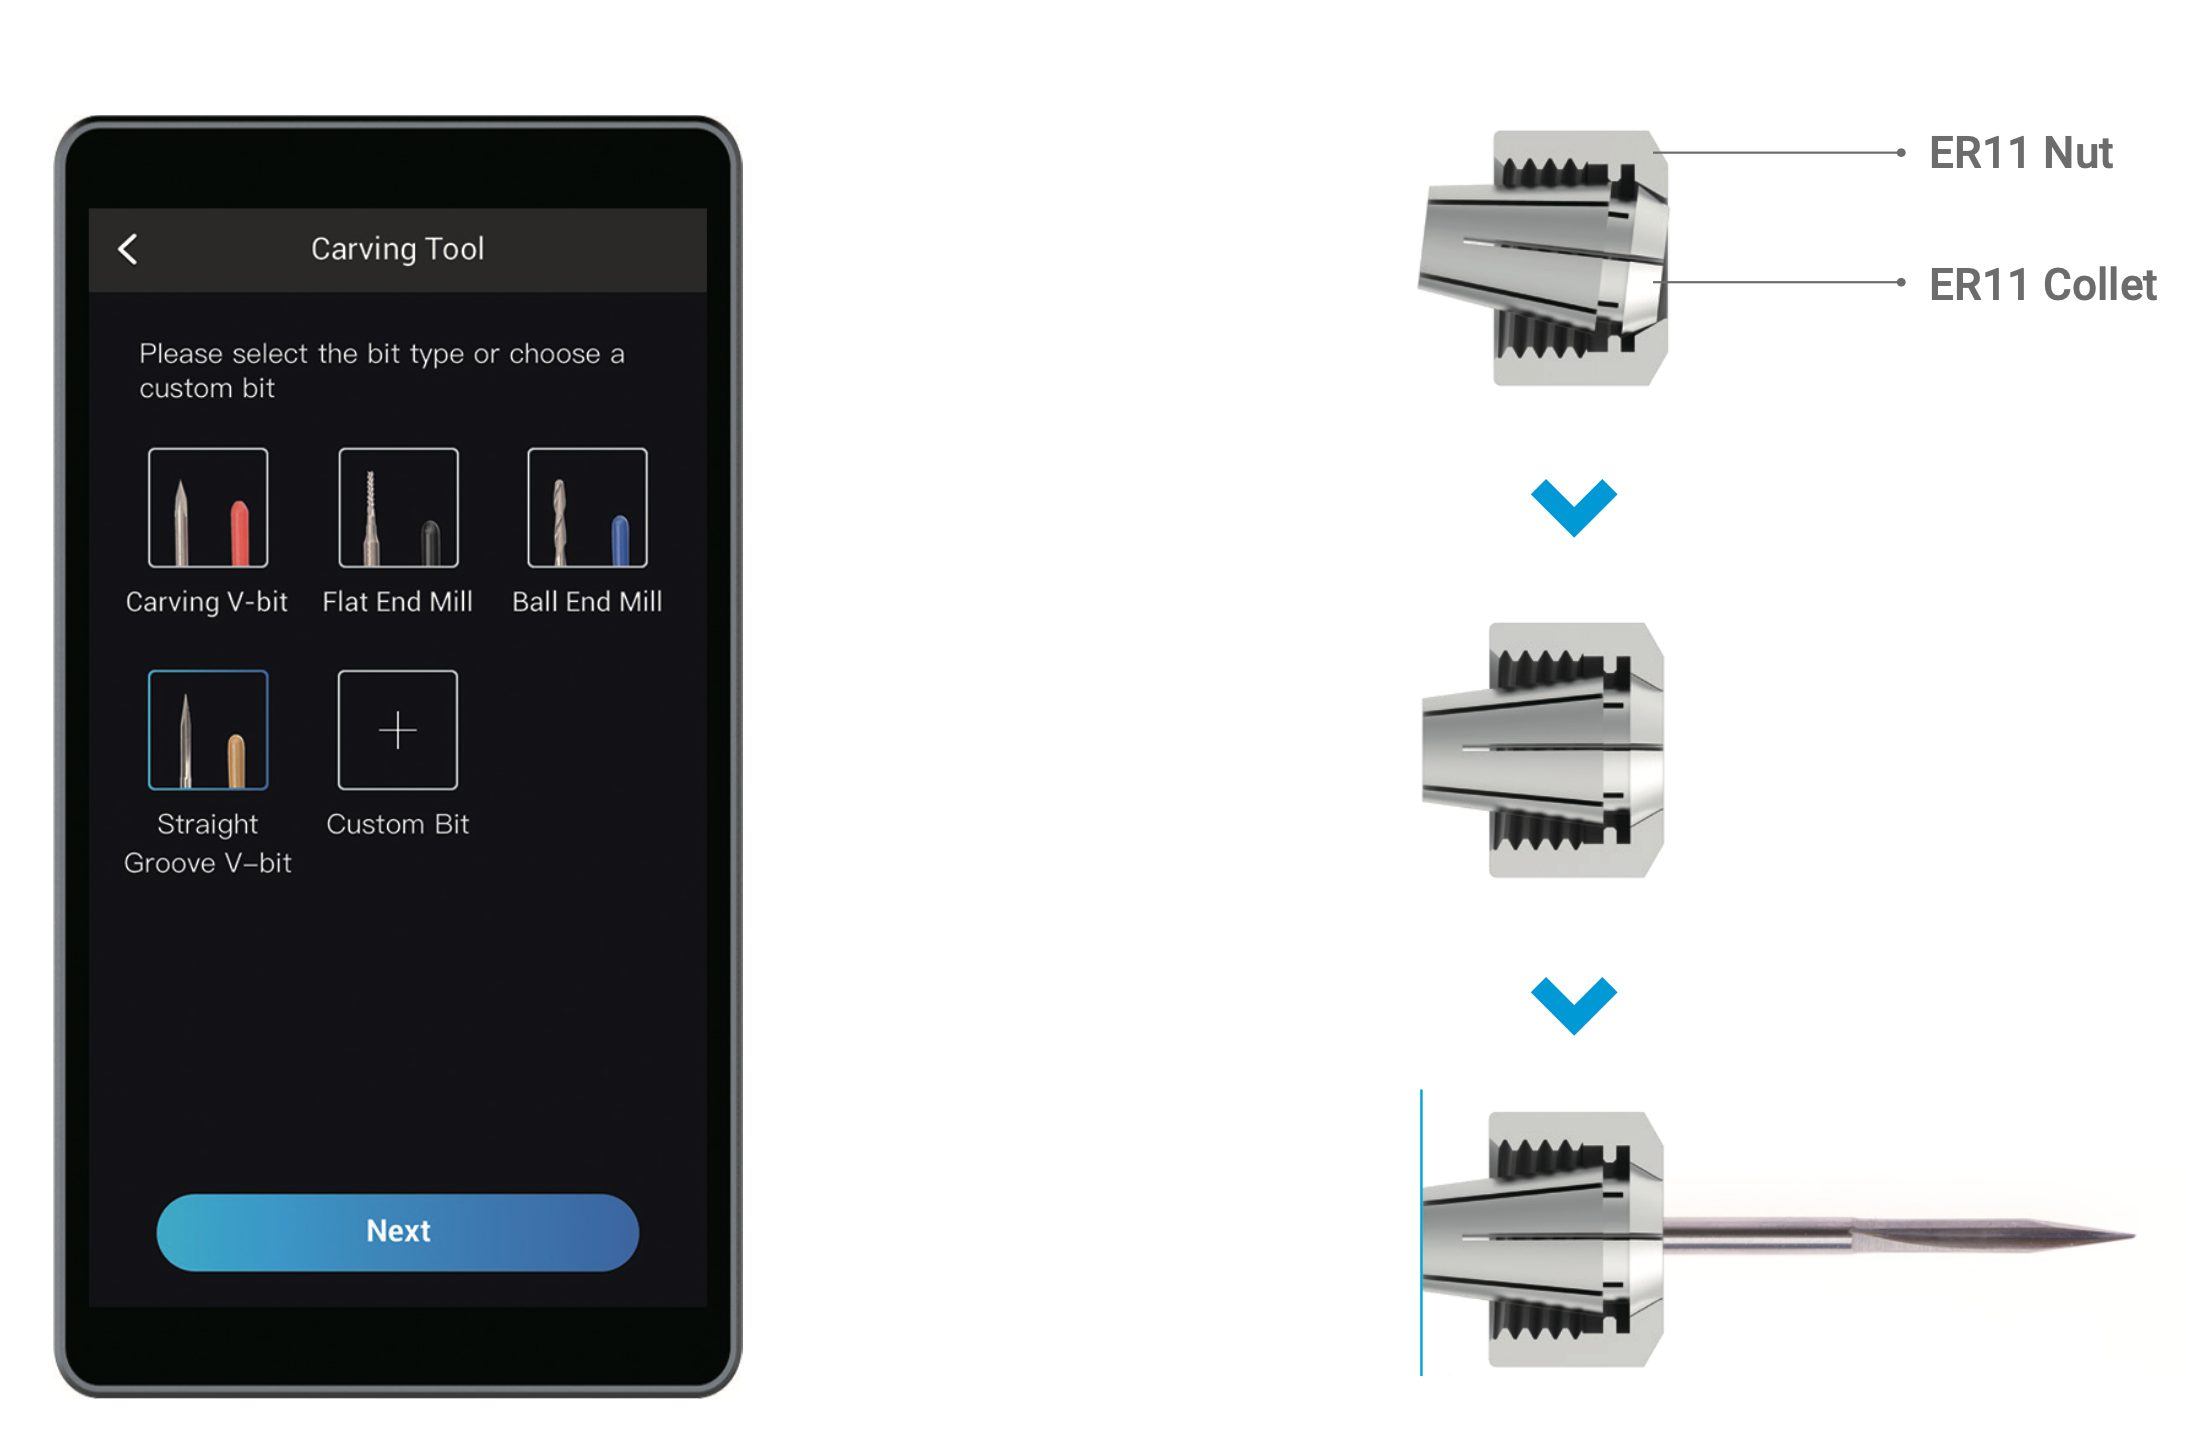
Twist the ER11 nut onto the Toolhead, and secure the nut by using open-end wrenches.
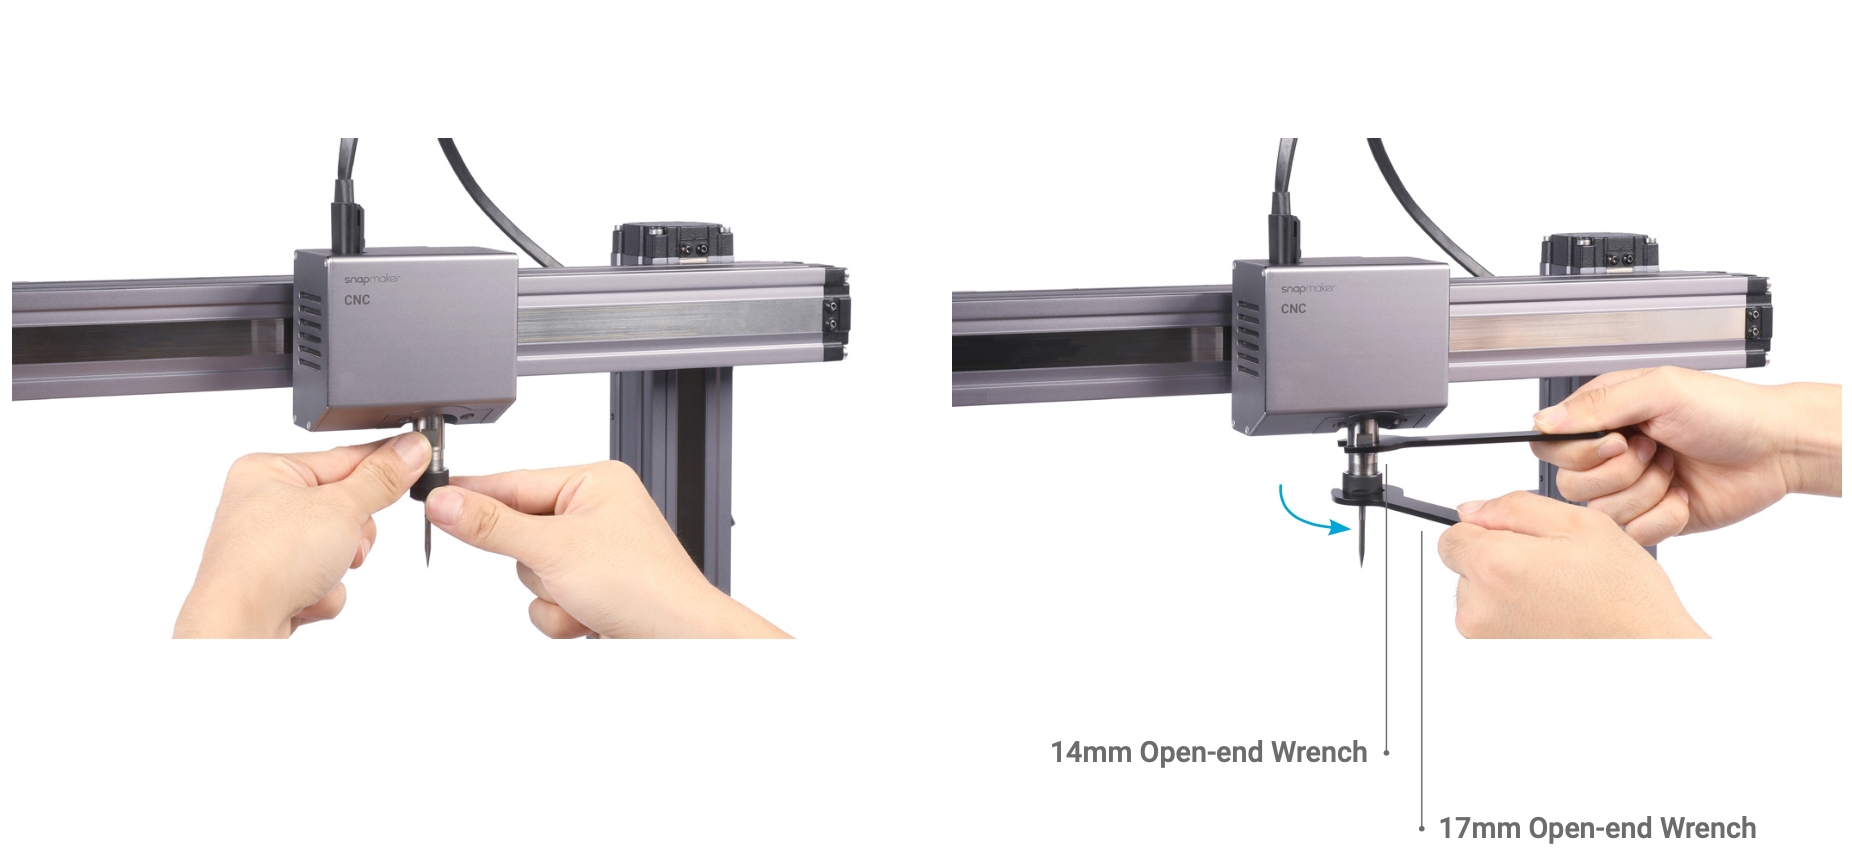
![]() Caution the sharp CNC bit.
Caution the sharp CNC bit.
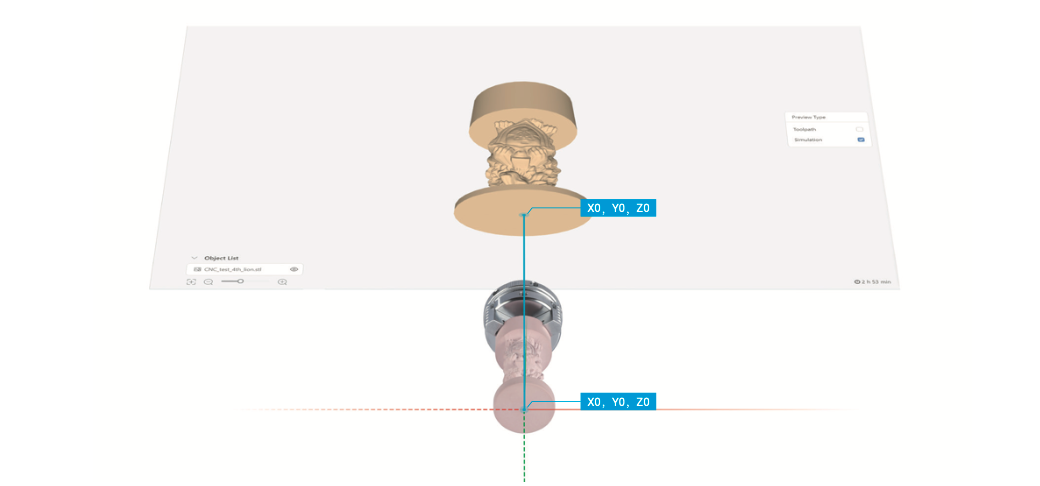
6.5 Set the Work Origin
How It Works: Work Origin
Setting the work origin helps the machine find out how to carve the material. The work origin (X0, Y0, Z0) on the material corresponds to the work origin (X0, Y0, Z0) in Luban.
How to Set the Work Origin
Read the instruction on Origin Assistant on the Touchscreen, and wear the CNC Safety Goggles. Follow on-screen instructions, and manipulate the illustrated part of the straight groove v-bit to touch the material.
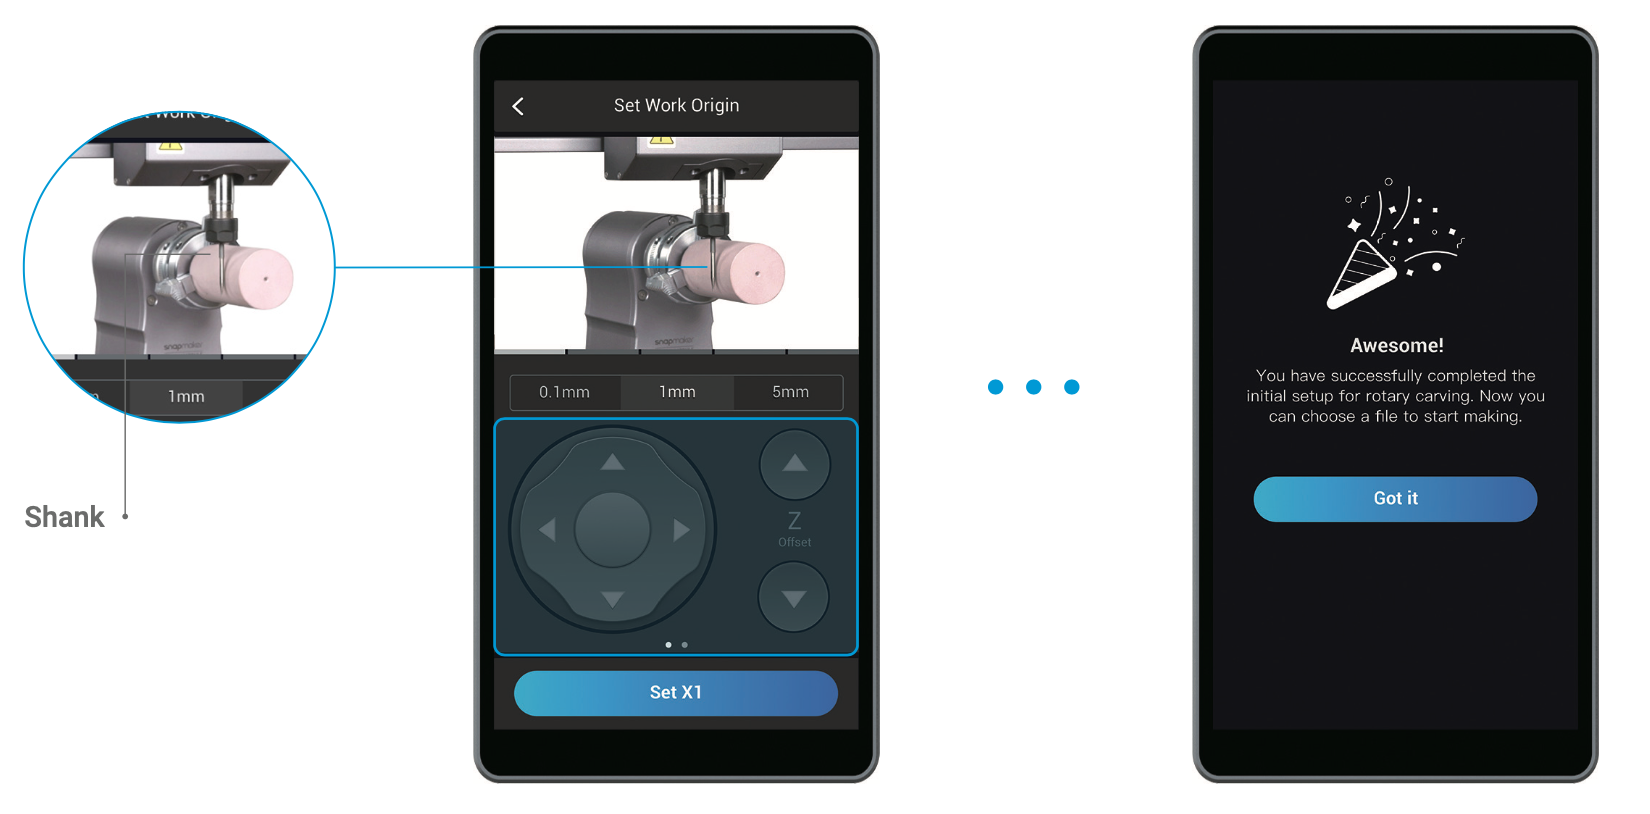
![]() If the CNC bit bumps into the machine, turn off the machine immediately or press the Emergency Stop Button
If the CNC bit bumps into the machine, turn off the machine immediately or press the Emergency Stop Button ![]() .
.