
Phenomenon:
- The filament is not pulled in smoothly during the printing process.
Possible causes:
- The nozzle is jammed.
- The gear is loosened;
- The motor cannot rotate during the printing process;
- The motor itself is broken so that it cannot provide enough strength;
- The chip that controls the motor, which is in the controller, is defective.
Solutions:
- Cause 1:
1) Make sure you followed the steps in Change Filament to remove the previous filament from the 3D Printing Nozzle.
2) Make sure that the end of the filament is as straight as possible and that you push the button as far as you can. Or the filament will get stuck in the middle of the feeding tube.
3) You can use the 1.5mm Hex Key Wrench to troubleshoot.
3.1) Click “Change Filament” on the touch screen and wait until the nozzle temperature reaches the target.
3.2) Press the button and insert the Hex Key Wrench into the filament inlet so that the remaining filament is extruded. Please be noted that the Hex Key Wrench cannot be inserted too far to avoid damaging the nozzle.
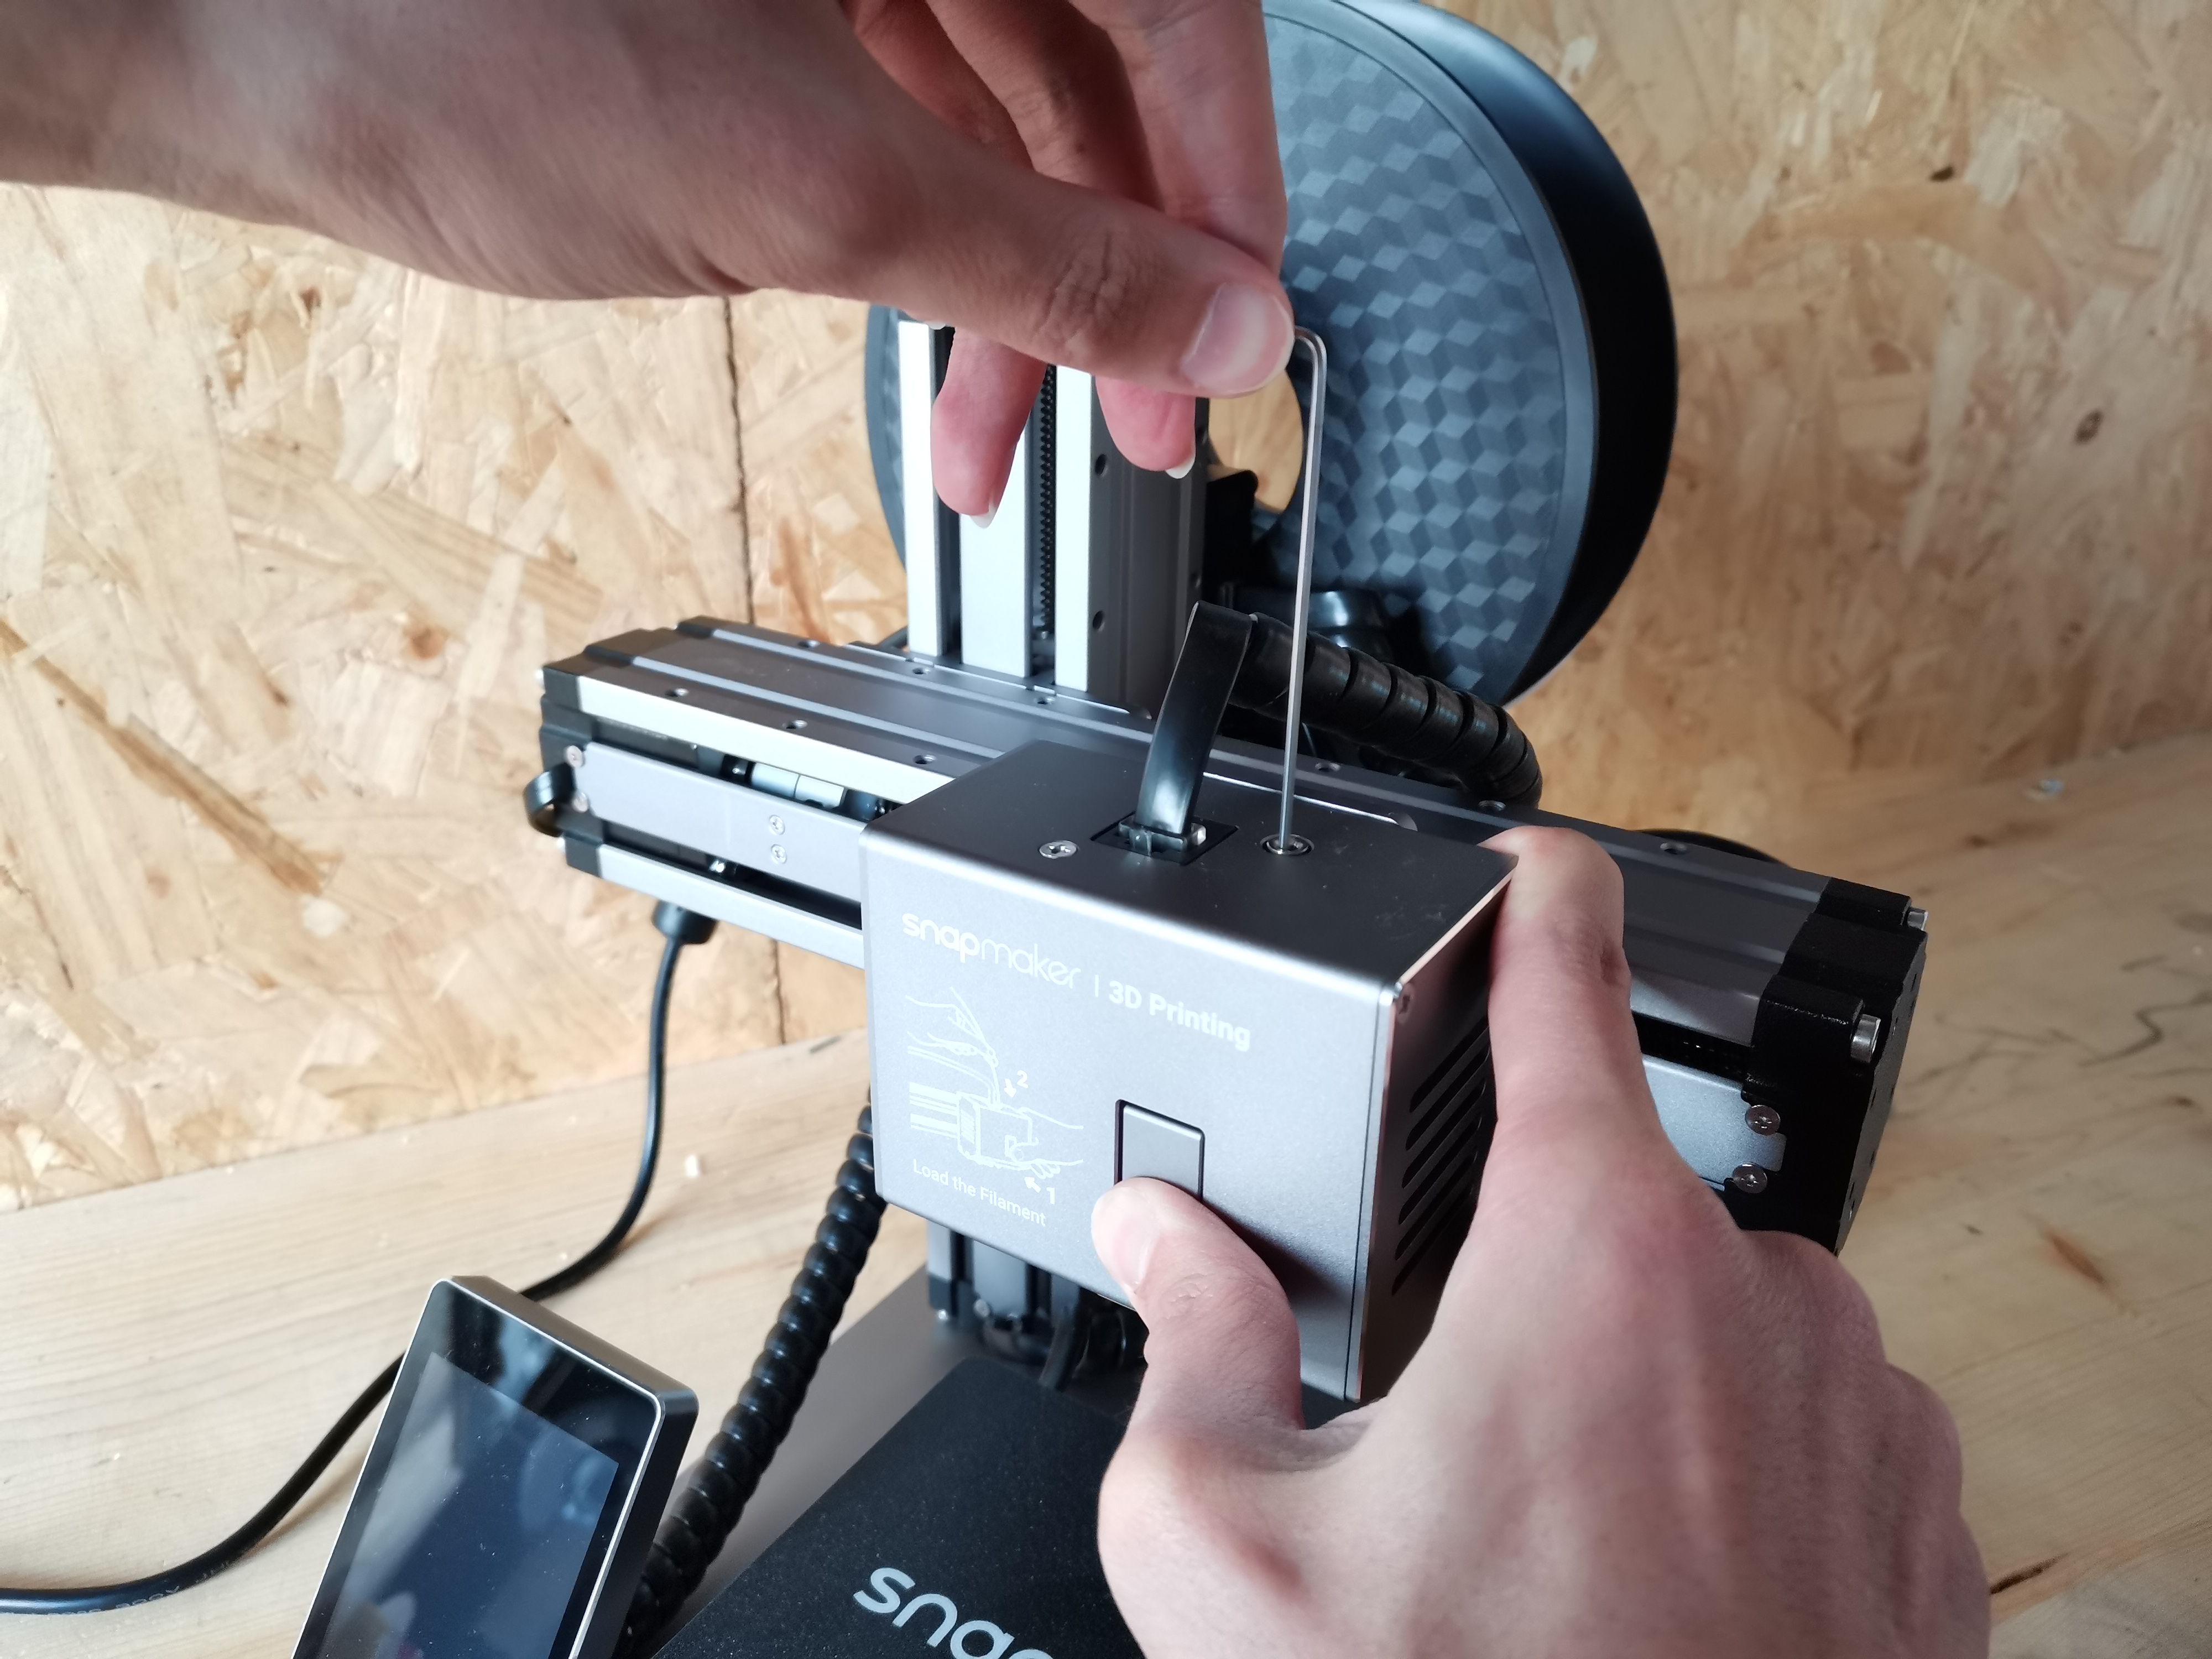
4) Try to squeeze out the filament in the nozzle by inserting the new filament.

5) If the nozzle is still jammed after a few tries, replace the Extruder Hot End Kit by following these steps.
Take out the jammed Extruder Hot End Kit:
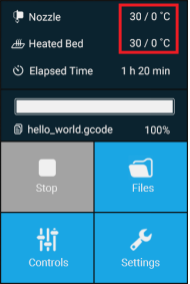
A, Wait for the nozzle to cool off until the real-time temperature on the Touch Screen is reduced to room temperature.
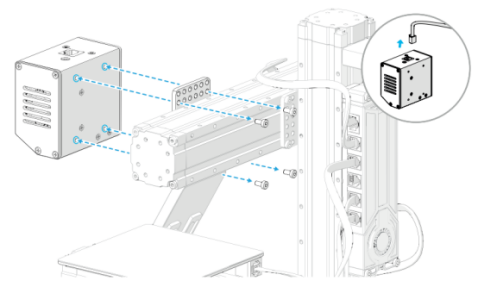
B. Power off the machine. Unplug the Module Cable and detach the 3D Printing Module from the X-Axis.
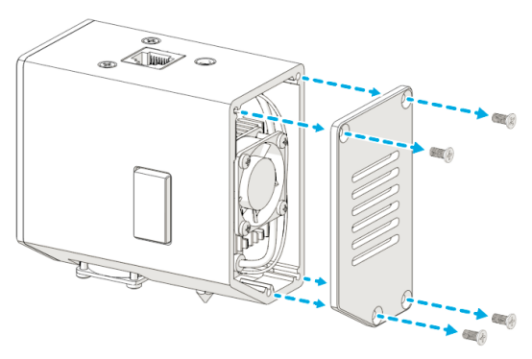
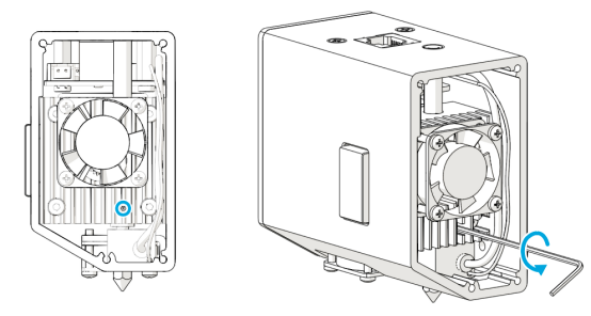
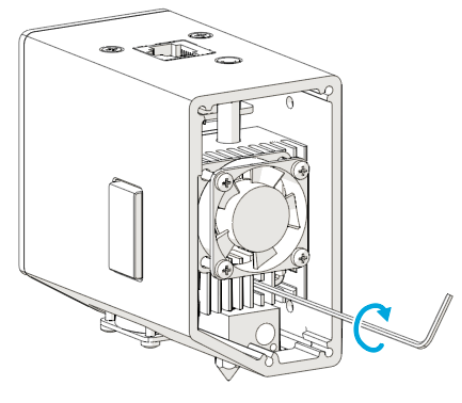
C, Detach the side cover on the right using the other end of the screwdriver.
D, Use the provided Hex Key Wench to loosen the screw under the fan.
Tips: To avoid losing the screw, it is recommended to loosen it instead of taking it out.
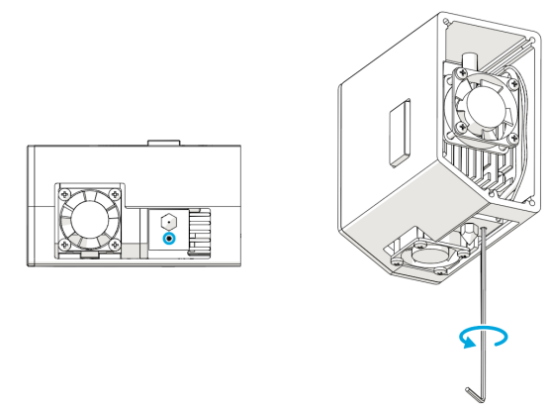
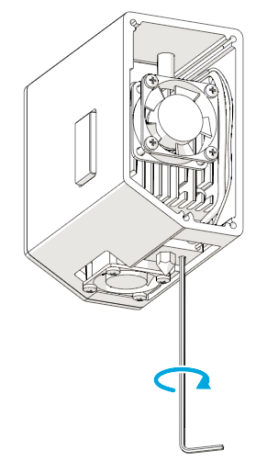
E, Loosen the screw on the heated block.
Tips: To avoid losing the screw, it is recommended to loosen it instead of taking it out.
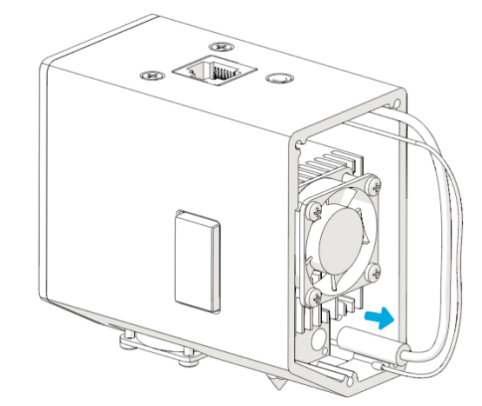
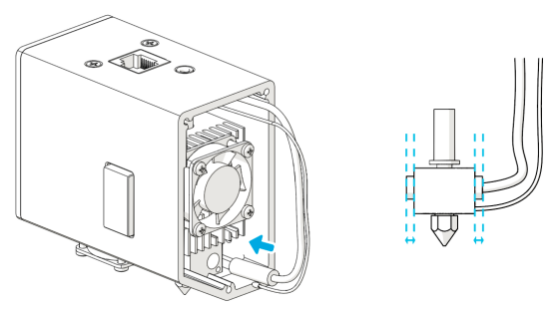
F, Extract the heating tube and thermistor.
F, Press the button on the front of the 3D Printing Module and extract the Extruder Hot End Kit.
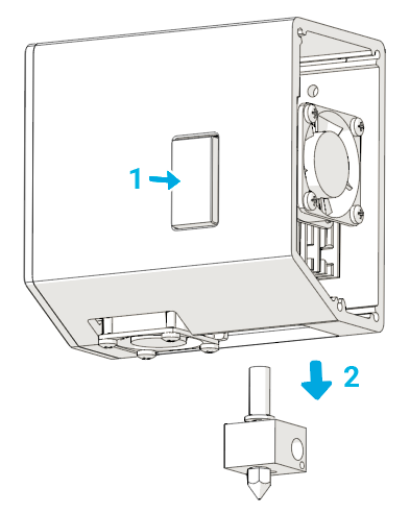
Attach the new Extruder Hot End Kit:
A, Press the button on the front of the 3D Printing Module and insert the new Extruder Hot End Kit. Keep the highlighted side of the heated block parallel with its nearby side of the 3D Printing Module.
B, Tighten the screw under the fan.
C, Insert the heating tube and thermistor into the heated block. Part of the heating tube should come out from the other side of the heated block while the end of the thermistor should stay in the heated block.
D, Tighten the screw on the heated block.
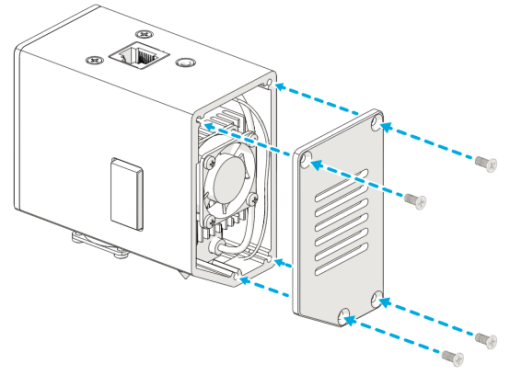
E, Attach the side cover back to the 3D Printing Module.
F, Attach the 3D Printing Module to the X-Axis and power on the machine.
6) Contact our support at support@snapmaker.com if the problem persists.
- Cause 2: When the gear in the 3D Printing Module is loosened and can’t guide the filament properly, please follow this tutorial to fix the gear: https://youtu.be/NlyKyBX1tF0
- Cause 3: Please detach the side cover of the 3D printing module and check if the gear rotates during the printing process.
- Cause 4: You need to replace the 3D printing module. Please contact support@snapmaker.com for help.
- Cause 5: You need to replace the controller. Please contact support@snapmaker.com for help.