
If you run into any of the following issues, you need to replace the heating tube and thermistor.
1. When printing via the computer, the console of Snapmkerjs indicates “Heating failed”.
2. The target temperature on the touchscreen drops to zero suddenly and the light on the controller turns to red.
3. There is a blob of filament on the hot end and it’s hard to clean up.
4. The target temperature in the touchscreen is not a normal number or NA. The light on the controller turns to red after restart.
5. The printer doesn’t start to print after you choose a file. The nozzle temperature jumps around the target temperature and the light on the controller turns to red.
Here are the steps to to replace the heating tube and thermistor.
Tools you need: scissors, dual-purpose screwdriver, 1.5 mm hex key wrench, tweezers, cable tie, heating tube, thermistor.
1. Remove the fan next to the nozzle
- Make sure that the nozzle is cooled to room temperature firstly and then detach the two side covers by using a screwdriver.
- Loosen the two screws next to the fan.
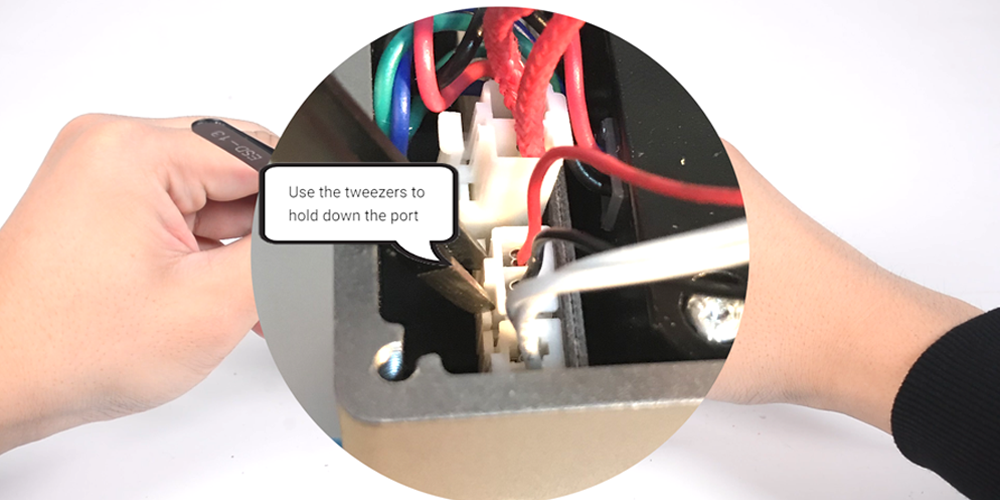
- Use the tweezers to hold down the port, unplug the connector of the fan and then remove the fan.
2. Remove the old heating tube and thermistor
- Unplug the connectors of the old heating tube and thermistor by using the tweezers.
- Cut the old heating tube and thermistor.
- Loosen the screw in the heated block with the 1.5mm hex key wrench and then extract the old heating tube and thermistor.
3. Install the new heating tube and thermistor
- Tie the new heating tube and thermistor up with a cable tie.
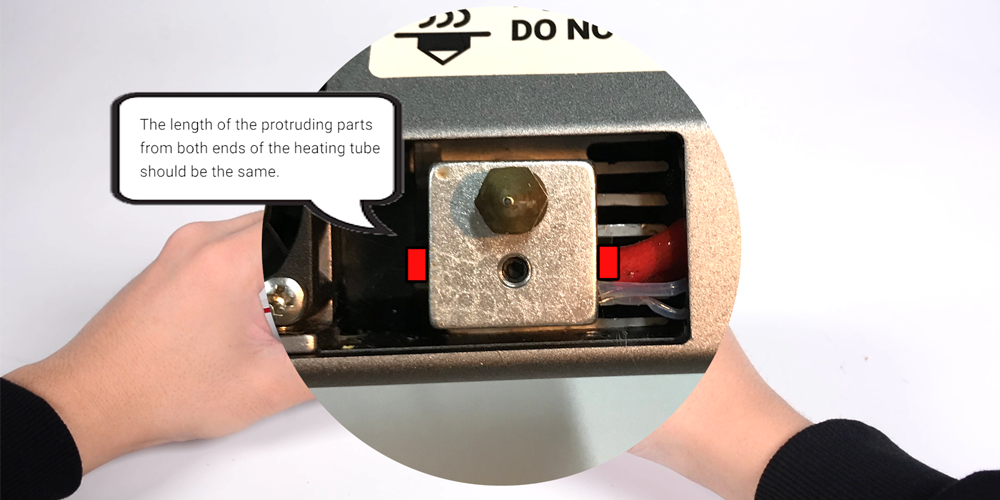
- Insert the new heating tube and thermistor into the heated block. Part of the heating tube should protrude from the other side of the heated block. Make sure both ends of the heating tube to the heated block should be of equal length.
- Make sure the thermistor is in the heated block and tighten the screw.
- Put the new heating tube and thermistor thought the module and plug the connectors into the ports.
- The heating tube and thermistor can’t touch the hot end.
4. Install the fan
Plug the connector of the fan into the interface and attach it to the module.
5. Assembly
Install the two side covers.
6. Test
Connect the module to the controller and turn on the power. Load the filament, calibrate the heated bed and start a short print. Check if there is any problem while printing.
Feel free to contact us for more help at support@snapmaker.com. We are always available to help you out.