
The first layer of any 3D printed model is the foundation of printing the model properly. With the dedicated Snapmaker heated bed and its sticker, the first layer generally has better adhesion. However, some users (especially beginners) can sometimes get stuck when the first layer cannot stick to the heated bed.
There are many ways to ensure the first layer of your print sticks to the bed properly. Here is a list of the most useful methods. You might use one of them or a combination of these methods to ensure that the first layer sticks perfectly to the heated bed.
- Clean the nozzle and the bed
- Level the bed
- Lower the print speed of the first layer and add a brim
- Increase the bed temperature and the initial layer line width
- (For ABS) Use glue and enclosure
- Apply blue tape to the bed
- Replace the sticker
Method 1
Clean the nozzle and the bed
Before starting any of your prints, you should ensure that the nozzle and the bed are clean. First, you need to make sure that the tip of the nozzle is clean. The simplest way is to wipe the nozzle with a cloth after heating up the nozzle to 210℃. Please note that the nozzle is quite hot and you should use a thick cloth to do the cleaning. To achieve the best adhesion of the heated bed, it is very important to keep it clean. You can use rubbing alcohol to remove grease stains from the bed.
Method 2
Level the bed
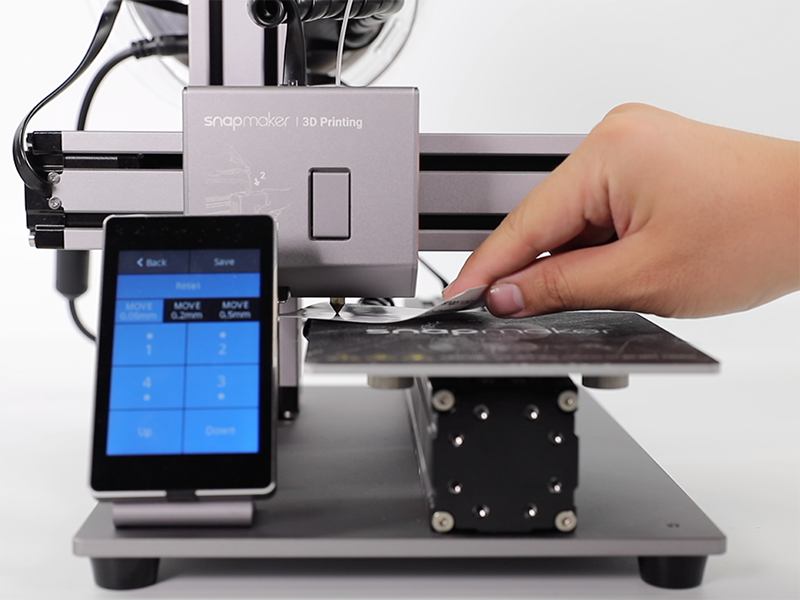
You should verify the printer is properly calibrated and leveled. It will result in uneven first layer adhesion if the bed is not level. The “paper test” is the most popular way to calibrate the bed properly. You can use a piece of A4 paper or the provided calibration card.
- Make sure that four screws for the bed are tightened.
- On the touchscreen, go to Settings > Calibration.
- Put one half of a piece of A4 paper between the nozzle and the bed. Tap 1 and the 3D Printing Module will move to the first calibration corner.
- Adjust the nozzle height using the Up and Down buttons on the touchscreen. Be sure to choose MOVE 0.05mm for fine adjustment.
- Finish adjustment when the paper can no longer be pushed forward yet it can still be pulled back with a slight resistance.
- Tap 2 and repeat the calibration process to level the second corner.
- Level the four corners in order.
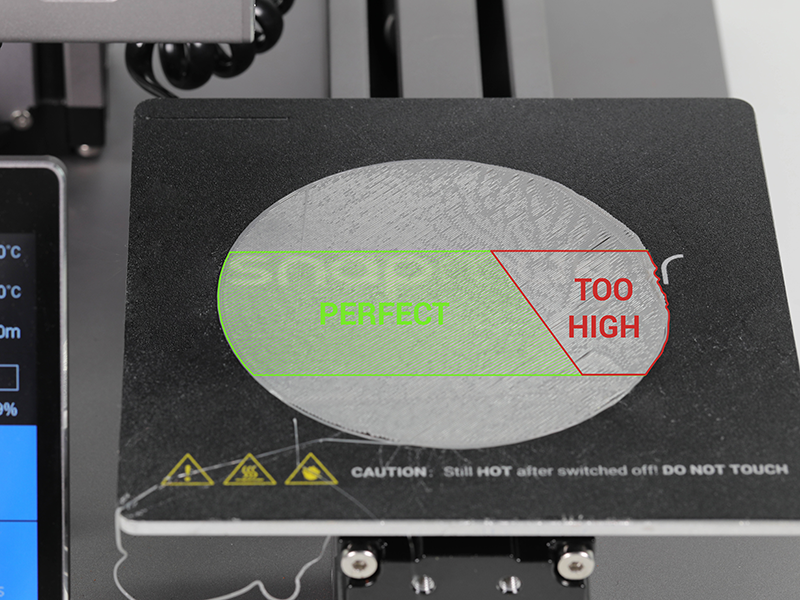
The nozzle should neither be too far from nor too close to the bed. If the nozzle is too far from the bed, the first layer will not stick to the bed. If the nozzle is too close to the bed, it will drag across the bed and damage the bed, and the filament can’t be extruded smoothly.
Method 3
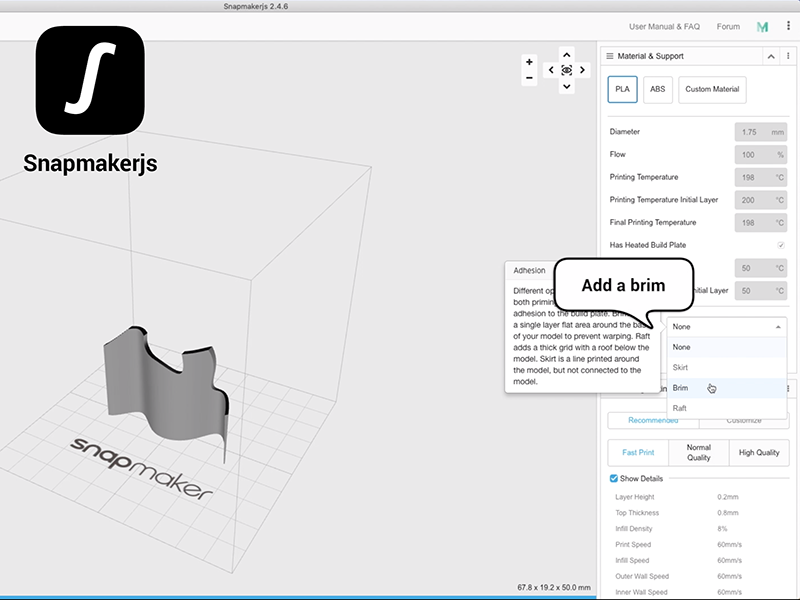
Add a brim and lower the print speed of the first layer
Generally, prints that have larger contact area with the heated bed can achieve better adhesion. Both rafts and brims help with bed adhesion and both can be used to stabilize models. A brim may be preferable to a raft when the model is delicate, has a very small surface area, or needs to be printed with support structures. This is because removing a brim from these types of models is easier than removing a raft.
Lower the print speed of the first layer helps the melted material to stick well to the heated bed. 10mm/s is recommended.
Method 4
Increase the bed temperature and the initial layer line width
Plastic filament tends to shrink and peel off from the bed as it cools. Increasing the temperature of the heated bed helps to provide a warmer platform and keep the first layer warm, mitigating shrinkage detachment. For PLA, you can increase the bed temperature to 60℃. In addition, increasing the first layer line width also helps the first layer to adhere better on the bed. You can increase the initial layer line width to 130% in Snapmakerjs. Besides, you should increase the first layer printing temperature to 205℃ to get better adhesion. Please note that it's not necessary to increase the printing temperature or the final printing temperature. Otherwise, the stringing issue will probably occur since the printing temperature is too high and the plastic material inside the nozzle will become less viscous and will leak out of the nozzle much more easily.
Method 5
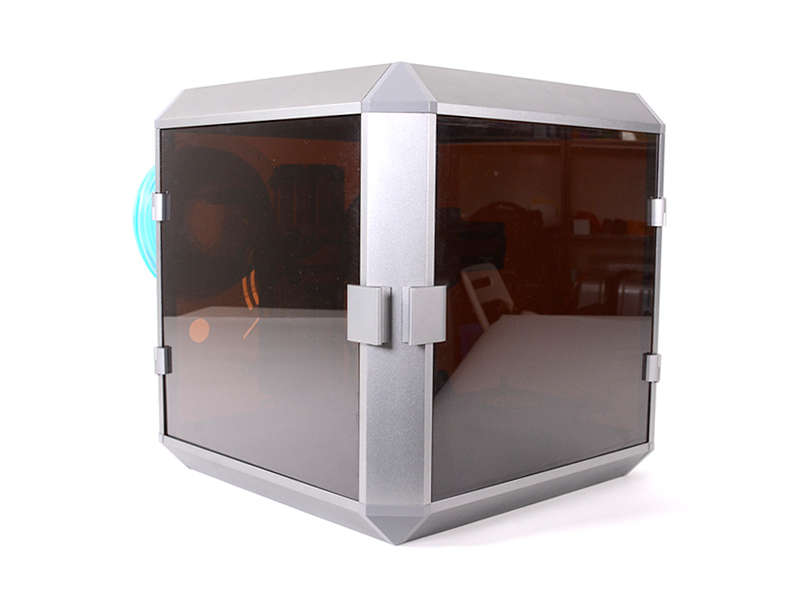
(For ABS) Use glue and enclosure
Compared with PLA, ABS is a little trickier to print with. It can be quite difficult for a beginner to find the right printing settings for ABS filament. Make sure that you have chosen the ABS mode in the Snapmakerjs so that you don’t need to bother about the settings.
If you fail to print with ABS filament using the default settings, here are a few steps that help to ensure a successful print. First, follow methods 1-4 to ensure your Snapmaker is in a proper state and printing settings are appropriate. Second, adjust the temperature settings in Snapmakerjs. Generally, ABS works better if the printing temperature is heated to 235-248℃ and the heated bed temperature is heated to 80-95℃. However, the heated bed temperature can only be heated up to over 80℃ when the printer is covered with an enclosure. (When the environment temperature is below 25℃, there is a chance that it cannot be heated up to 95℃. It is normal that it takes longer time to heat up the bed temperature when the environment temperature is lower.) Third, cover the heated bed with a thin layer of glue from a common glue stick. Last but not least, use an enclosure to keep the printing temperature stable and high.
Method 6
Apply blue tape to the bed
Blue tape is probably the most popular and inexpensive 3D printing surface. It always leaves a pleasant and clean surface on the bottom layer of your print. If the first layer still cannot stick to the heated bed after you tried all methods above, you can cover the bed with strips of blue tape. Be sure to lay the strips down edge to edge without overlap. Blue tape is quite durable. You may replace it when you feel that your current layer is not good enough for your print.
Method 7
Replace the sticker
If everything above fails, it might mean that the heated bed sticker is worn off or damaged. You should try a new sticker. Detach the heated bed, and then tear off the sticker. Place a new sticker on top of the heated bed carefully. (Replacement sticker sheets are available on Snapmaker online shop.) Be sure to level the heated bed after you replace the sticker.

Feel free to contact us for more help. Email your questions to support@snapmaker.com with “Troubleshooting” in the title. We are always available to help you out.